





Blog
Insights & updates from our experts


Resolve plant floor and IT issues before they disrupt production.

Stay audit-ready while resolving issues and reducing operational risk.
Resolve issues quickly with an AI-powered system that automates ticketing.
Unifiy IT, HR, Facilities, Finance, and more on a single, AI-powered service platform.
Simplify on-call scheduling, automate escalations, and reduce burnout.
Automate postmortems, AI summaries, and post-incident workflows
Create, organize, and continuously improve your knowledge base to find the right answers with Sera AI.
We're here to help

The integration with Atlassian Jira using the Xurrent Integration Service is

The integration with Atlassian Jira using the Xurrent Integration Service is

The integration with Atlassian Jira using the Xurrent Integration Service is

The integration with Atlassian Jira using the Xurrent Integration Service is

The integration with Atlassian Jira using the Xurrent Integration Service is

The integration with Atlassian Jira using the Xurrent Integration Service is

The integration with Atlassian Jira using the Xurrent Integration Service is

The integration with Atlassian Jira using the Xurrent Integration Service is
Resolve issues quickly with an AI-powered system that automates ticketing.
Unifiy IT, HR, Facilities, Finance, and more on a single, AI-powered service platform.
Simplify on-call scheduling, automate escalations, and reduce burnout.
Automate postmortems, AI summaries, and post-incident workflows
Create, organize, and continuously improve your knowledge base to find the right answers with Sera AI.
Resolve plant floor and IT issues before they disrupt production.
Stay audit-ready while resolving issues and reducing operational risk.

Detect, respond, and resolve incidents fast to cut downtime and MTTR.

Keep your store online, even during your biggest sales moments.

Protect patient data and resolve issues fast, so care teams stay focused on care.

Standardize service delivery across every store and channel.

We are here to help 24/7

Connect with other Xurrent Users

Get insights and tips on how to get the most out of Xurrent

Apps, APIs, and updates

Xurrent service functionality

Eliminate manual tasks, optimize workflows, and deliver faster resolutions.
Learn how organizations have reduced downtime, improved 50% MTTA & MTTR, and cut costs with Xurrent IMR.
Discover Xurrent IMR's quick support, bidirectional integrations with Jira and Slack, and more cohesive incident response capabilities compared to Opsgenie.
Understand why users value Xurrent IMR for its intuitive interface, efficient incident alerting, customizable On-call schedules, and escalations.
AI features sit on a spectrum defined by how much of your specific context they need before they are useful. Turning on a setting is cheap because it needs nothing from you: the capability is already there, you are enabling it. Using AI to clean up a draft email is cheap, because you hand it the whole context inline: the draft goes in, a better draft comes out, and nothing about your organization needs teaching first.
Sera AI Studio is a different category. It produces good output only once it knows your world: your knowledge, your request templates, your sense of what a correct answer looks like. Teaching it that is a real time investment. Studio is not a feature you turn on, it is a capability you build. The setup is where the value comes from. Most of the “how do I use this” questions we hear come from expecting a toggle and running into configuration work instead.
Before touching the product, figure out who is going to invest the time. Someone needs to own the baseline, read the results, and drive the content updates. How deliberately that person works determines result quality. Name that person first.
The Golden Set is where you build your baseline. A scenario is a prompt or query paired with the answer you expect the AI to land on, so the first job is figuring out what your users ask.
Pull from a few sources: search phrase reporting shows you the real language people use, and your team’s intuition plus a little crowdsourcing fills in the common questions that reporting alone will miss. Start with a representative set.
Be deliberate about the Run as user. Sera AI binds to the permissions of the individual you select, so a scenario runs with exactly the access that person has. If you pick an end user and then expect the AI to surface a sensitive knowledge article that is only visible to select internal teams, you have set yourself up for failure before you have started. Include a few counter-cases in your testing to confirm the boundaries hold. Start where you want the agent to work.
You can add scenarios one at a time through the create modal.
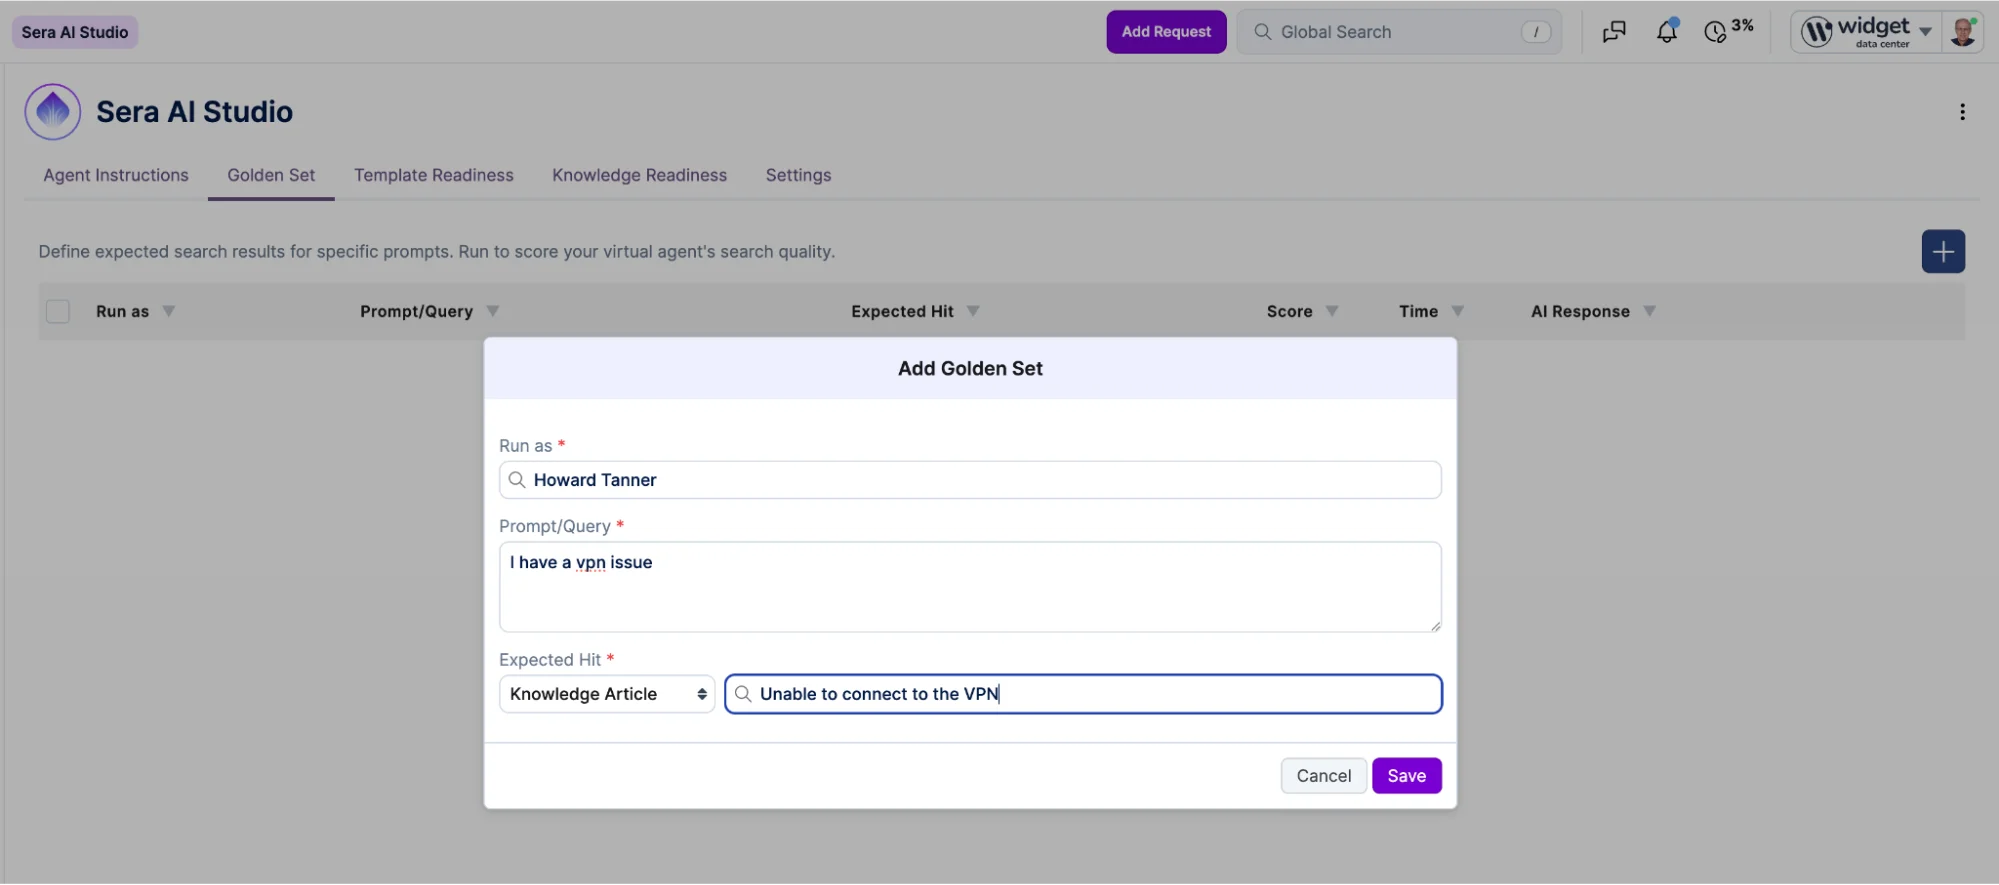
Once your scenarios are in, the Run All button does the processing. It may take a few minutes to return results, but it beats working through that modal one scenario at a time. When the run finishes, you have a starting point.
If you are adding a lot of scenarios, the import option from a spreadsheet is a faster path in. Make sure your column formats match the expected shape before you import.
Your first number may be low, even around 50%. This number identifies the work to be done, not a product shortcoming. It tells you, per scenario, where your content needs work before AI can reason over it.
You have a couple of ways to work the results.
I run a trend analysis. I take the full result set and put it into my own LLM instance to look for patterns across the misses. If you have a smaller set of cases, going one by one in the UI works too.
Either way, look at the AI Response. That field shows you the work the model did to arrive at its answer. When the model gets it wrong, the response shows you why, and it usually points straight at content that is not AI ready. I start with the trend analysis to find where to invest first. If most of my misses are knowledge, I start with knowledge. If most are request templates, I start there.
This is where the Knowledge Readiness and Template Readiness tabs come in.
You have two ways to work them. You can find the specific cases from your Golden Set in these tabs and work through the missing elements to raise their AI readiness scoring. Or you can start straight from the readiness sheets themselves, filter by the resources with the most missing fields (the column has a filter for exactly this), and work down the list. Today these updates are one by one; we are looking at bulk editing for future enhancements.
Start with your Golden Set cases, because those are the scenarios you are measuring against. Apply those trends to all your content. Fix only the tested scenarios and you will see a gap: strong results inside the Golden Set, weaker ones outside it.
Content readiness gets your answers correct. Some of what you want is behavioral, not content-based. When out-of-the-box behavior is not enough, use Agent Instructions. This is your control plane: the place to shape tone, set boundaries, and steer how the agent reasons over the content you have made ready.
It warrants its own post. For now, know it exists: it is the lever for behavior that content fixes cannot provide.
Keep re-running as you go so you can watch your progress. At 90%+, move to real user testing. How long depends on your environment. The breadth of your updates determines overall quality.
When you do move to live users, use the Skill Pool setting under Enable Sera AI in Self Service to gate visibility during rollout. Treat the Golden Set as your test, an initial user pool as your confirmation. Once that pool confirms the results hold up with real people, add more skill pools, and then open it to the whole organization.
The time investment pays off. Every scenario you fix improves every future request that touches the same conten Questions or ideas as you go? The Xurrent AI team welcomes your feedback




.avif)