





Blog
Insights & updates from our experts


Resolve plant floor and IT issues before they disrupt production.

Stay audit-ready while resolving issues and reducing operational risk.
Resolve issues quickly with an AI-powered system that automates ticketing.
Unifiy IT, HR, Facilities, Finance, and more on a single, AI-powered service platform.
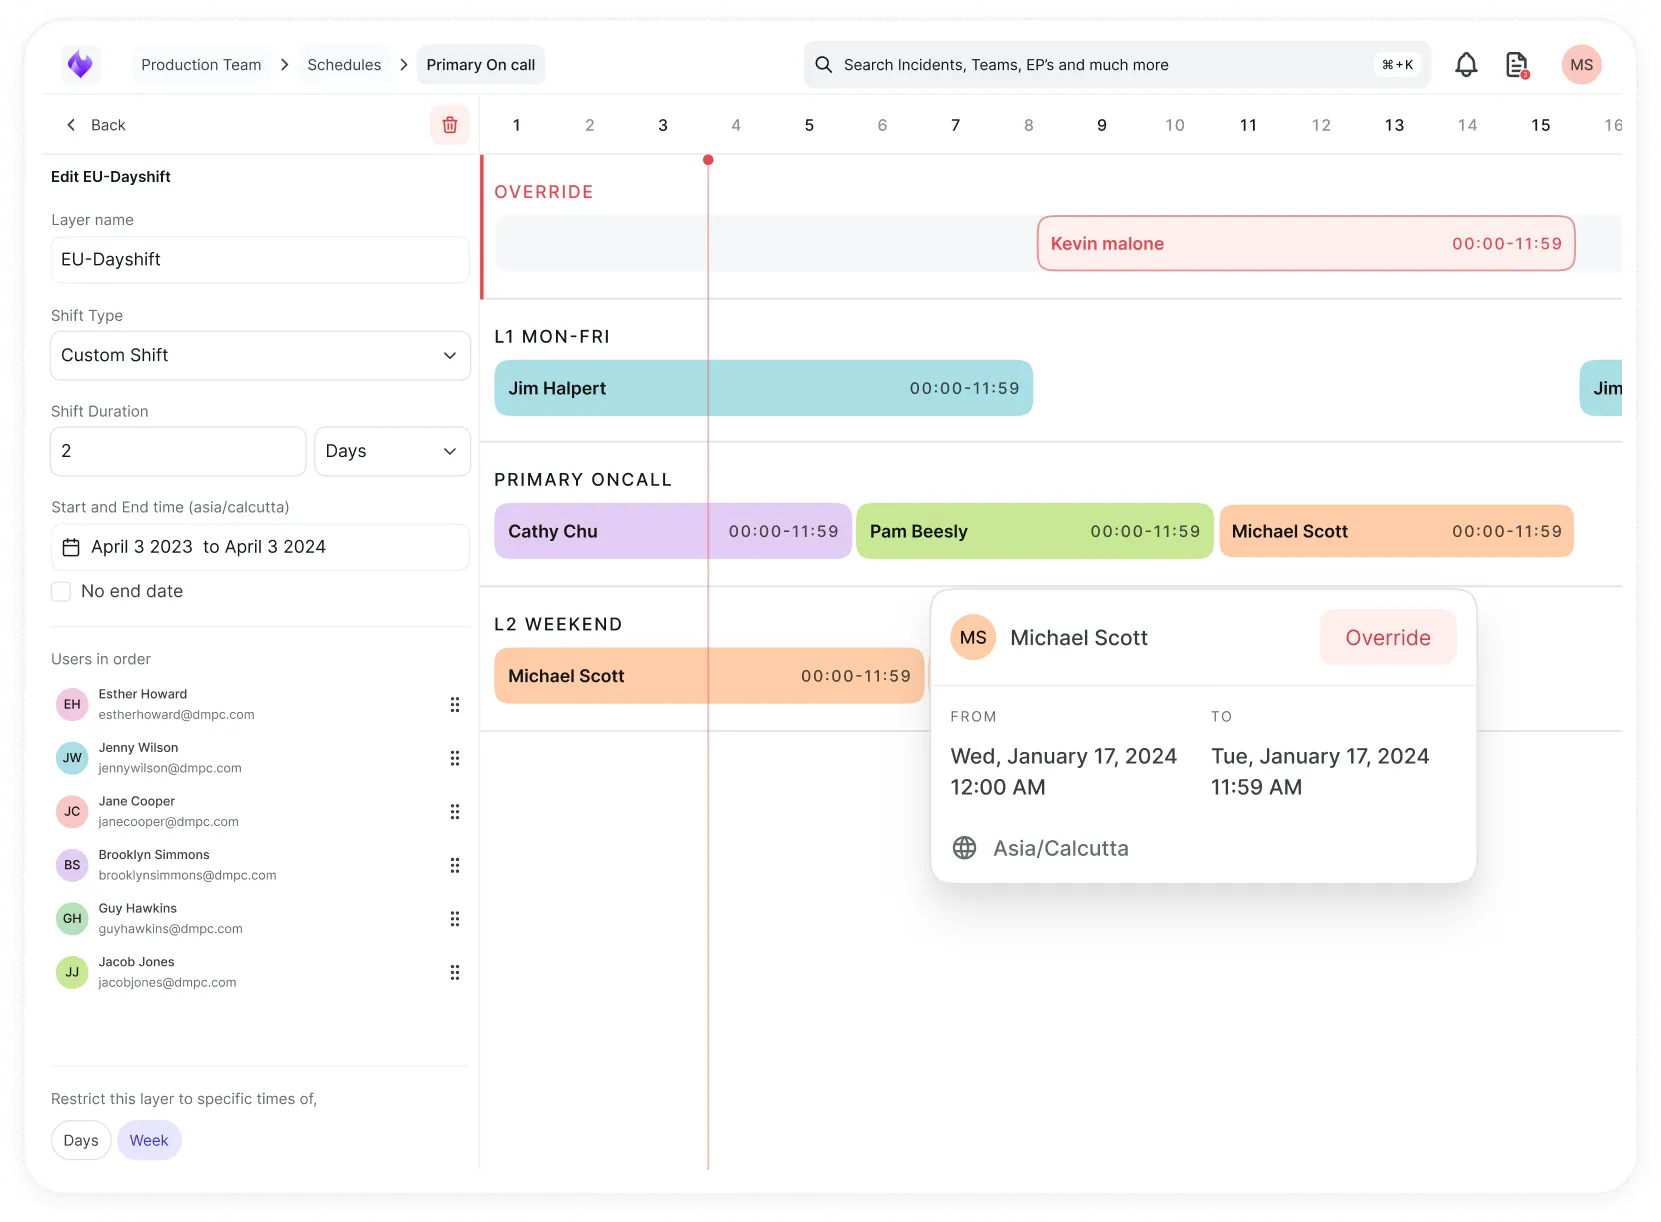
Simplify on-call scheduling, automate escalations, and reduce burnout.
Automate postmortems, AI summaries, and post-incident workflows
Create, organize, and continuously improve your knowledge base to find the right answers with Sera AI.
We're here to help

The integration with Atlassian Jira using the Xurrent Integration Service is

The integration with Atlassian Jira using the Xurrent Integration Service is

The integration with Atlassian Jira using the Xurrent Integration Service is

The integration with Atlassian Jira using the Xurrent Integration Service is

The integration with Atlassian Jira using the Xurrent Integration Service is

The integration with Atlassian Jira using the Xurrent Integration Service is

The integration with Atlassian Jira using the Xurrent Integration Service is

The integration with Atlassian Jira using the Xurrent Integration Service is
Resolve issues quickly with an AI-powered system that automates ticketing.
Unifiy IT, HR, Facilities, Finance, and more on a single, AI-powered service platform.
Simplify on-call scheduling, automate escalations, and reduce burnout.
Automate postmortems, AI summaries, and post-incident workflows
Create, organize, and continuously improve your knowledge base to find the right answers with Sera AI.
Resolve plant floor and IT issues before they disrupt production.
Stay audit-ready while resolving issues and reducing operational risk.

Detect, respond, and resolve incidents fast to cut downtime and MTTR.

Keep your store online, even during your biggest sales moments.

Protect patient data and resolve issues fast, so care teams stay focused on care.

Standardize service delivery across every store and channel.

We are here to help 24/7

Connect with other Xurrent Users

Get insights and tips on how to get the most out of Xurrent

Apps, APIs, and updates

Xurrent service functionality

Eliminate manual tasks, optimize workflows, and deliver faster resolutions.
Learn how organizations have reduced downtime, improved 50% MTTA & MTTR, and cut costs with Xurrent IMR.
Discover Xurrent IMR's quick support, bidirectional integrations with Jira and Slack, and more cohesive incident response capabilities compared to Opsgenie.
Understand why users value Xurrent IMR for its intuitive interface, efficient incident alerting, customizable On-call schedules, and escalations.

The default incident form works, but it treats every incident the same. A late-night CPU spike gets the same form as a data breach affecting production. Responders end up either capturing too little information at 3am, or fumbling through a long form with fields that aren't relevant to the situation.
Custom Incident Form fixes this by letting admins configure two things:
The result: a responder declaring a Security Incident sees CVE ID, CVSS score, and compliance frameworks. A responder declaring a routine Alert sees a short form with just the essentials. Same product, right form every time.
Three concepts, in the order you set them up:
The building blocks. Define a field once (its name, type, and options if applicable), and it becomes available to attach to any incident type.
Examples: Impact Summary, CVE ID, CVSS score, Region Affected, Customer ticket link.
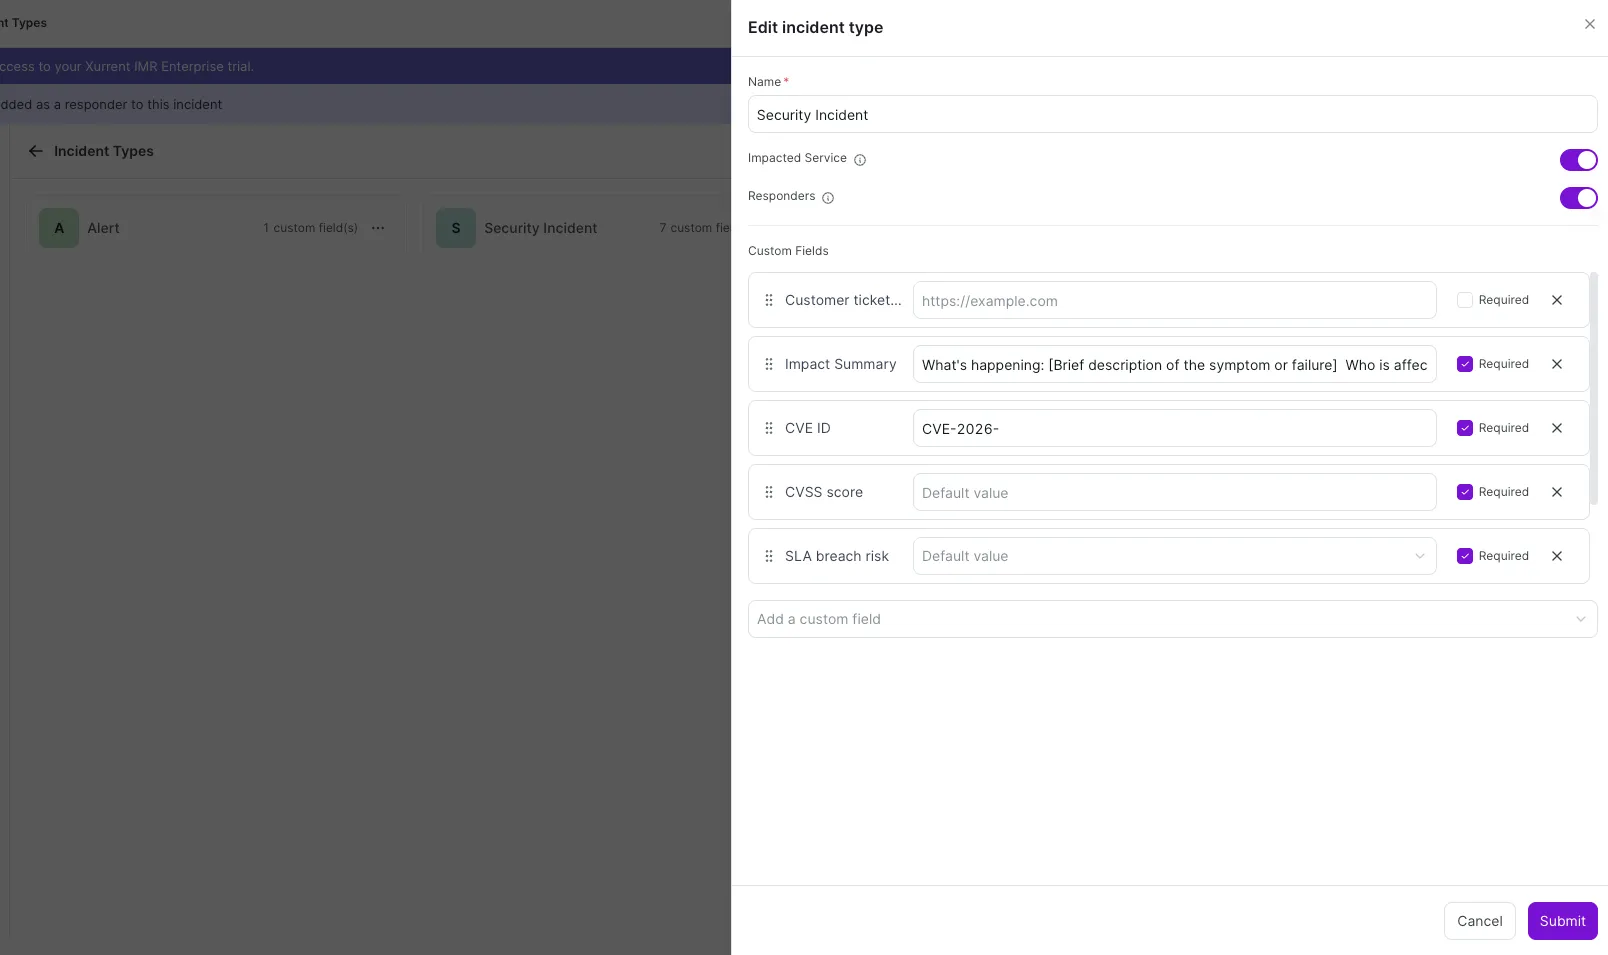
The situations your team responds to. Each type has its own set of custom fields (chosen from the shared pool), each field's default value, and each field's mandatory status.
Examples: Alert, Security Incident, Major Incident, Sev0, Sev1.
The runtime experience. A responder picks an incident type first - the form reshapes to show that type's custom fields, in the configured order, with any defaults pre-filled.
Only account admins and owners can configure this feature.
Start in the Custom fields tab. This is a shared pool of field definitions that all incident types can draw from.

Field type
Click Create Custom fields, then in the dialog:
Click Submit to save. Repeat for every field you want available across your incident types.
Switch to the Incident types tab. Each incident type represents a distinct kind of situation your team handles.
For every custom field you attach to an incident type, you decide:
Once you've configured your fields and types, the Create Incident flow adapts to what you've set up.
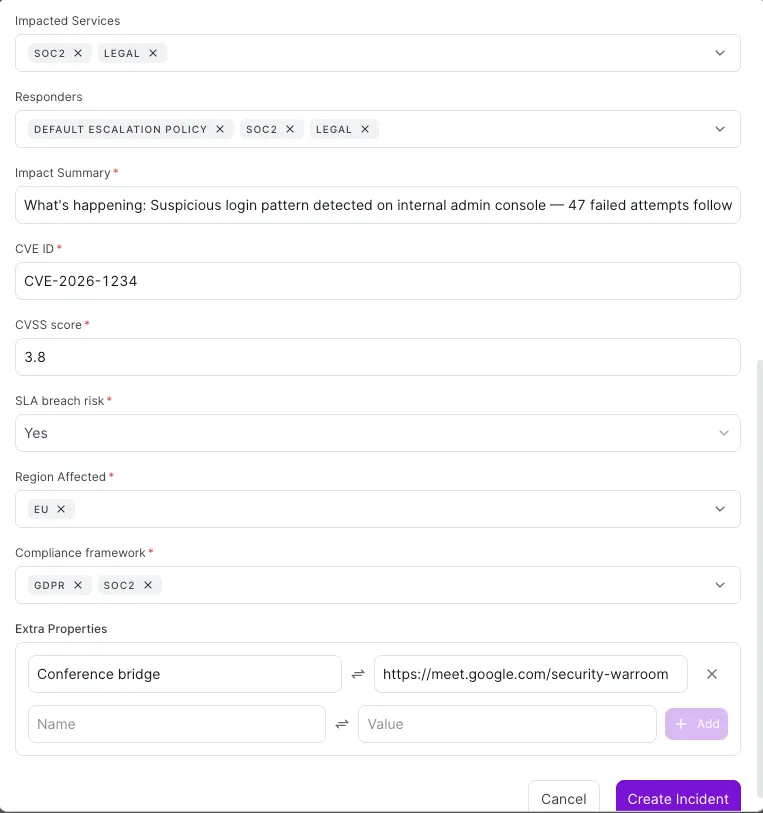
The custom fields load in the order the admin set up. Any field with a default value is pre-filled. Any field marked required will block submission until it has a value.
Sometimes a responder needs to attach information to a specific incident that doesn't fit any predefined custom field. Extra Properties handle this.
At the bottom of the Create Incident form (and on the incident detail view), responders can add any number of key/value pairs - for example, adding a conference bridge URL for this specific war room, or a one-off note that isn't worth adding as a permanent custom field.
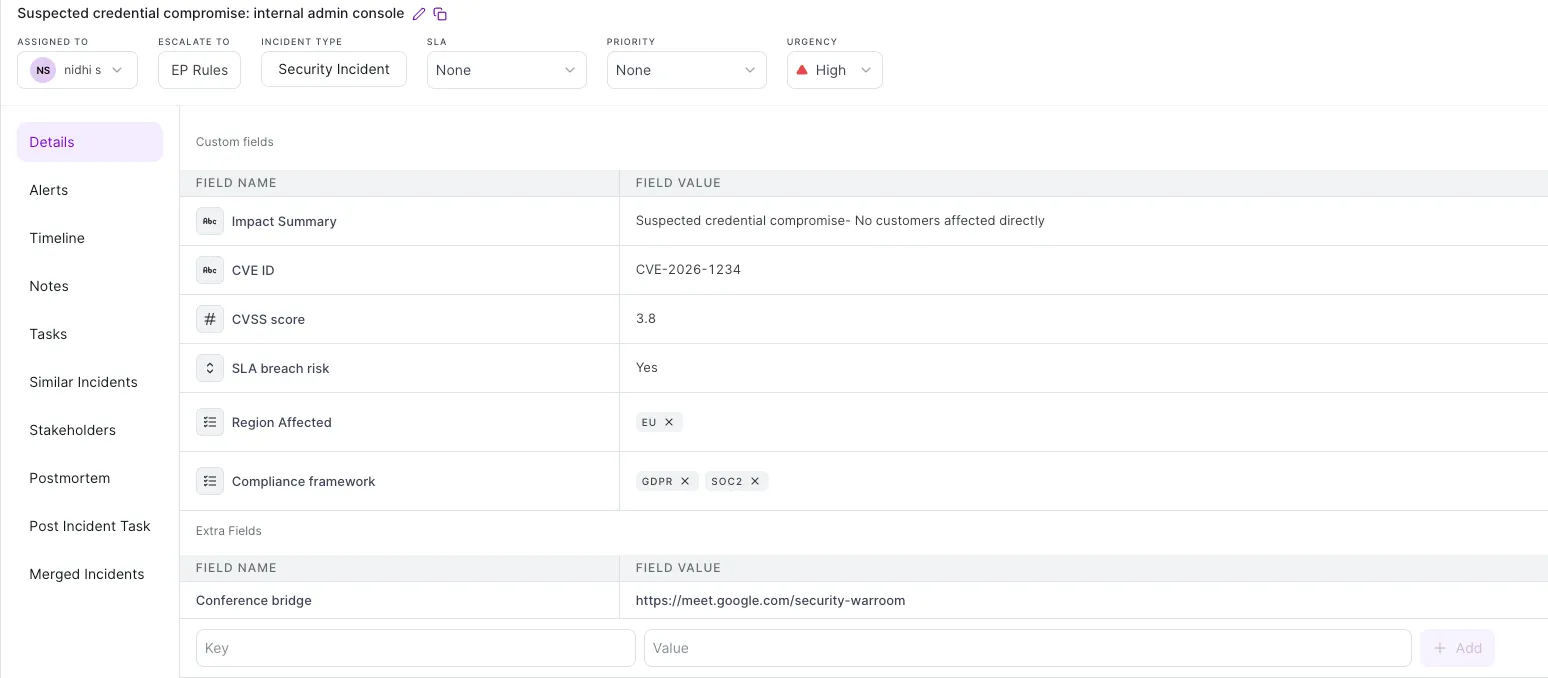
Custom field values show up in two places on the incident detail view.
The incident type is displayed prominently at the top of the incident, next to Assignee, Escalate To, SLA, Priority, and Urgency. This tells everyone joining the incident what kind of situation they've walked into.
Two tables appear:

.webp)
.webp)
.webp)