





Blog
Insights & updates from our experts


Resolve plant floor and IT issues before they disrupt production.

Stay audit-ready while resolving issues and reducing operational risk.
Resolve issues quickly with an AI-powered system that automates ticketing.
Unifiy IT, HR, Facilities, Finance, and more on a single, AI-powered service platform.
Simplify on-call scheduling, automate escalations, and reduce burnout.
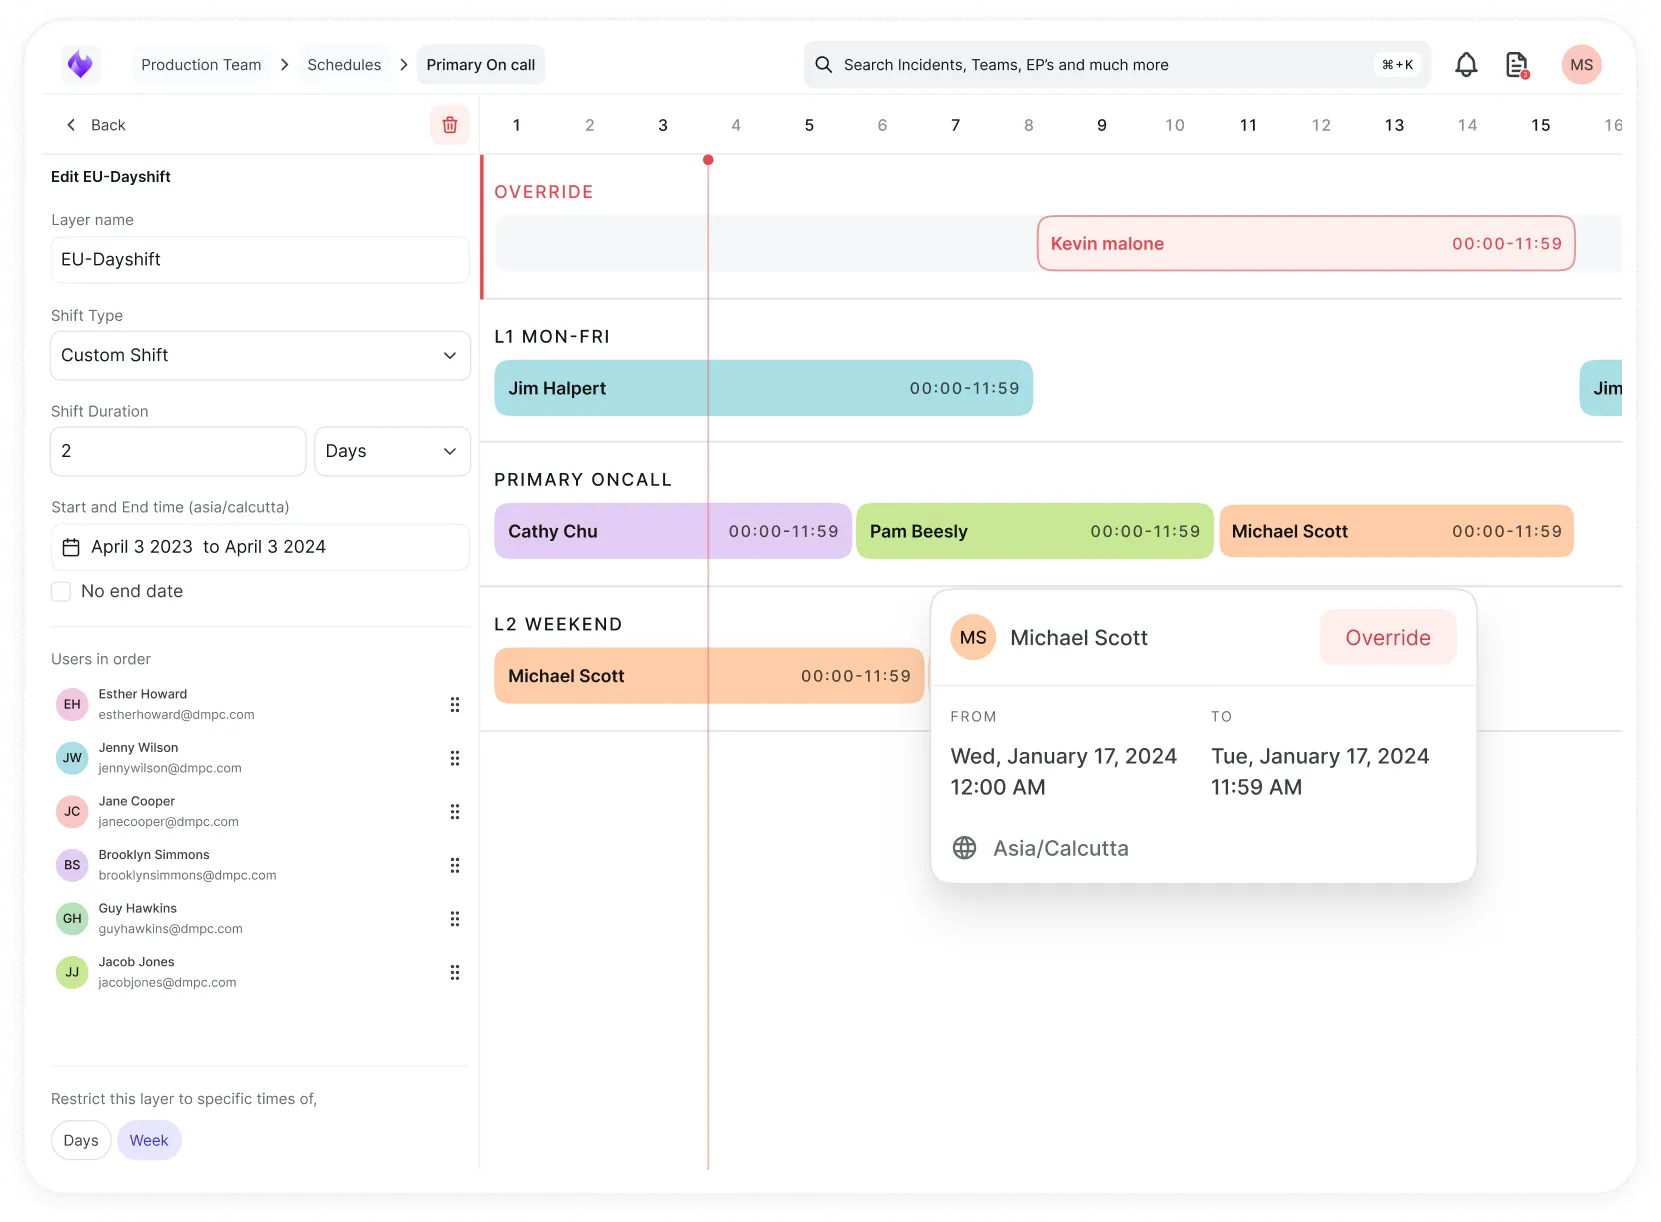
Automate postmortems, AI summaries, and post-incident workflows
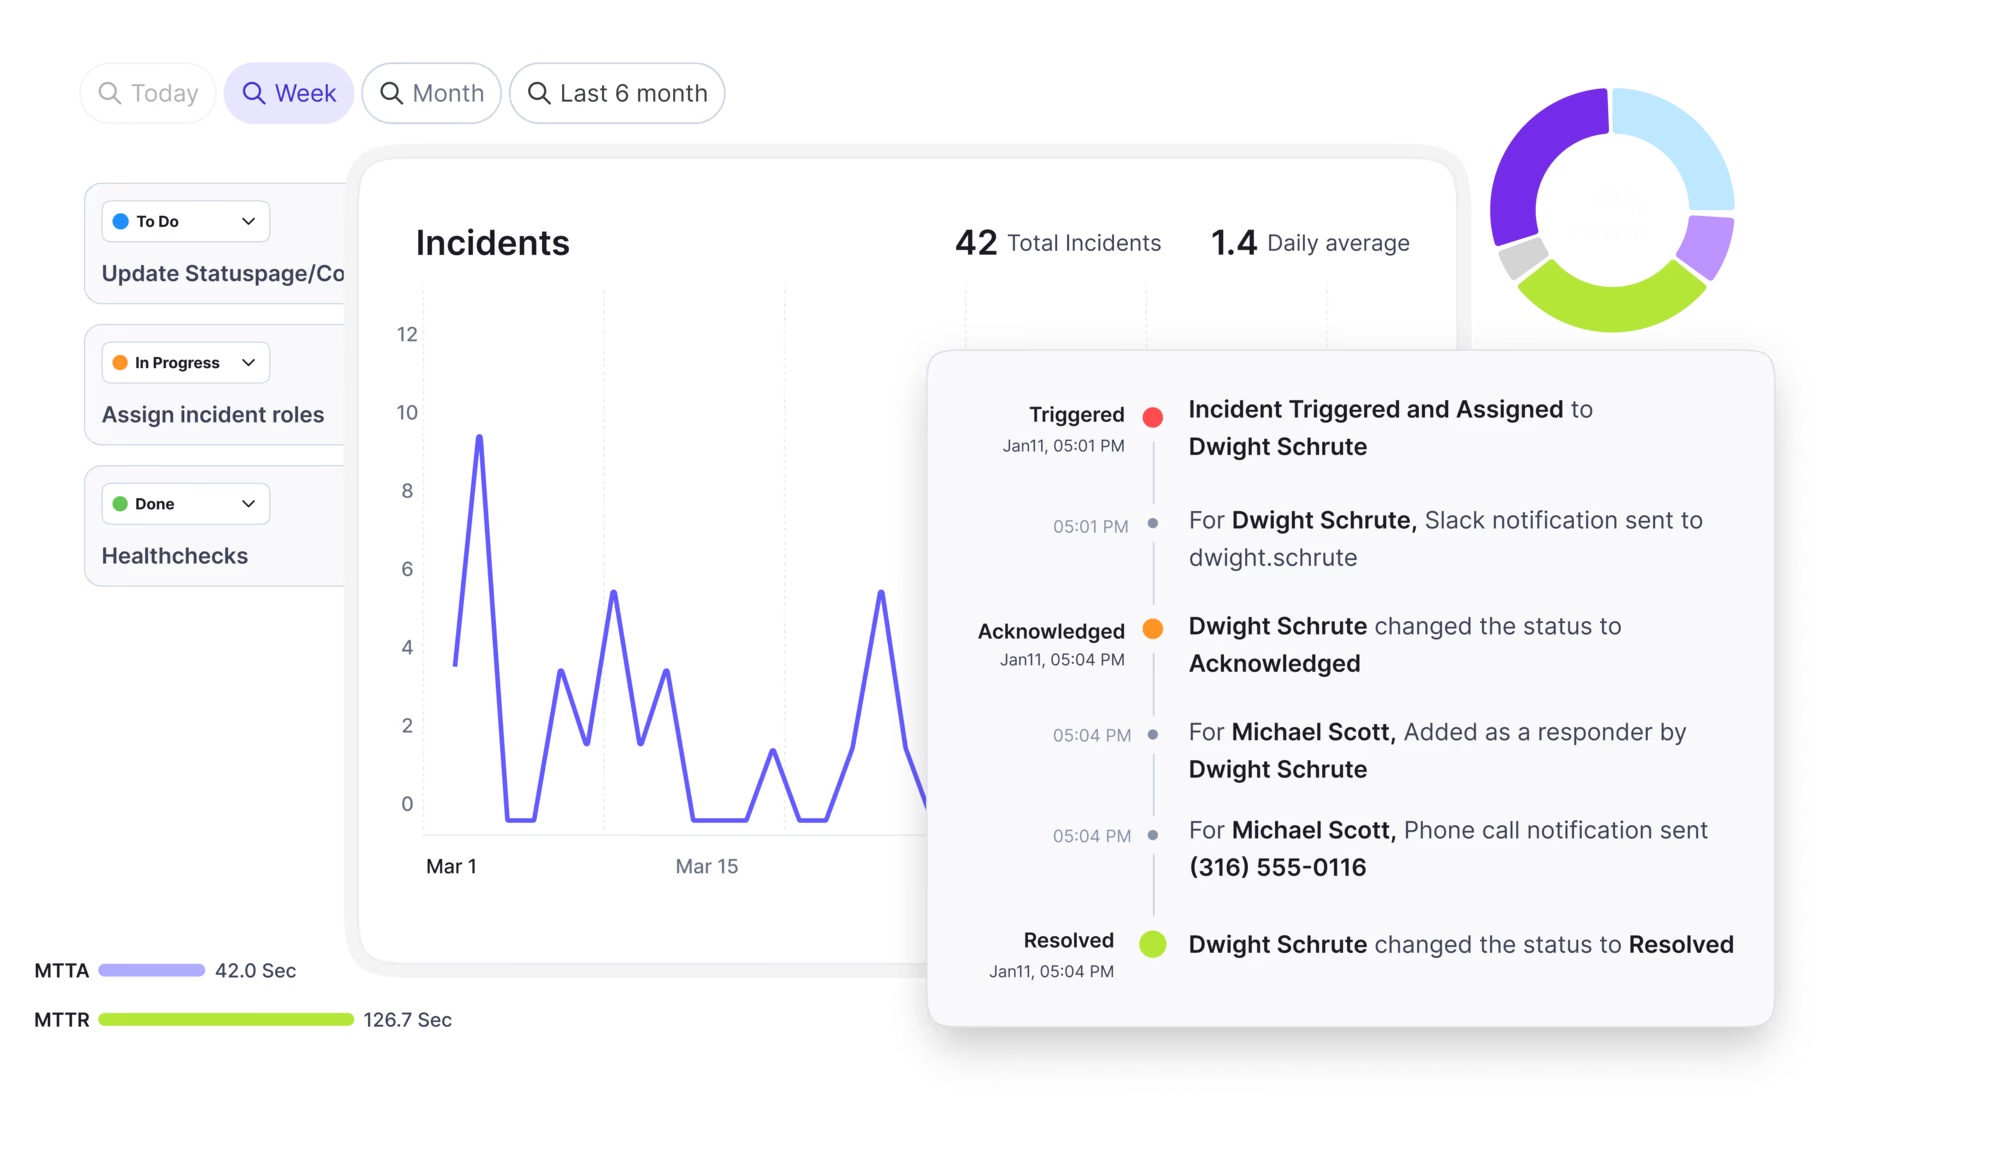
Create, organize, and continuously improve your knowledge base to find the right answers with Sera AI.
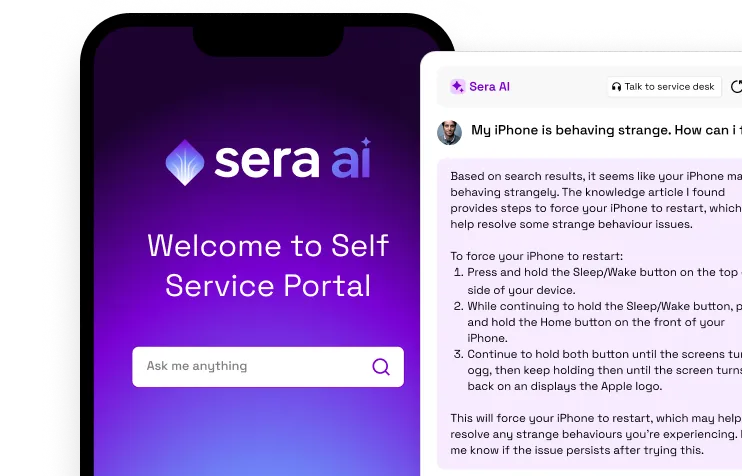
We're here to help

The integration with Atlassian Jira using the Xurrent Integration Service is

The integration with Atlassian Jira using the Xurrent Integration Service is

The integration with Atlassian Jira using the Xurrent Integration Service is

The integration with Atlassian Jira using the Xurrent Integration Service is

The integration with Atlassian Jira using the Xurrent Integration Service is

The integration with Atlassian Jira using the Xurrent Integration Service is

The integration with Atlassian Jira using the Xurrent Integration Service is

The integration with Atlassian Jira using the Xurrent Integration Service is
Resolve issues quickly with an AI-powered system that automates ticketing.
Unifiy IT, HR, Facilities, Finance, and more on a single, AI-powered service platform.
Simplify on-call scheduling, automate escalations, and reduce burnout.
Automate postmortems, AI summaries, and post-incident workflows
Create, organize, and continuously improve your knowledge base to find the right answers with Sera AI.
Resolve plant floor and IT issues before they disrupt production.
Stay audit-ready while resolving issues and reducing operational risk.

Detect, respond, and resolve incidents fast to cut downtime and MTTR.

Keep your store online, even during your biggest sales moments.

Protect patient data and resolve issues fast, so care teams stay focused on care.

Standardize service delivery across every store and channel.

We are here to help 24/7

Connect with other Xurrent Users

Get insights and tips on how to get the most out of Xurrent

Apps, APIs, and updates

Xurrent service functionality

Eliminate manual tasks, optimize workflows, and deliver faster resolutions.
Learn how organizations have reduced downtime, improved 50% MTTA & MTTR, and cut costs with Xurrent IMR.
Discover Xurrent IMR's quick support, bidirectional integrations with Jira and Slack, and more cohesive incident response capabilities compared to Opsgenie.
Understand why users value Xurrent IMR for its intuitive interface, efficient incident alerting, customizable On-call schedules, and escalations.

This guide walks you through setting up a secure, two-way connection between Xurrent IMR and ServiceNow. Once connected, incidents in either platform will stay in sync, ensuring your teams have real-time visibility and control.
The Xurrent IMR integration is available directly from the ServiceNow Store. You'll need:
We'll install the app from the Store, configure it in ServiceNow, and then connect everything from inside Xurrent IMR.
1. Log in to your ServiceNow instance as a System Administrator.
2. Navigate to System Applications → All Available Applications → All.
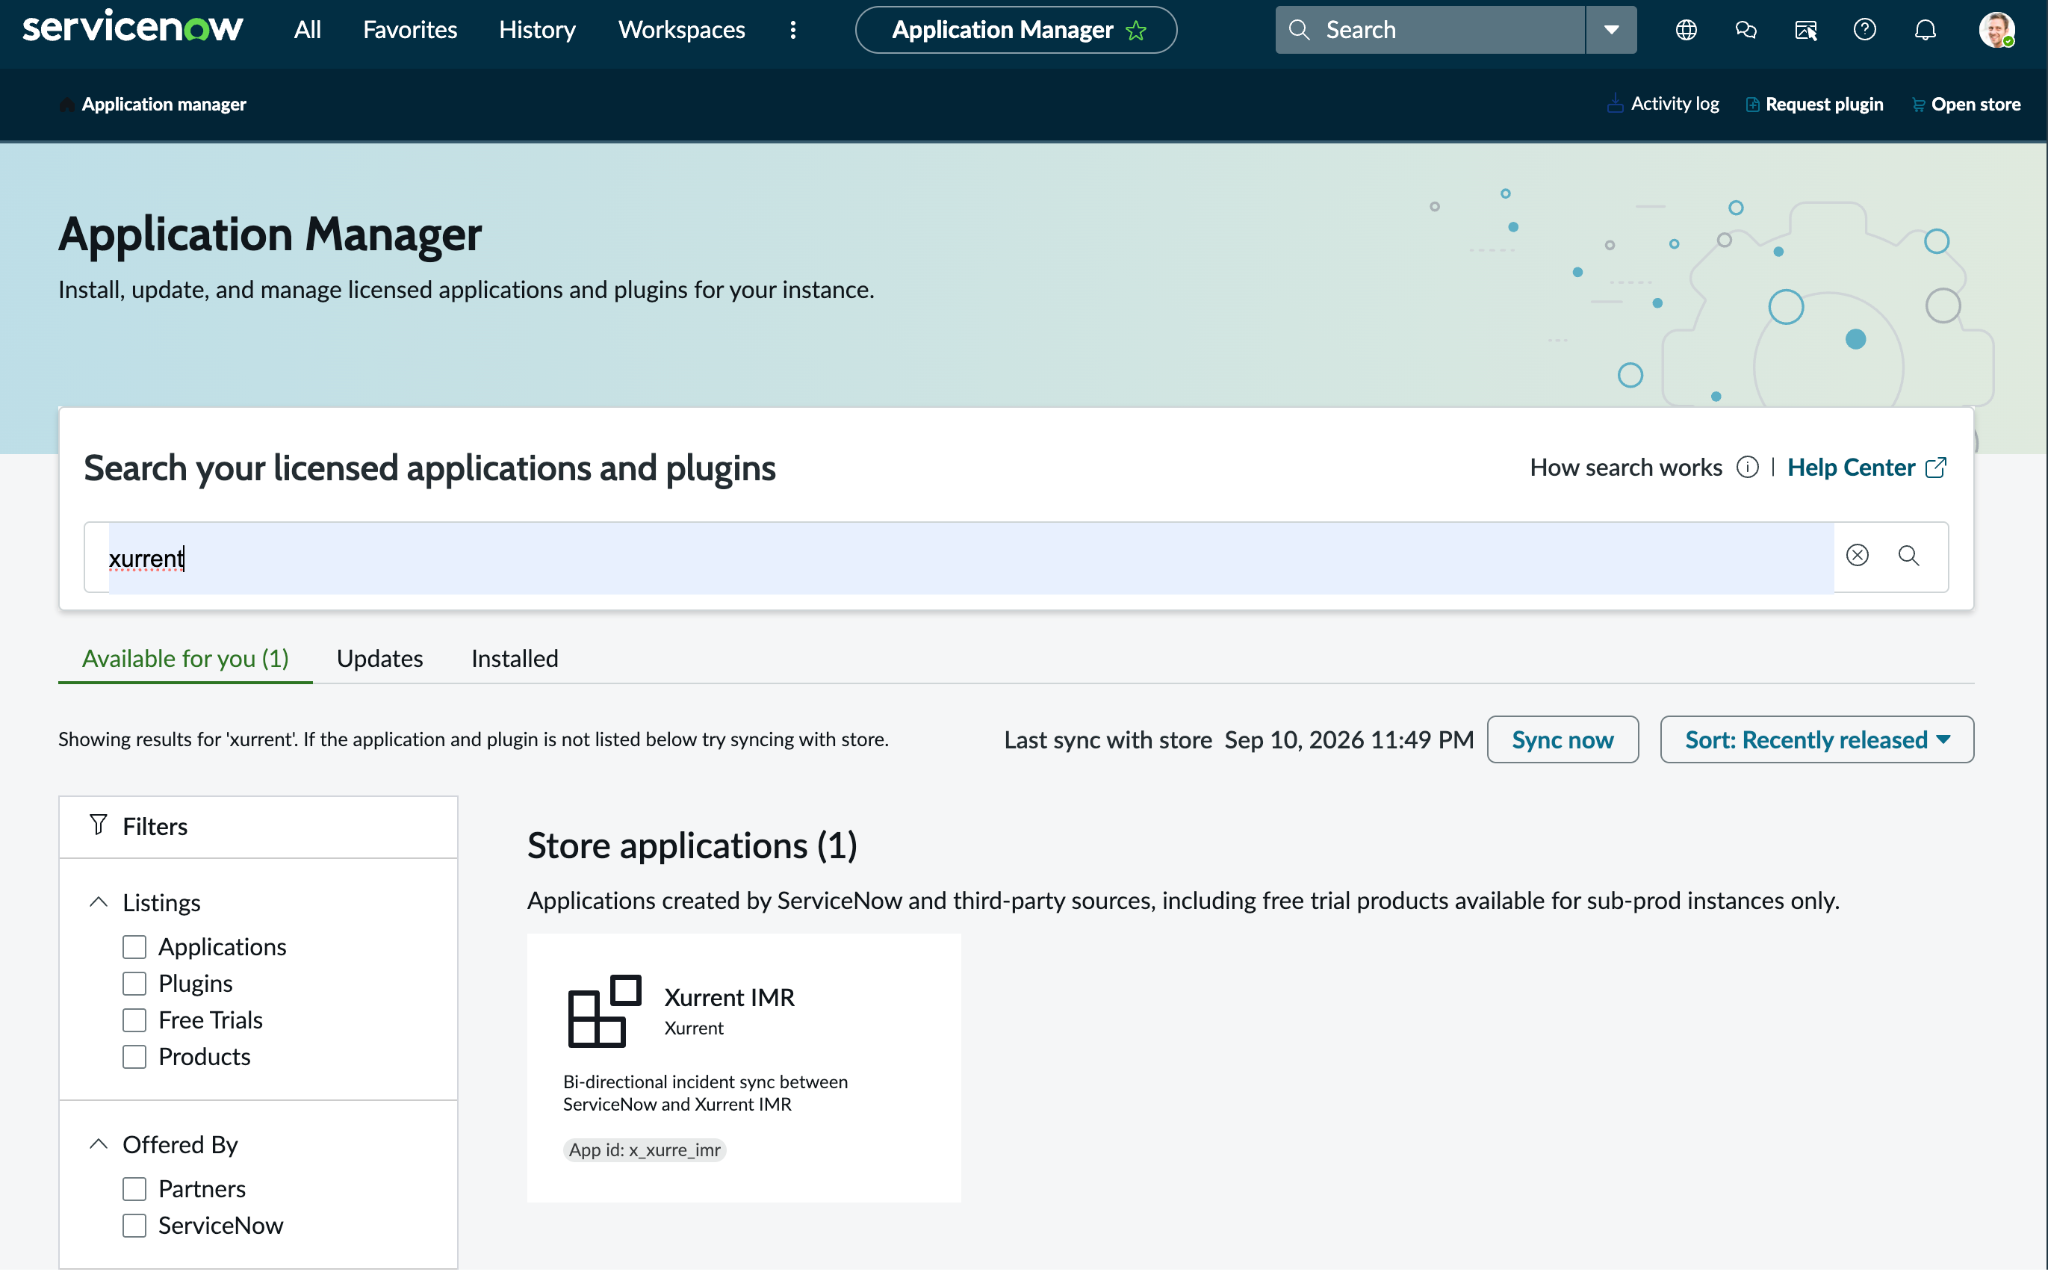
3. Search for "Xurrent IMR" and open it.
4. Click Install.
5. Review the scope, roles, and tables the app will create, then confirm Install.
6. Once installation completes, confirm it appears under System Applications → My Company Applications with an Active status and scope x_xurre_imr.
The integration ships switched off and with no credentials configured nothing will sync until you complete the steps below.
1. Go to: https://<your_instance>.service-now.com/sys_properties_list.do
2. Search for: glide.oauth.inbound.client.credential.grant_type.enabled
3. If it exists → set Value to true.
4. If it doesn't exist → create it:
5. Click Save.

The integration authenticates inbound calls from Xurrent IMR using a dedicated ServiceNow user rather than a personal admin account. Create this user before setting up the OAuth entity.

ServiceNow's OAuth setup varies by instance. Use Method A if your instance offers the newer wizard. If it doesn't, use Method B an older flow that's still fully supported.
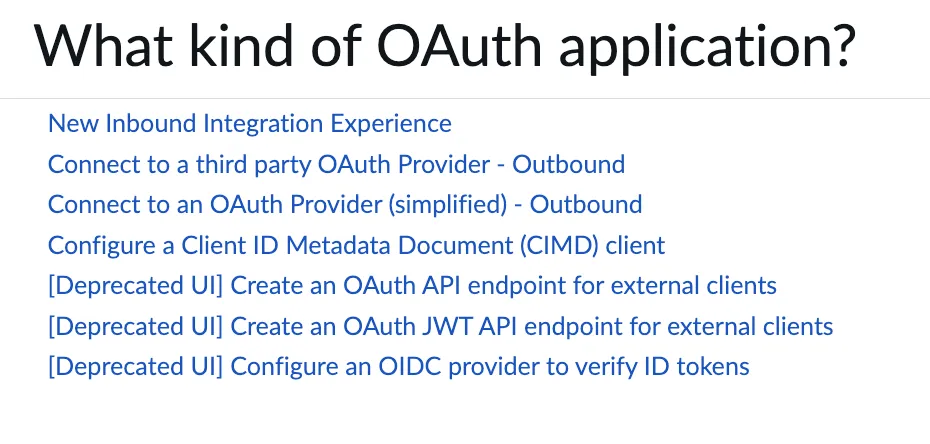
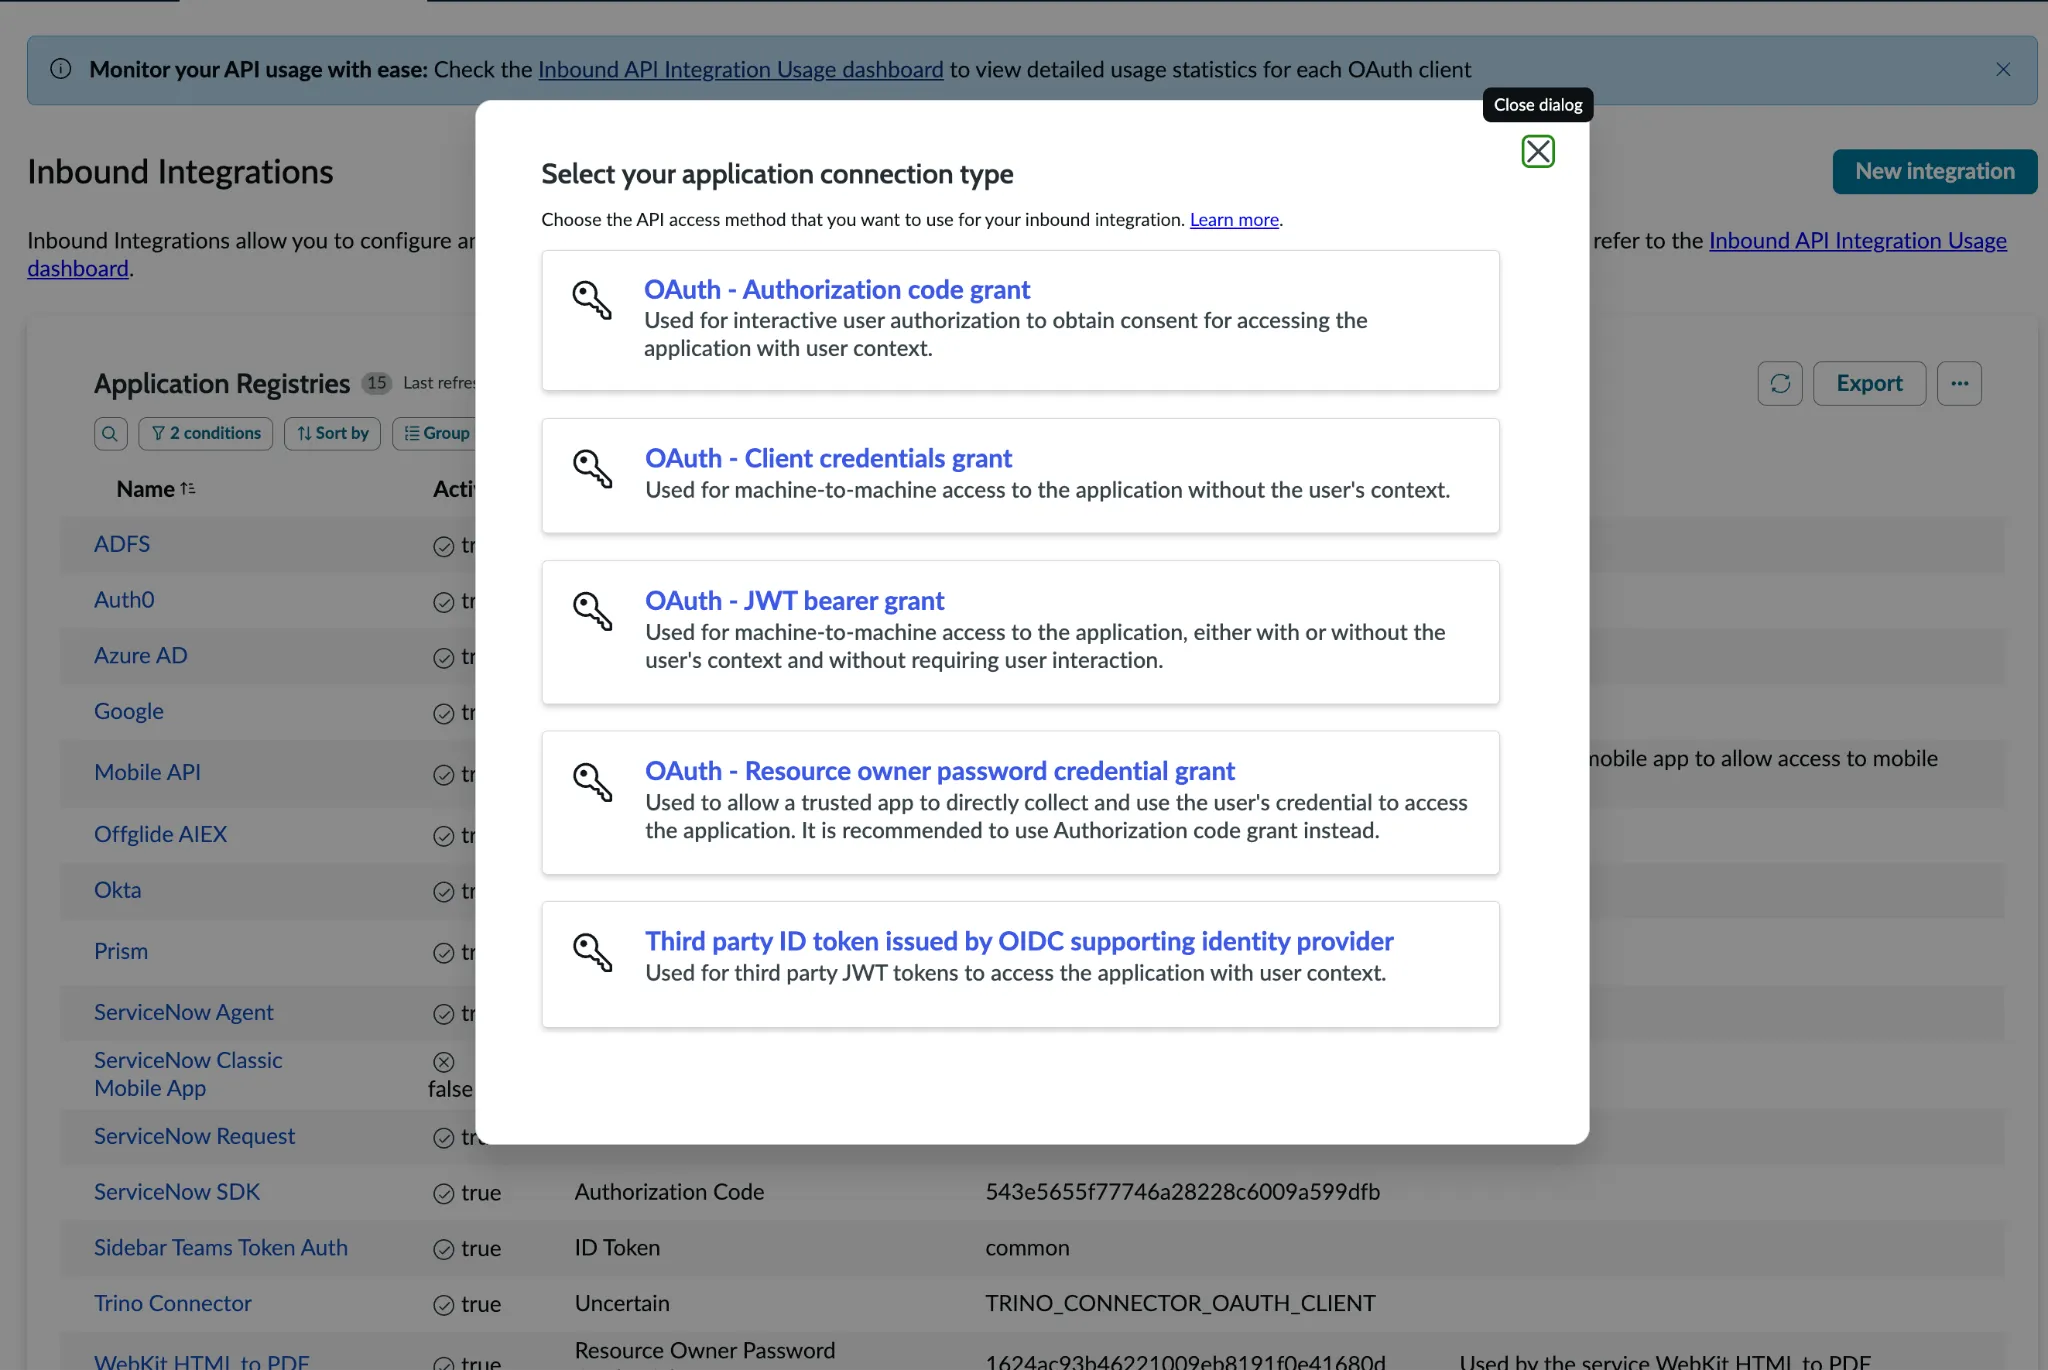
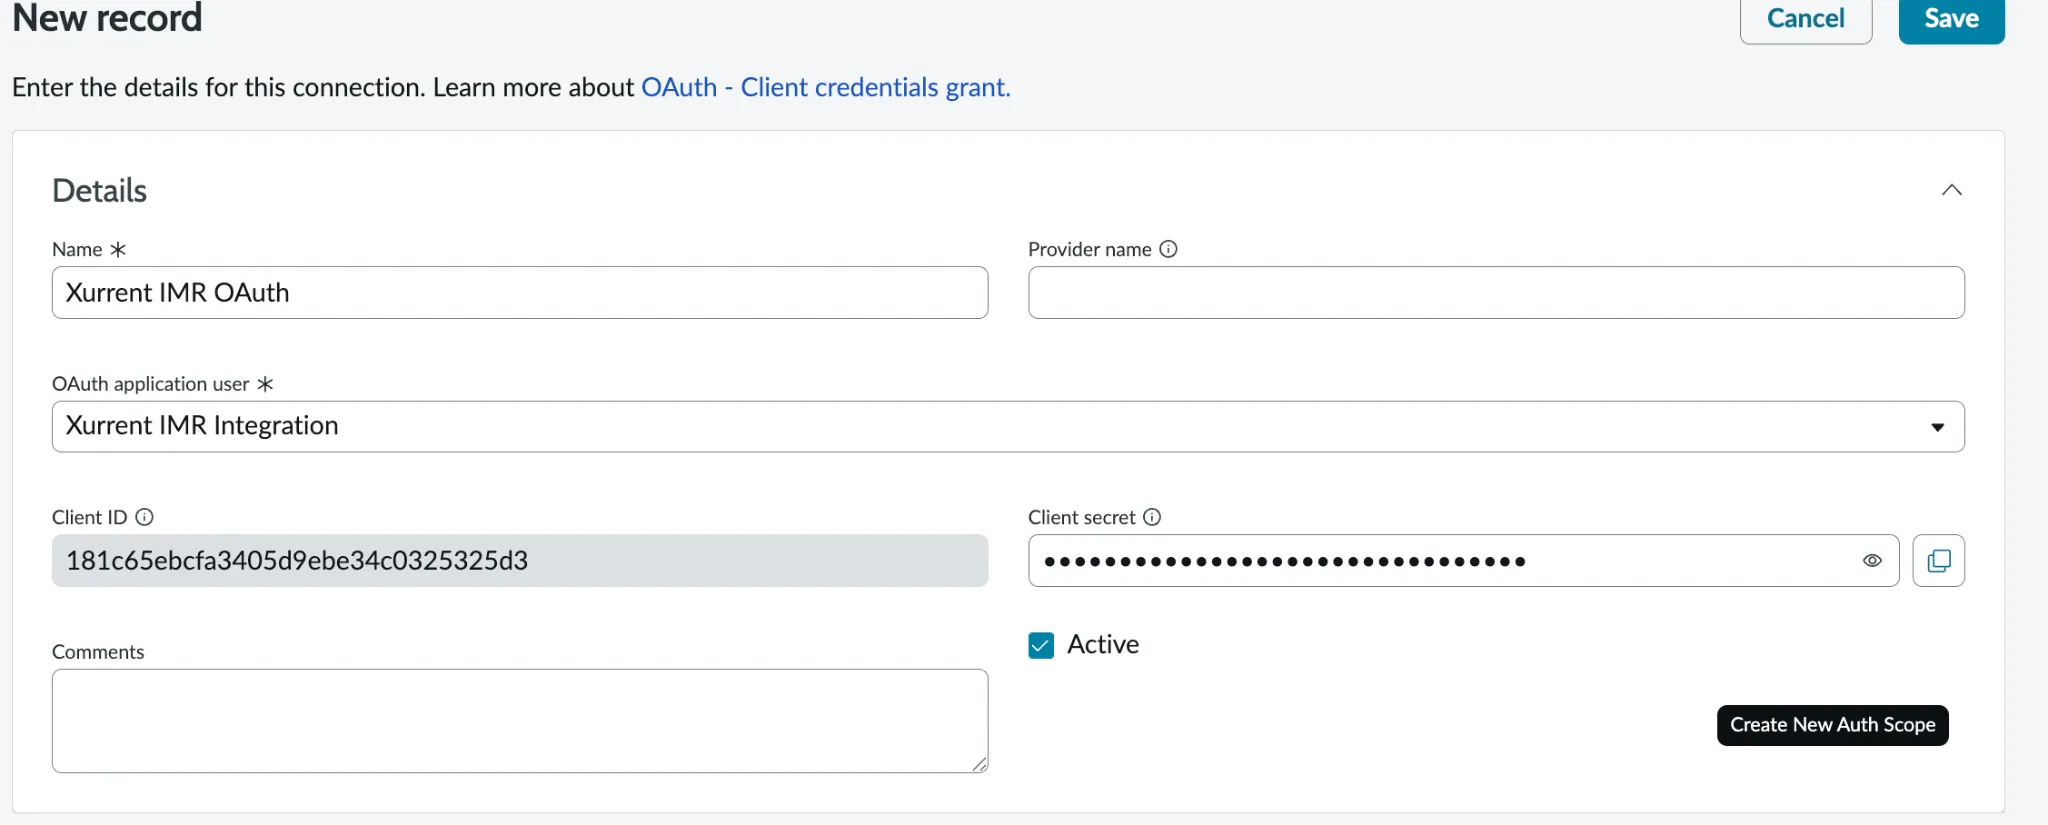
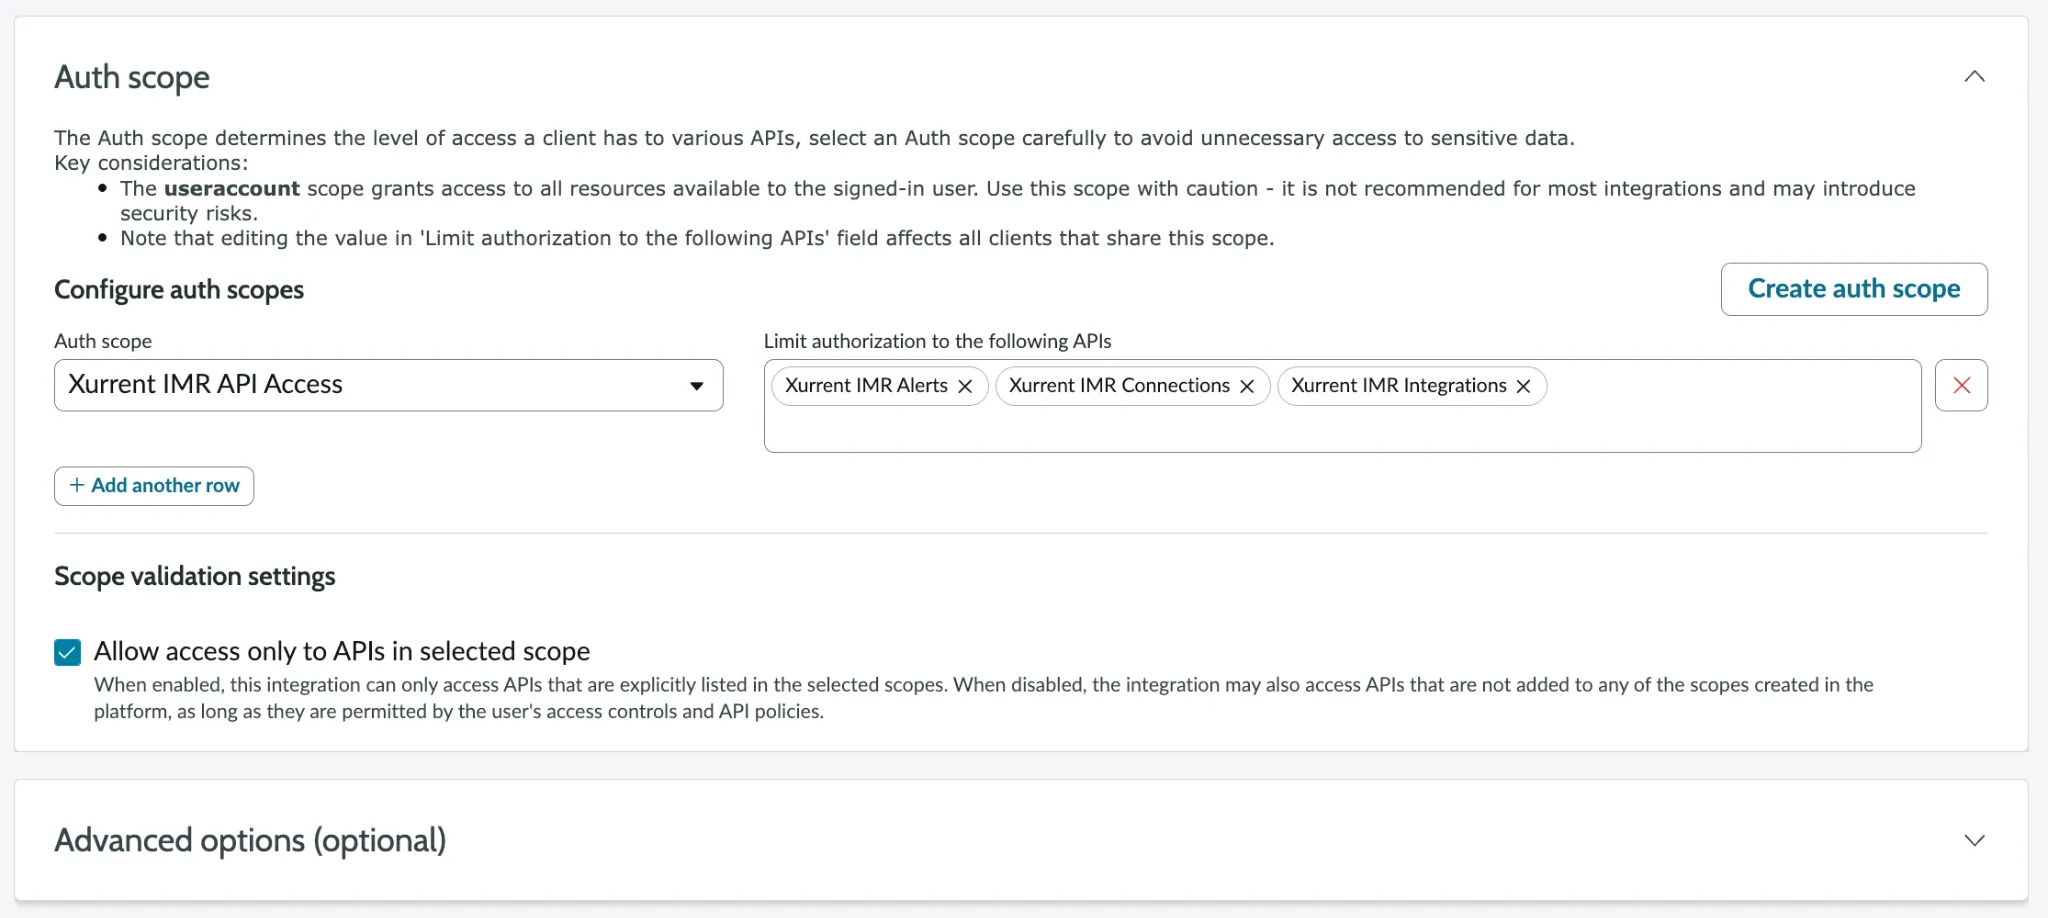
If your instance doesn't show "New Inbound Integration Experience", use this older but still fully functional flow instead it appears as "Create an OAuth API endpoint for external clients".
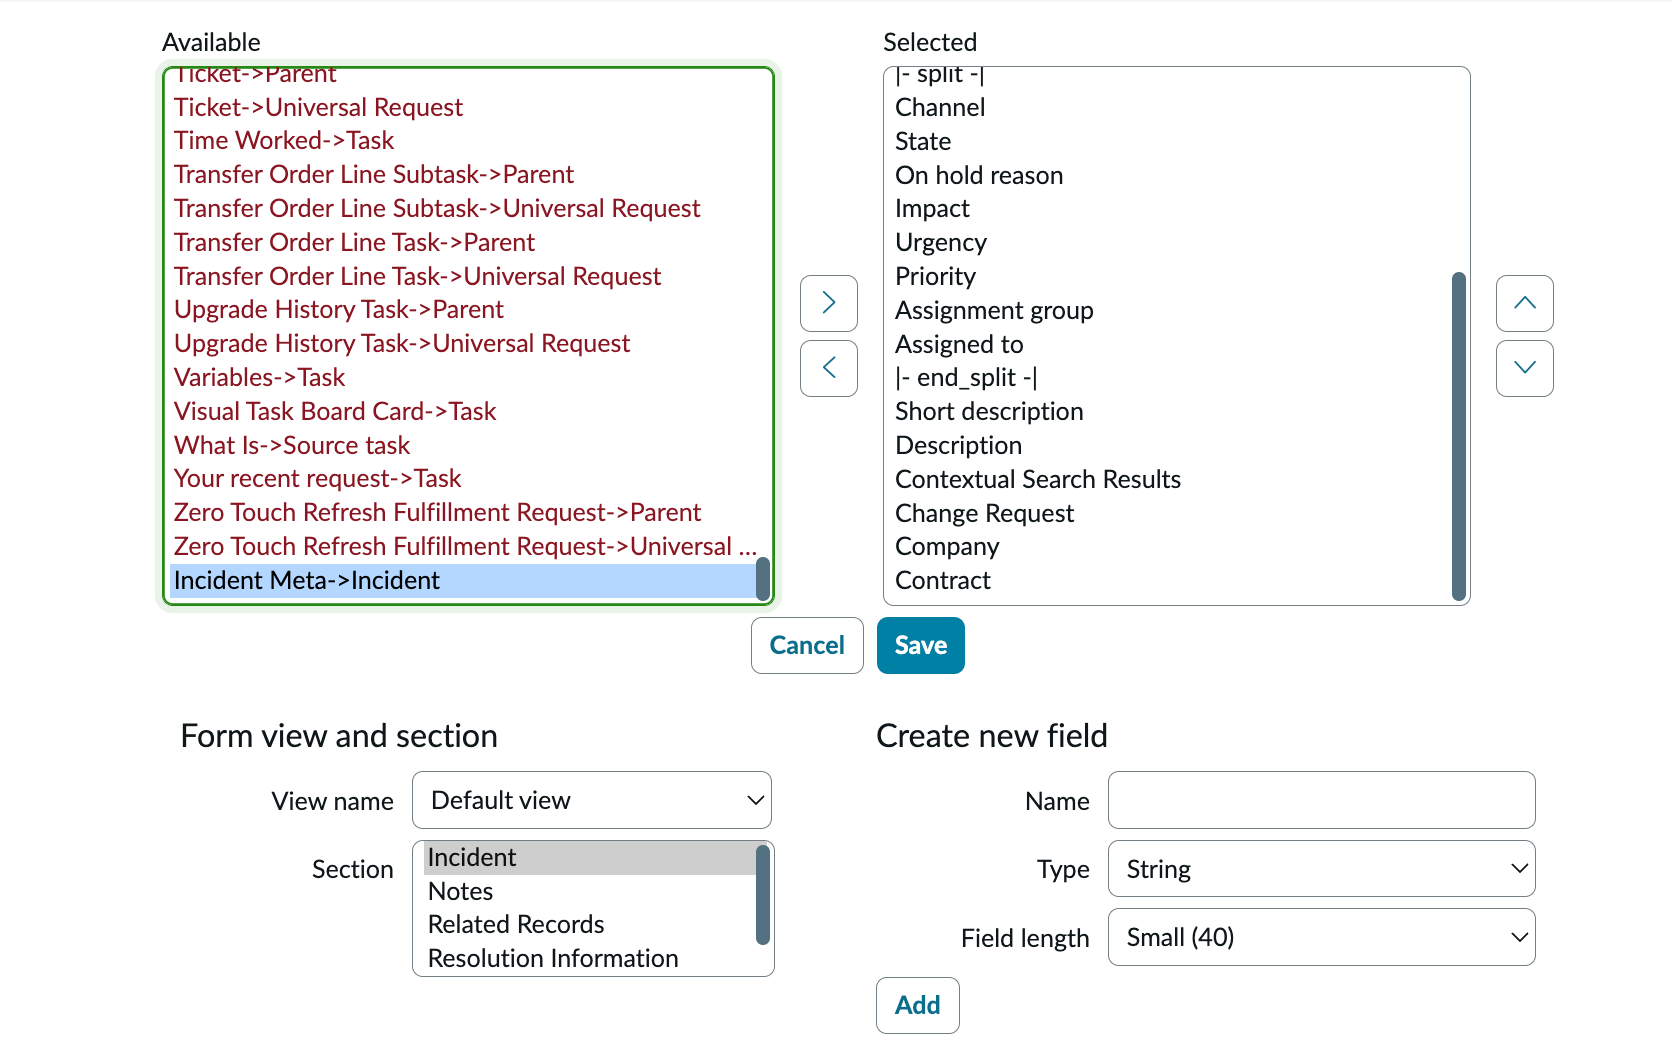
Xurrent IMR data which system originated an incident, and the linked Xurrent IMR incident URL lives on its own table, not as custom fields on the Incident form. Add it as a related list.
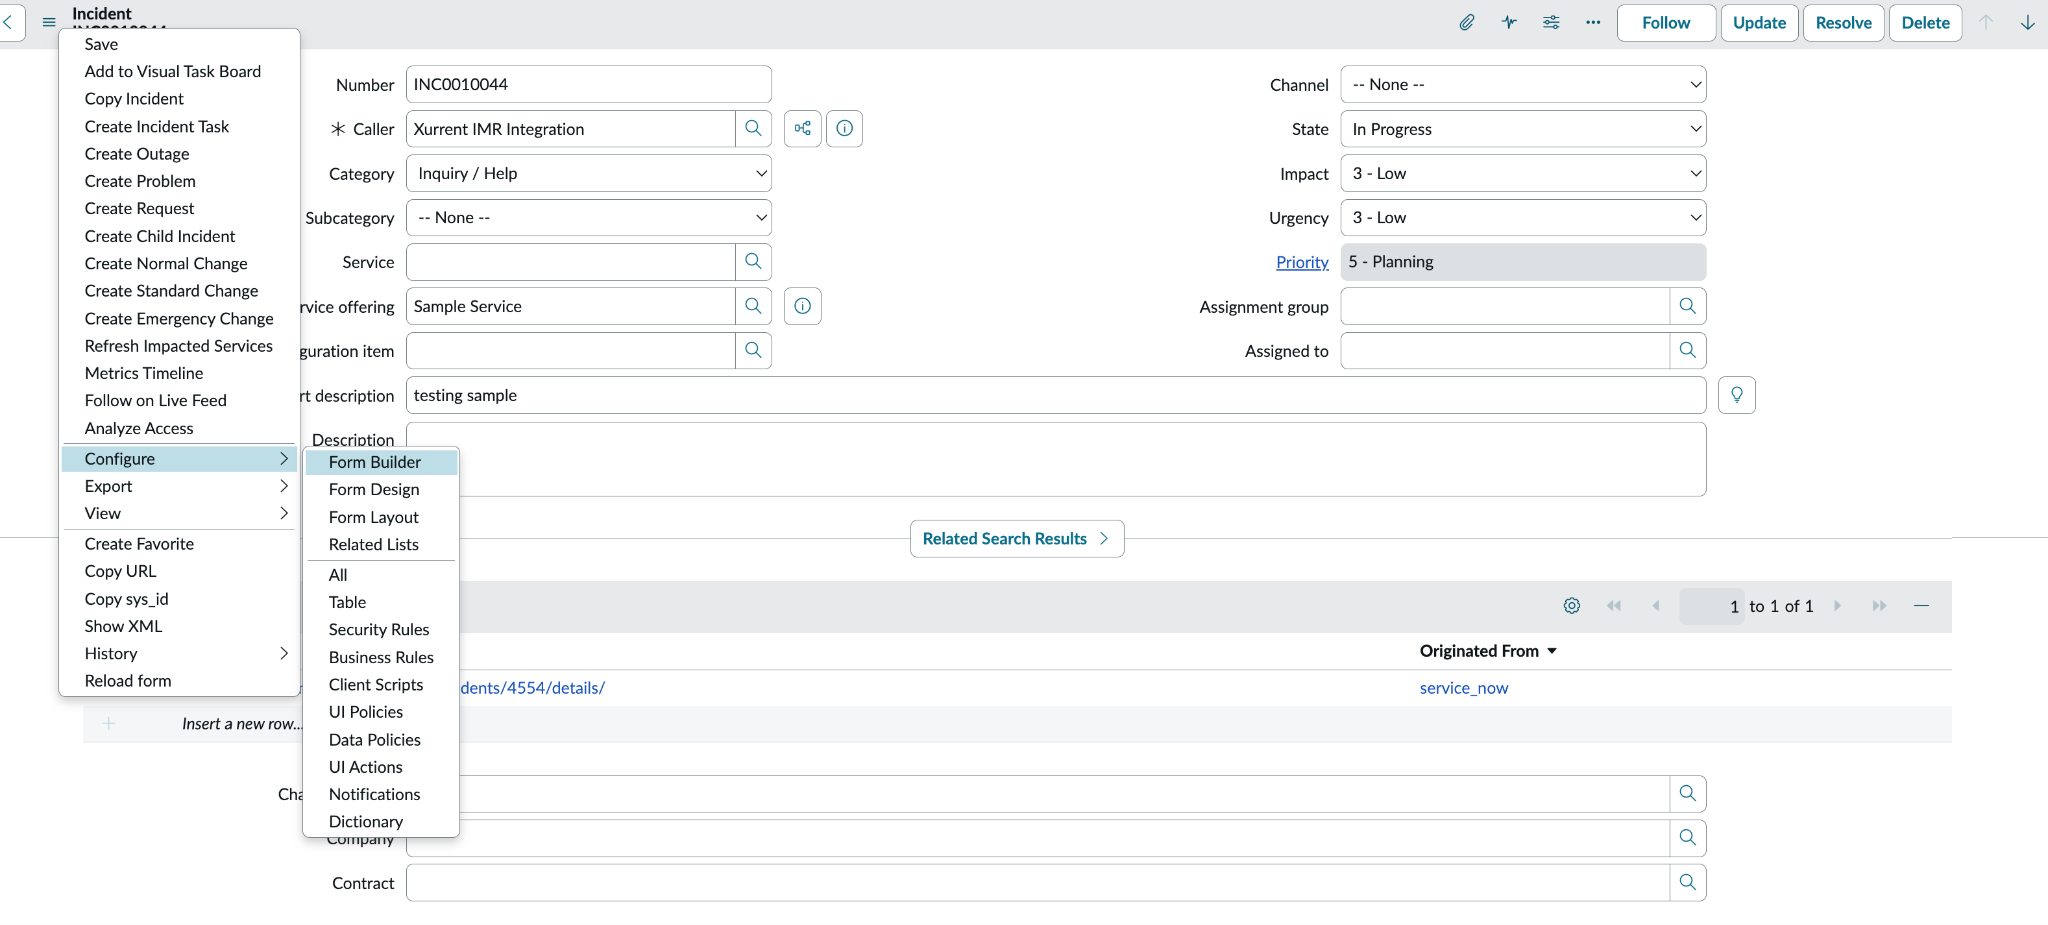
For security, the integration only exposes a specific set of ServiceNow tables when mapping Xurrent IMR services to ServiceNow entities, controlled by an admin-only property.
Property
x_xurre_imr.allowed_entity_tables
Default
cmdb_ci, service_offering, cmdb_ci_service, sys_user_group (Configuration Item, Service, Service Offering, Assignment Group)
Who can edit it
System Administrators only
To change it, navigate to sys_properties_list.do, open x_xurre_imr.allowed_entity_tables, and edit the comma-separated table list. Most customers can leave this at its default.
1. Visit: https://<your_instance>.service-now.com/$studio.do?sysparm_transaction_scope=global&sysparm_use_polaris=true
2. Select the Xurrent IMR application.
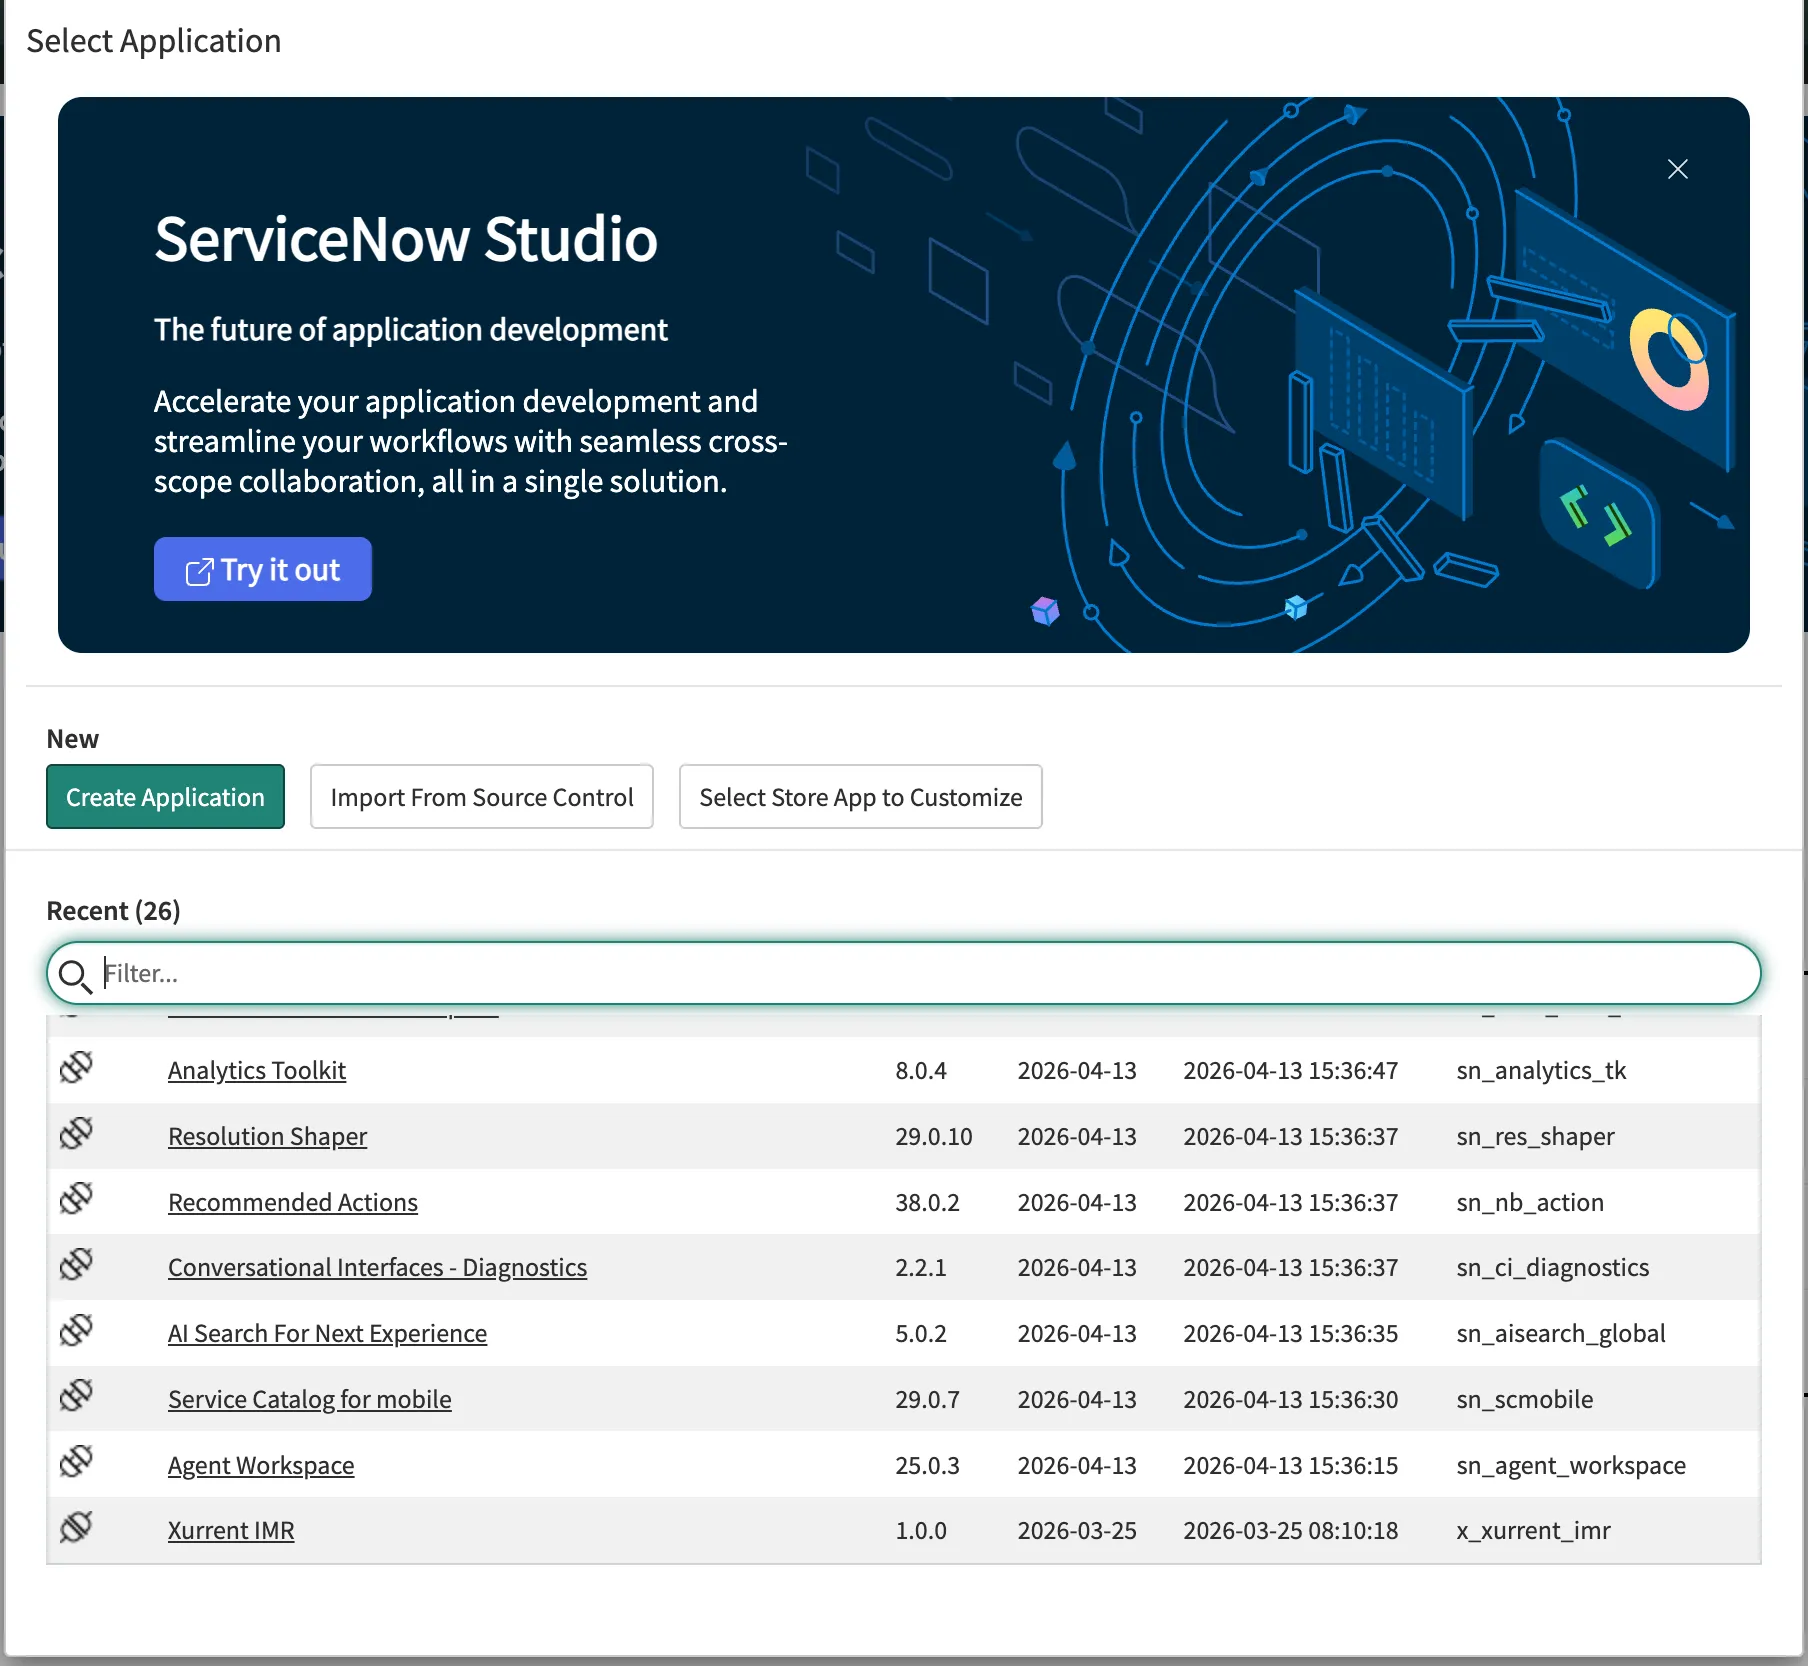
3. Click File → Settings. This will open the Application Settings for Xurrent IMR.
4. Copy the Scope and save it somewhere safe.


5. In Xurrent IMR, go to Profile → Account → Connections → ServiceNow.
6. Click Configure.

7. Fill in:
Click Add.
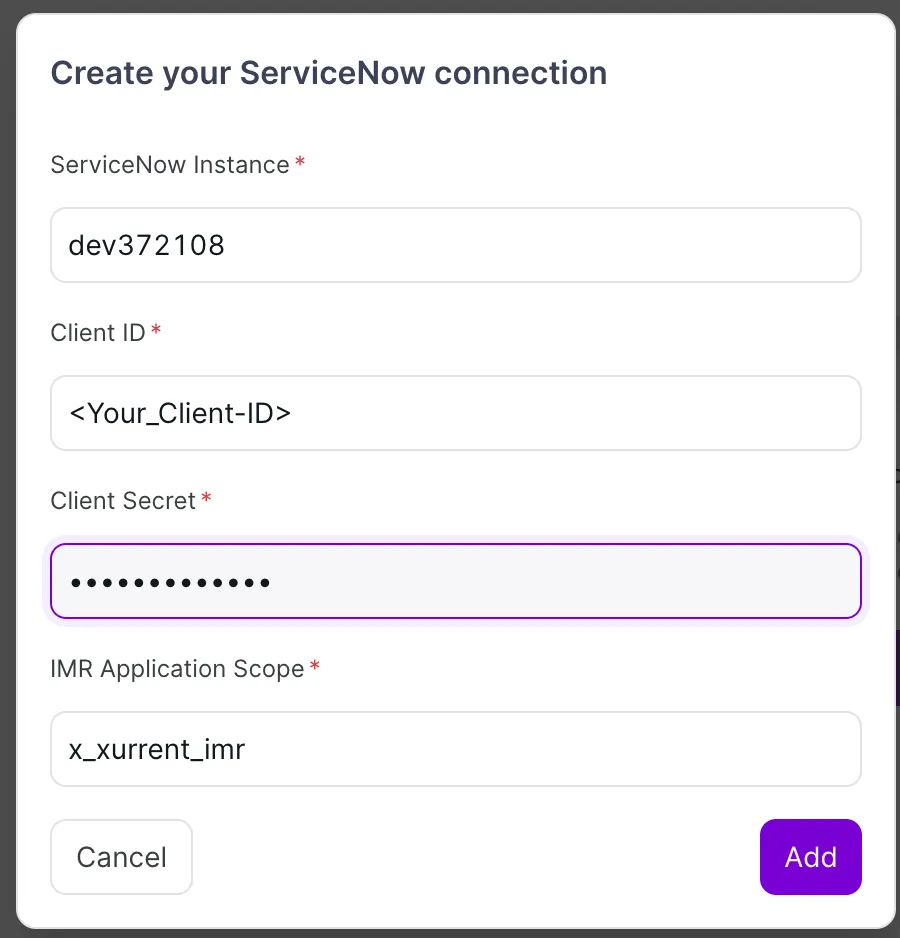
8. You will now see the connection between ServiceNow and Xurrent IMR, along with a generated Webhook Secret. Copy this Webhook Secret — you will need it in Section 5.
9. Click Continue.

Before Xurrent IMR can send authenticated webhook calls into ServiceNow, the webhook secret must be stored in ServiceNow and the integration must be explicitly switched on.

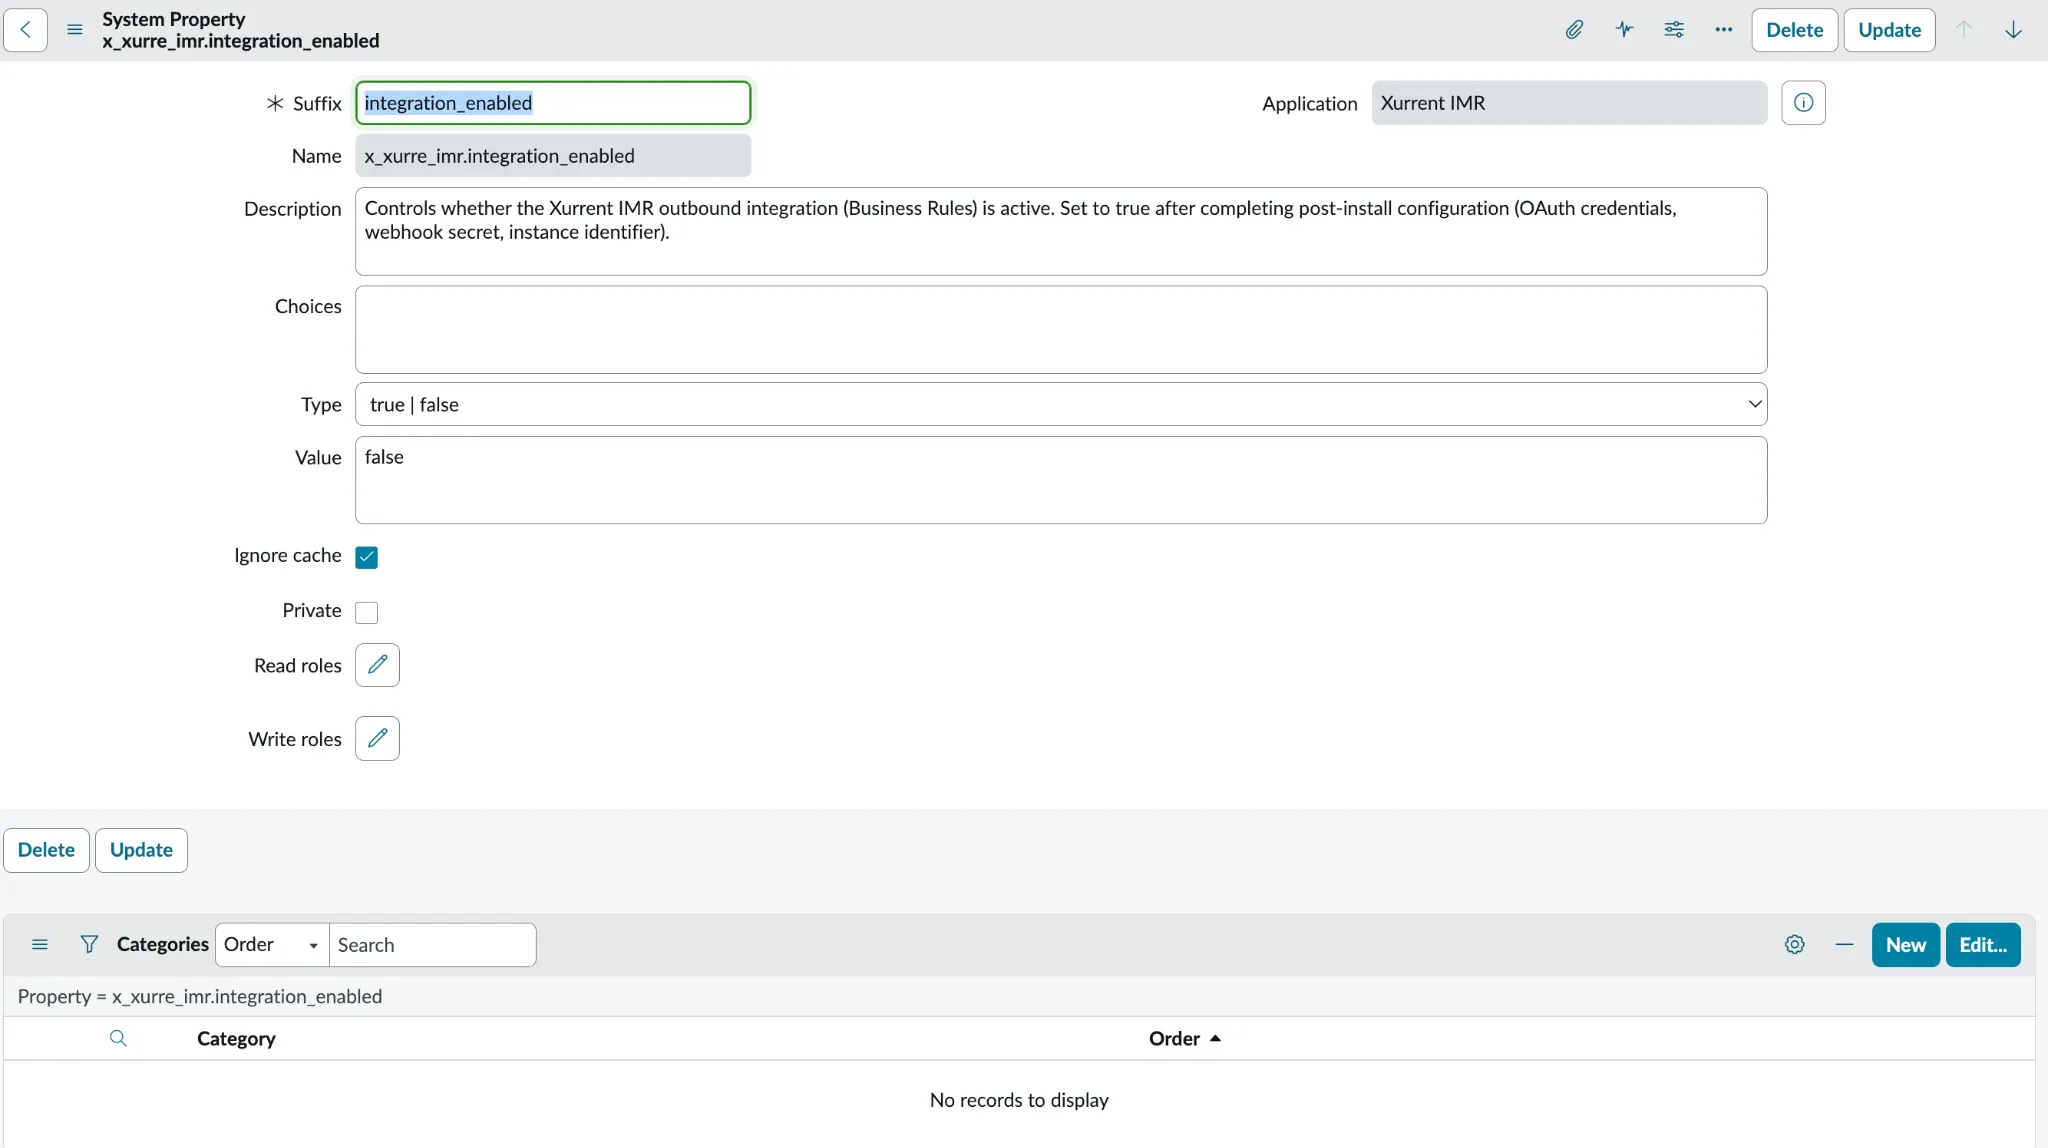
The integration is now fully authenticated and switched on. Incidents will begin syncing once you complete the mapping and configuration steps below.
Map your Xurrent IMR Service to a ServiceNow entity type. For example:
Select your desired entity type and click Continue.
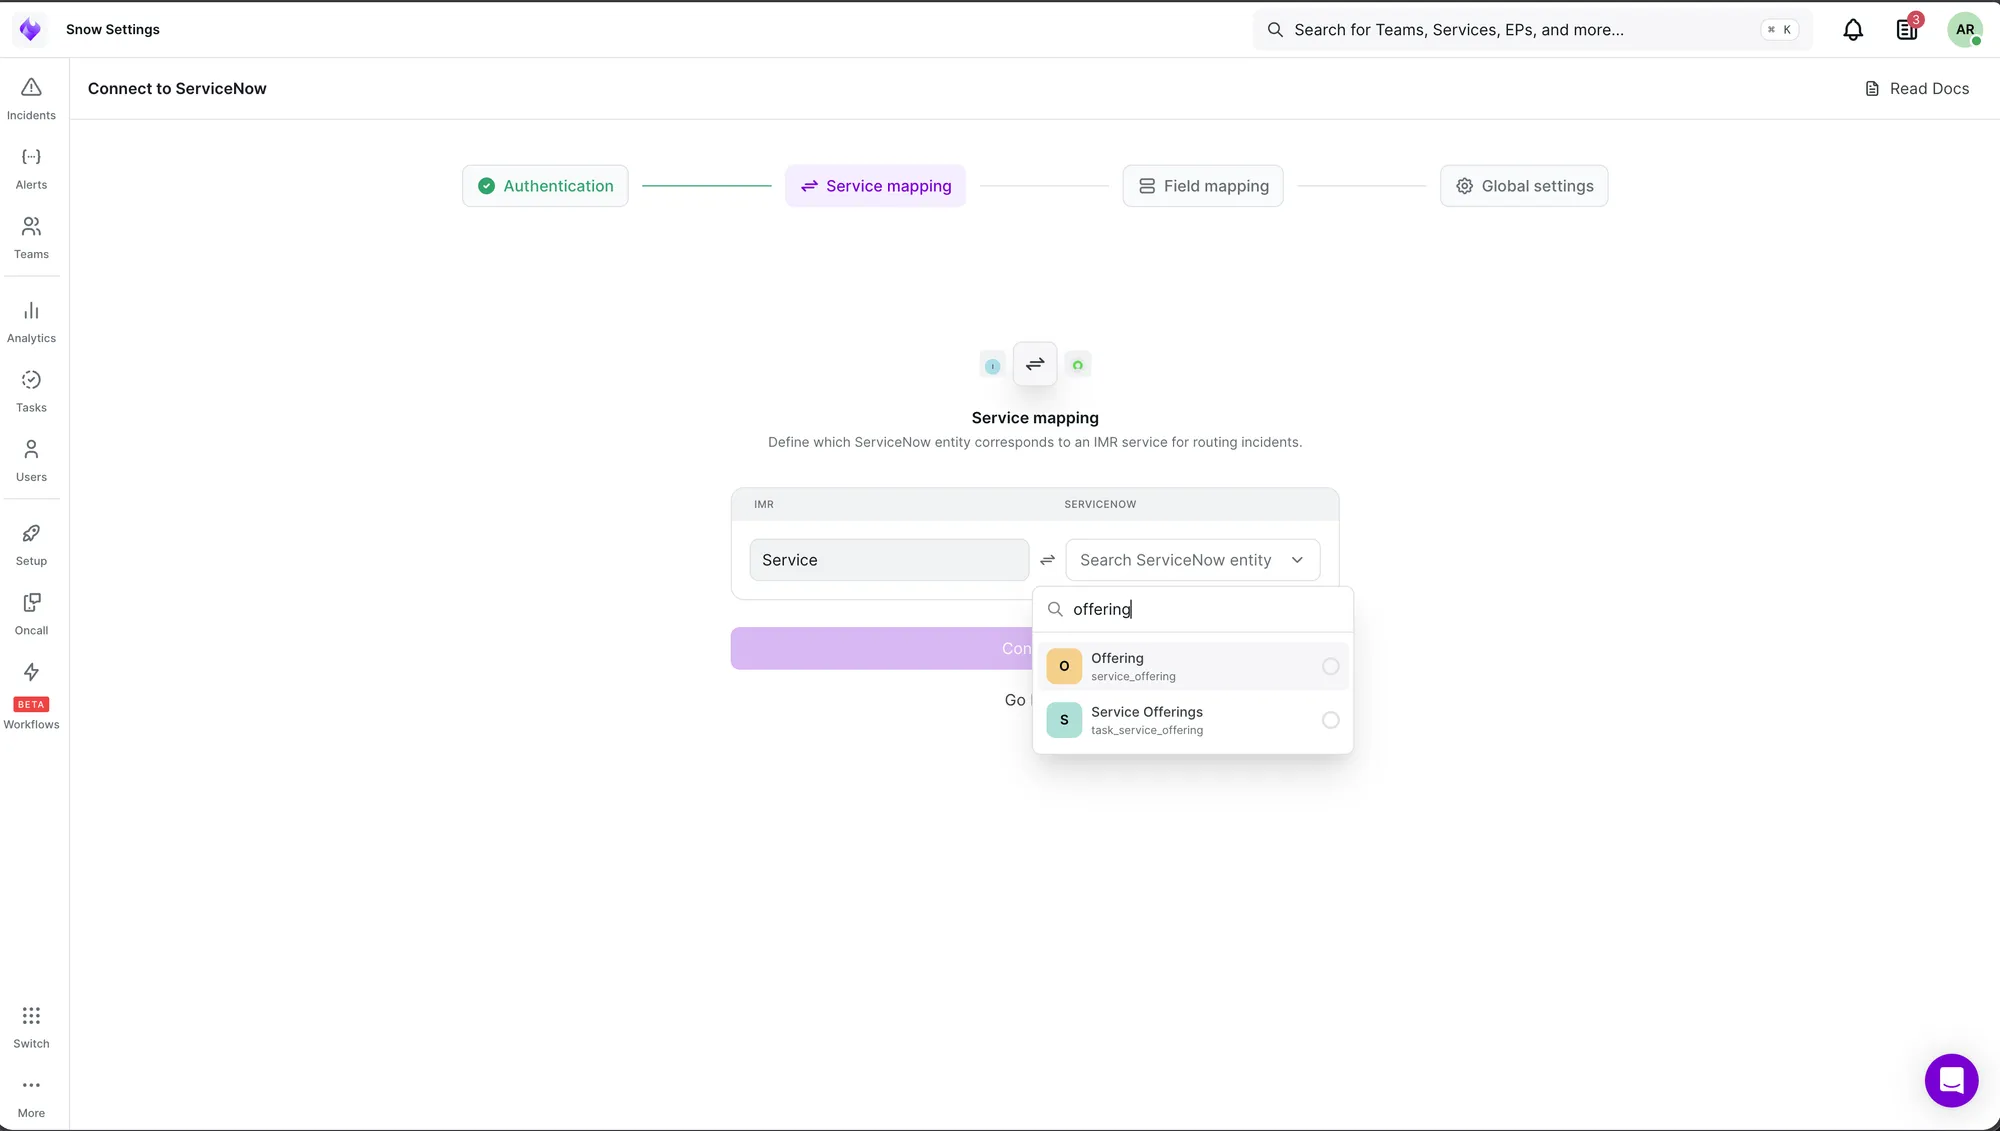
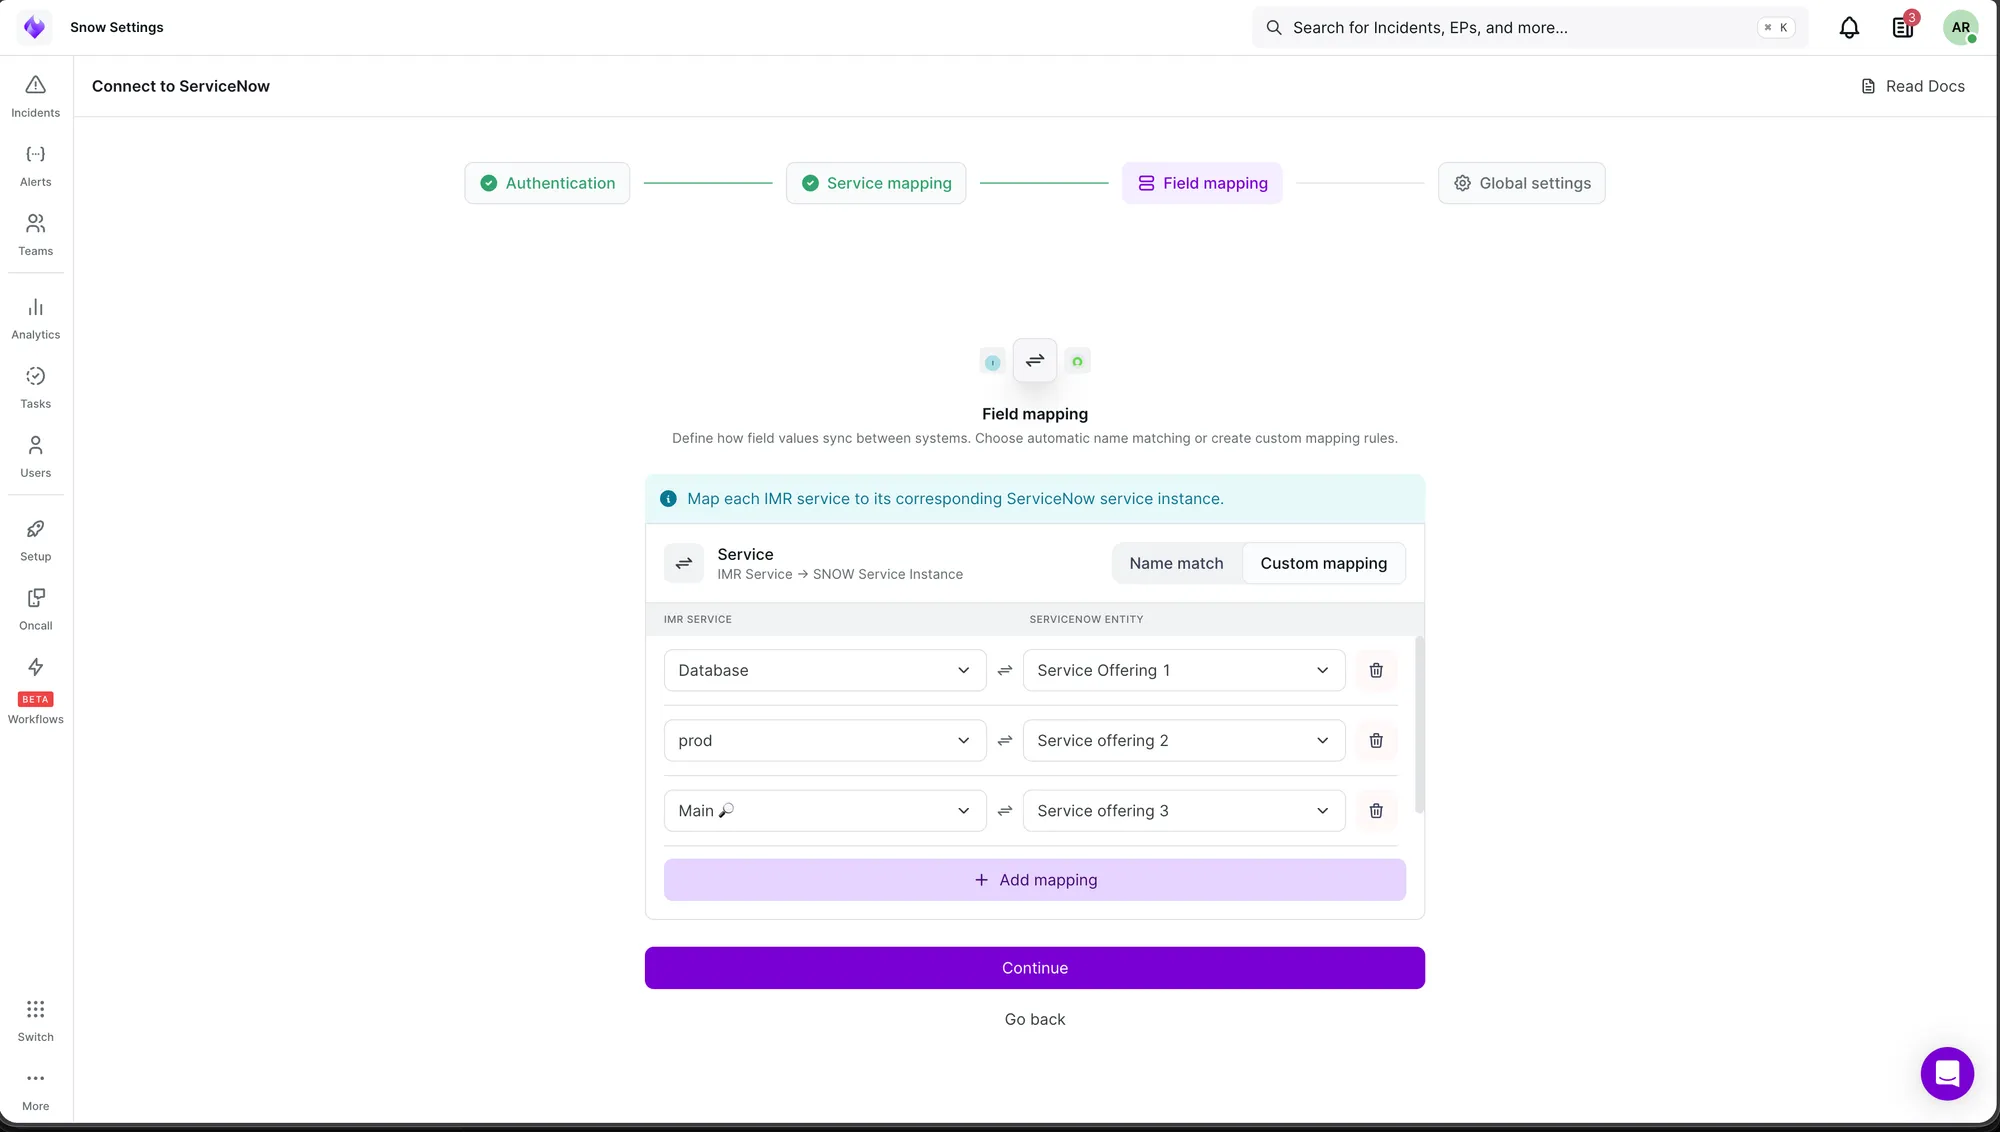
You can map Xurrent IMR services to ServiceNow entity records using one of two strategies:
We match by name automatically. When receiving alerts from ServiceNow, we check the name of the entity (e.g., a service offering) and, if we find a service in your account with the same name, we create an incident in that service. For outgoing incidents created in Xurrent IMR, we check the service name and attempt to create an incident in ServiceNow with the matching entity name. When you select Name Match, ServiceNow V2 integrations will automatically be created in every service in your Xurrent IMR account.

Custom Match (Recommended)
You manually map specific entity records to specific Xurrent IMR services. Only the mapped services will have ServiceNow V2 integrations created automatically. When receiving alerts, we match by the unique ID of the record rather than the name. For outgoing incidents, we send the unique ID of the entity record to create the incident. We recommend Custom Match as it gives you more control over the integration.
These settings serve as the base configuration for all integrations created automatically in your services. You can later change the configuration for individual integrations.
Trigger Source
Restrict Sync Direction
When enabled, syncing is restricted to the initial trigger direction only. For example, if the direction is IMR → SNOW and an incident is created in Xurrent IMR, it will create an incident in ServiceNow. However, if the incident state is later changed in ServiceNow, that change will not sync back to Xurrent IMR.
Sync Notes
When enabled, work notes will sync between the two systems.
Provision and Sync Priorities from ServiceNow
When enabled, incident priorities will sync between the two systems. If a priority does not exist in Xurrent IMR, it will be provisioned (created) as a new priority in the incident's team.
Status Mapping
Map Xurrent IMR statuses to ServiceNow incident states. You can map multiple ServiceNow states to a single Xurrent IMR status. One state should be set as the default for outgoing (IMR → SNOW) incidents.
Urgency Mapping
Map Xurrent IMR urgencies to ServiceNow urgencies. You can map multiple ServiceNow urgencies to a single Xurrent IMR urgency. One urgency should be set as the default for outgoing (IMR → SNOW) incidents.
ServiceNow Mandatory Fields
If there are mandatory fields required to create or update an incident in ServiceNow, you can set their values here. You can set static values or dynamic values using the {{incident.<field>}} syntax. For example: {{incident.summary}}.
Click Deploy Connection. This will create ServiceNow V2 integrations in your Xurrent IMR account.

To view or update an individual integration:
1. Go to Teams → select a team → Services → select a service → Integrations.
2. Select the ServiceNow V2 integration.
Here you can view and update the individual integration configuration.


.webp)
.webp)
.webp)