




Blog
Insights & updates from our experts


Resolve plant floor and IT issues before they disrupt production.

Stay audit-ready while resolving issues and reducing operational risk.
Resolve issues quickly with an AI-powered system that automates ticketing.
Unifiy IT, HR, Facilities, Finance, and more on a single, AI-powered service platform.
Simplify on-call scheduling, automate escalations, and reduce burnout.
Automate postmortems, AI summaries, and post-incident workflows
Create, organize, and continuously improve your knowledge base to find the right answers with Sera AI.
We're here to help

The integration with Atlassian Jira using the Xurrent Integration Service is

The integration with Atlassian Jira using the Xurrent Integration Service is

The integration with Atlassian Jira using the Xurrent Integration Service is

The integration with Atlassian Jira using the Xurrent Integration Service is

The integration with Atlassian Jira using the Xurrent Integration Service is

The integration with Atlassian Jira using the Xurrent Integration Service is

The integration with Atlassian Jira using the Xurrent Integration Service is

The integration with Atlassian Jira using the Xurrent Integration Service is
Resolve issues quickly with an AI-powered system that automates ticketing.
Unifiy IT, HR, Facilities, Finance, and more on a single, AI-powered service platform.
Simplify on-call scheduling, automate escalations, and reduce burnout.
Automate postmortems, AI summaries, and post-incident workflows
Create, organize, and continuously improve your knowledge base to find the right answers with Sera AI.
Resolve plant floor and IT issues before they disrupt production.
Stay audit-ready while resolving issues and reducing operational risk.

Detect, respond, and resolve incidents fast to cut downtime and MTTR.

Keep your store online, even during your biggest sales moments.

Protect patient data and resolve issues fast, so care teams stay focused on care.
Standardize service delivery across every store and channel.

We are here to help 24/7

Connect with other Xurrent Users

Get insights and tips on how to get the most out of Xurrent

Apps, APIs, and updates

Xurrent service functionality

Eliminate manual tasks, optimize workflows, and deliver faster resolutions.
Learn how organizations have reduced downtime, improved 50% MTTA & MTTR, and cut costs with Xurrent IMR.
Discover Xurrent IMR's quick support, bidirectional integrations with Jira and Slack, and more cohesive incident response capabilities compared to Opsgenie.
Understand why users value Xurrent IMR for its intuitive interface, efficient incident alerting, customizable On-call schedules, and escalations.

Google Chat is an intelligent and secure communication and collaboration tool, built for teams. From ad-hoc messaging to topic-based workstream collaboration, Google Chat makes it easy to get work done where the conversation is happening. The Xurrent IMR Incident Management platform fetches alerts from your monitoring apps, creates and assigns incidents based on schedules and escalation policies and intimates engineers on call. When these two applications come together, the result is a fast, stress-free incident-resolution process.
There are two ways to receive Google Chat notifications from Xurrent IMR
Through this method, you can instruct Xurrent IMR to notify you on Google Chat whenever an incident is assigned to you. This can be in place of, or in addition to notifications via phone call or SMS.
You can add your Google Chat handle to your notification rules and set up when you want to be alerted on Google Chat.
First, you'll need to directly message the Xurrent IMR Google Chatbot, which would initiate the Connection request.
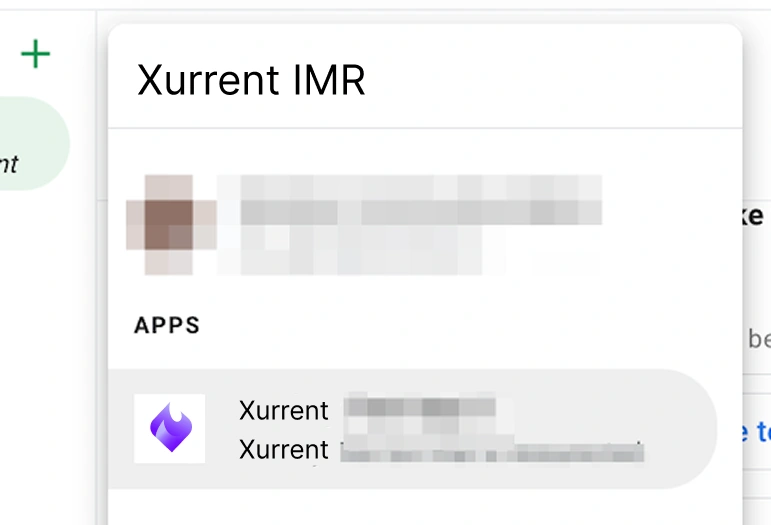
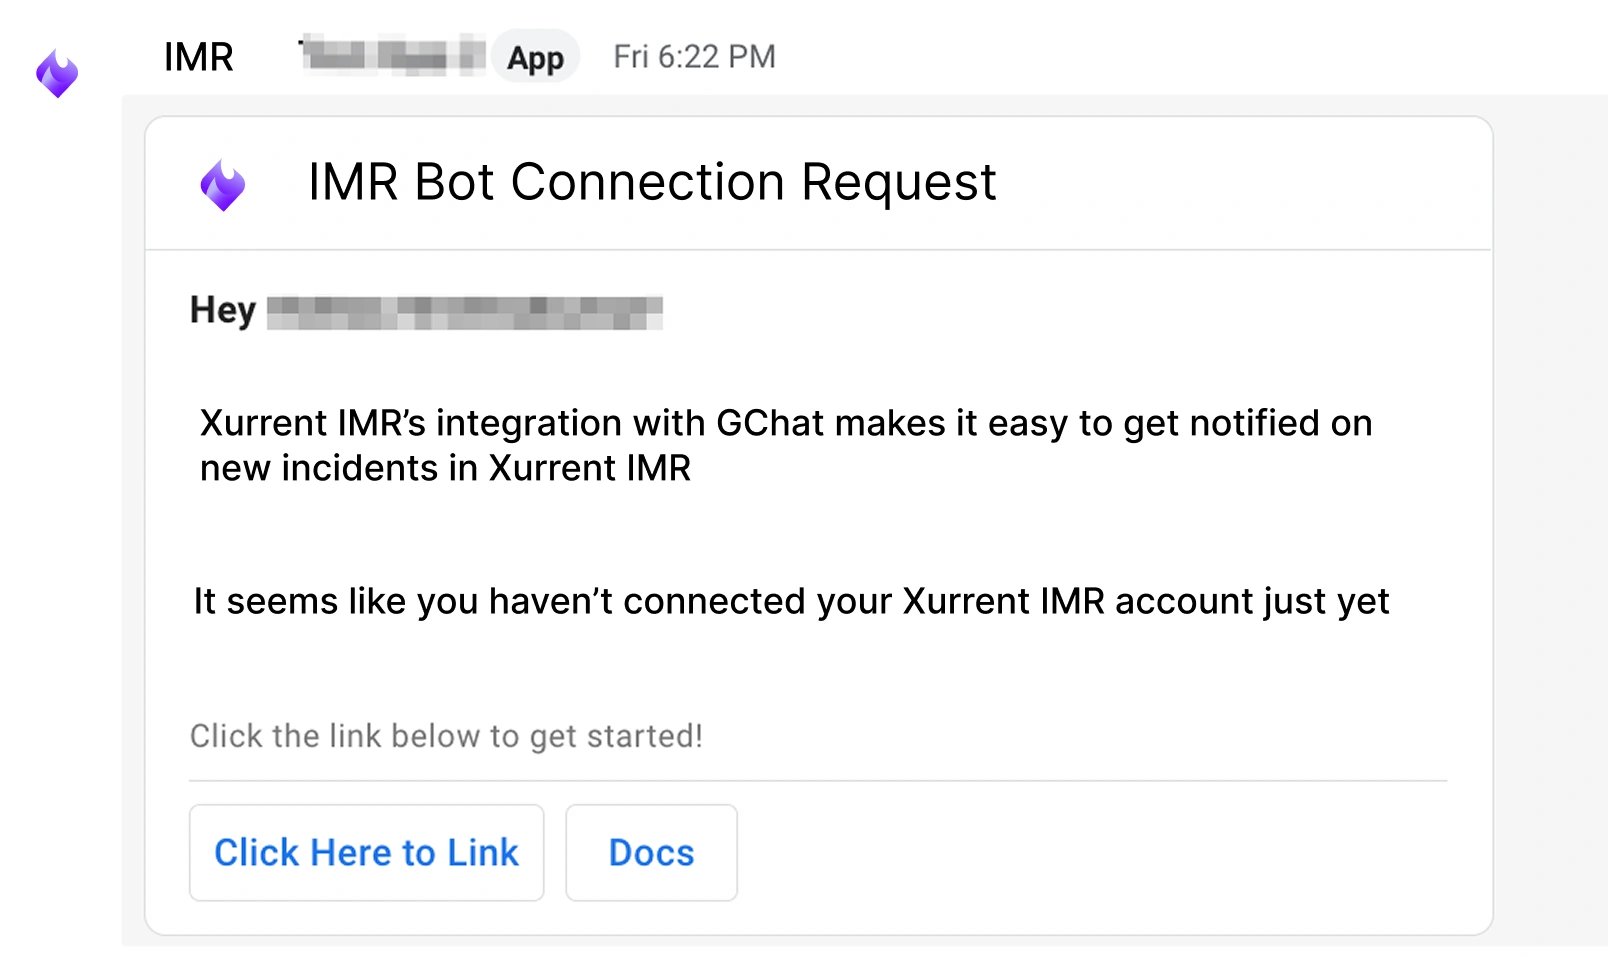
The Xurrent IMR bot is now added as your personal contact method.
Through this method, you can instruct Xurrent IMR to notify a Google Chat space whenever an incident is assigned to the Service that you connected it to.
First, you'll need to directly message the Xurrent IMR Google Chatbot, which would initiate the personal Connection request. Follow the steps above for the same.
Next, in the space that you want to be alerted on with your teammates, add the Xurrent IMR Bot.
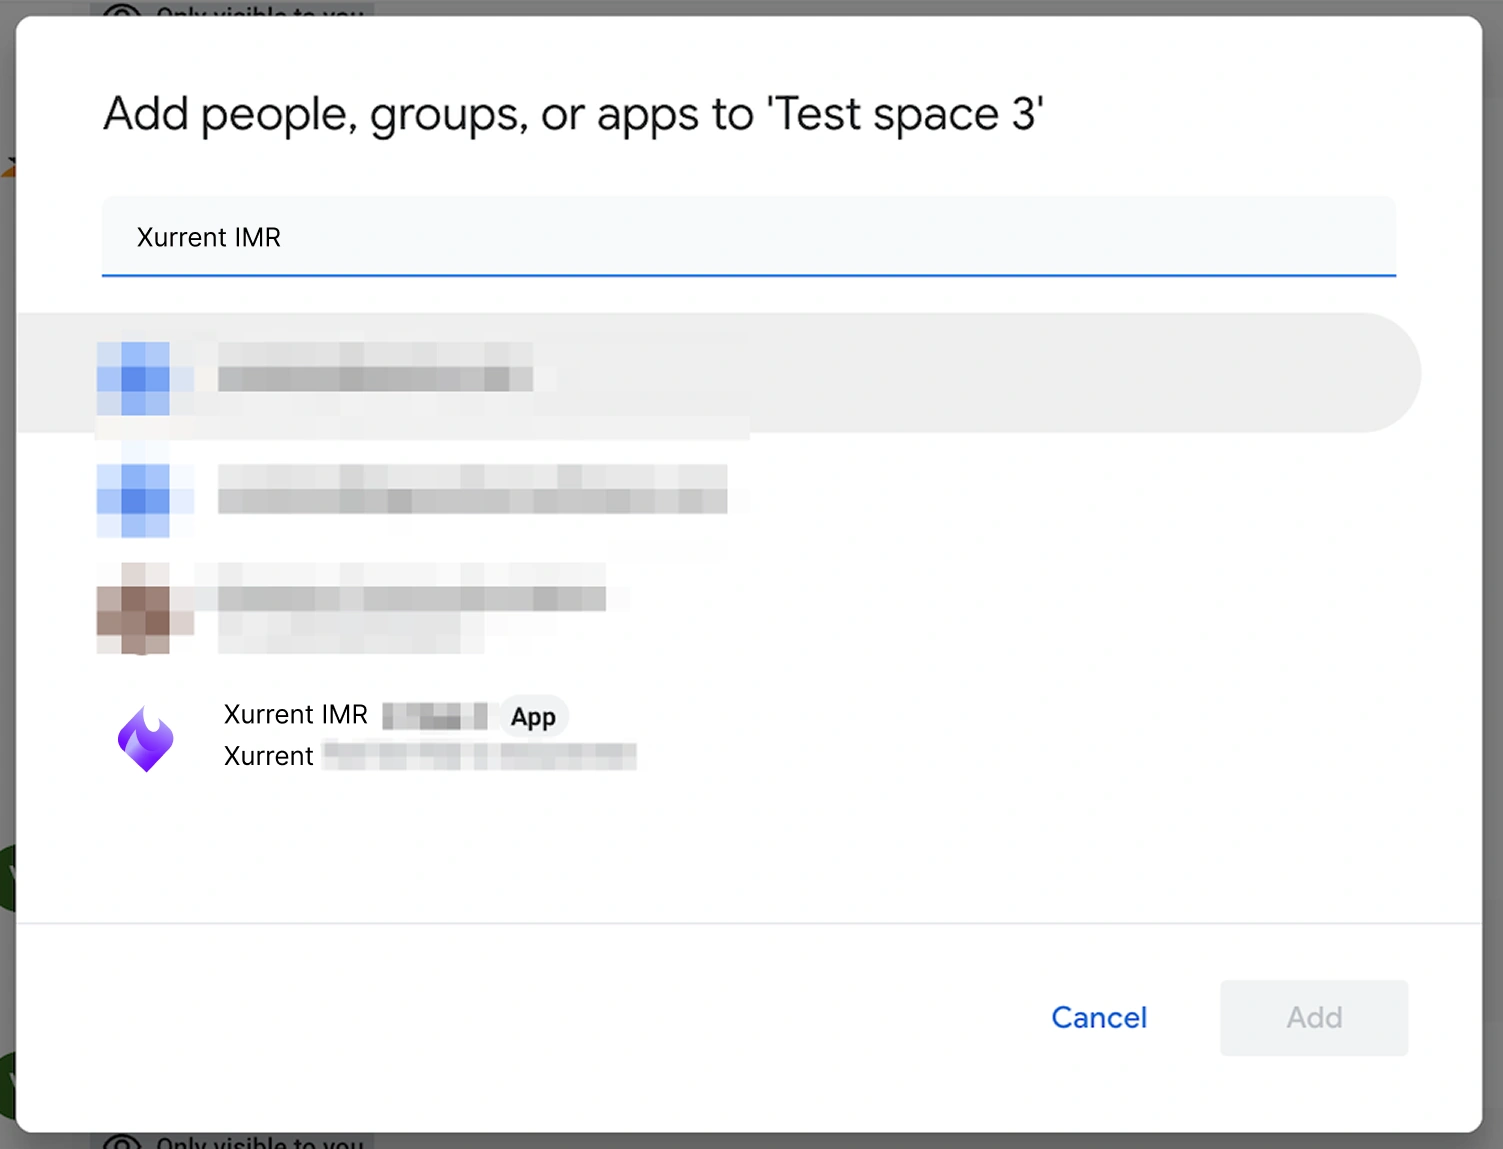
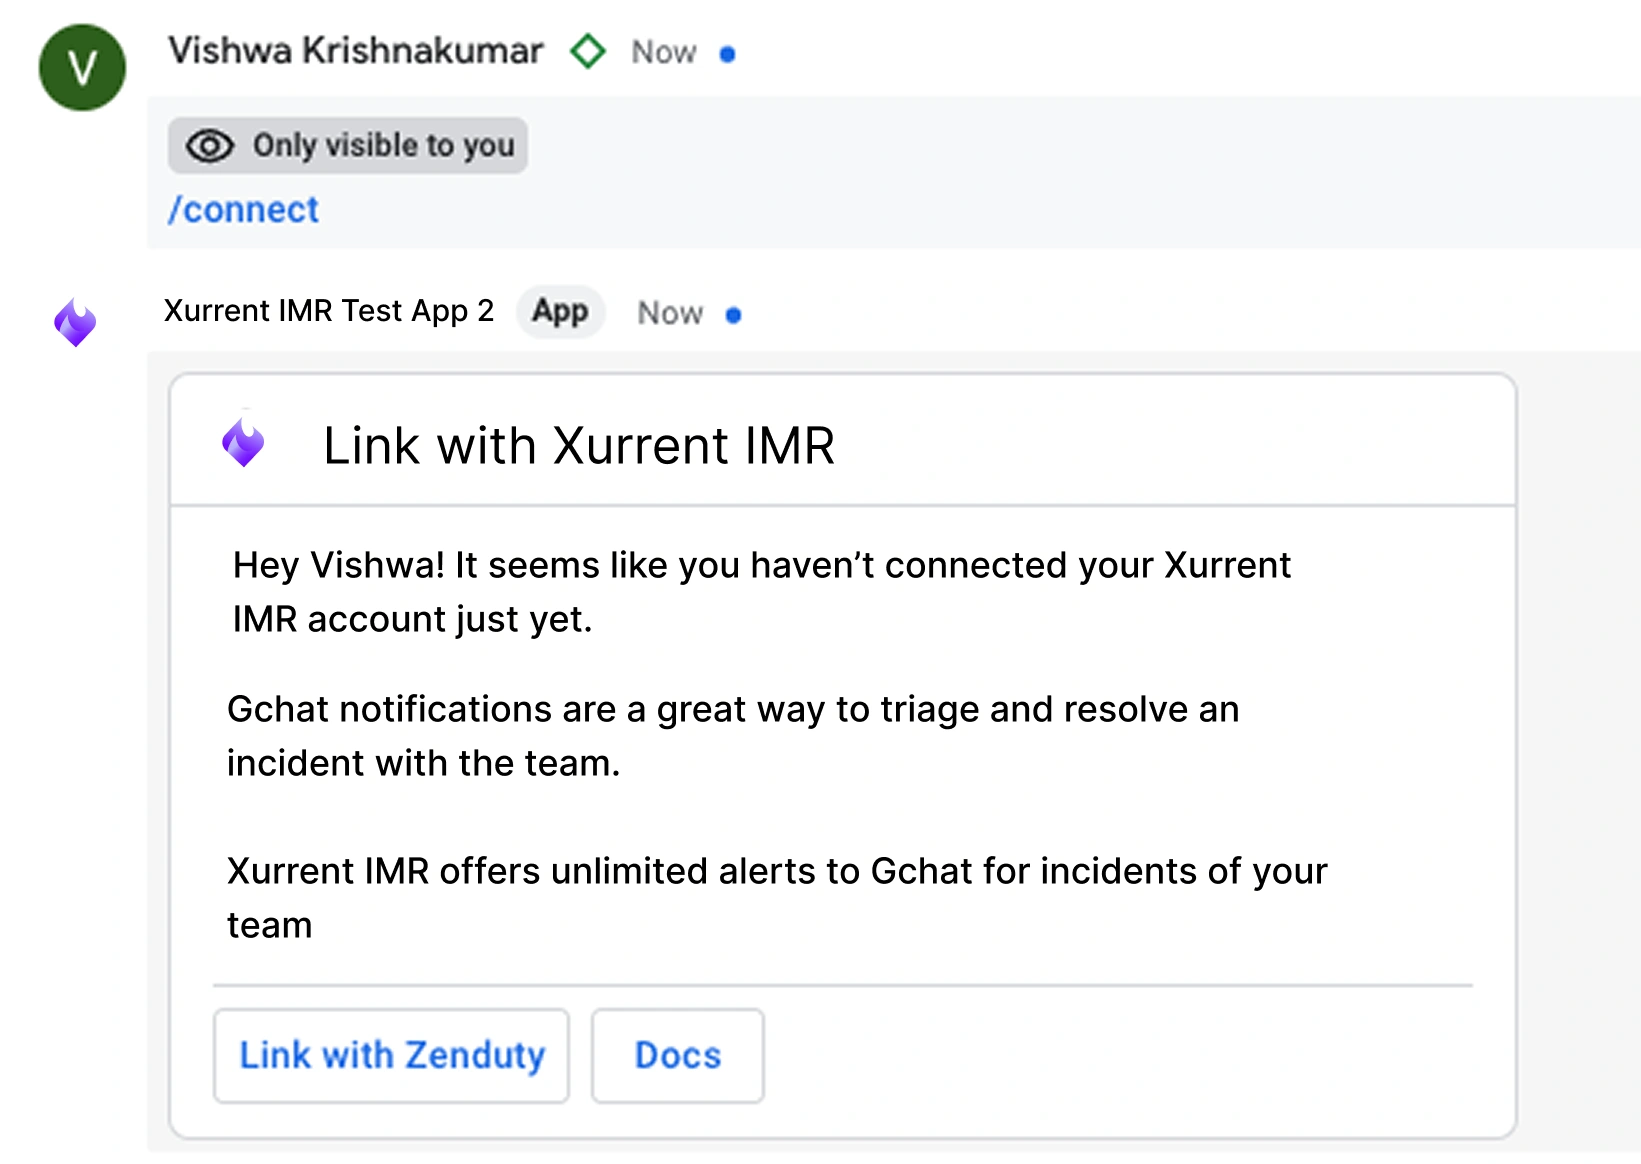
Note: You no longer need to generate a new link for each service. A single connection link can be used to integrate multiple services, simplifying the setup process for teams managing several services within the same Google Chat space.
The Xurrent IMR bot is now added in your Google Chat Space to notify you and your teammates if any Incidents come up.
Note: You can add multiple services to one Google space using the '/connect' command
Once set up, all Xurrent IMR alerts will reflect on Google Chat.

The Xurrent IMR Google Chat bot allows you to search for and view on-call users associated with a specific escalation policy. Use the available command to trigger the bot, search for escalation policies, and retrieve the list of on-call users.
Available Text Commands on Google Chat:
@Xurrent IMR whoisoncall - View on-call users of an escalation policy.
Steps to View On-Call Users of an Escalation Policy
Type the Command
In the chat, type:
@Xurrent IMR whoisoncall
Trigger the Xurrent IMR Bot Prompt
After sending the command, a Xurrent IMR bot prompt will appear, asking you to input the escalation policy name.
Search for the Escalation Policy
In the input text field, type the name of the escalation policy.
You must type at least 3 characters to trigger the search.
Press Enter to proceed.
Select the Matching Escalation Policy
The Xurrent IMR bot prompt will update with a list of matching escalation policies based on your search query.
Select the escalation policy you want to view the on-call users for.
View On-Call Users
A new Xurrent IMR bot prompt will appear, showing the on-call users for the selected escalation policy. The prompt will display users for different levels of escalation if applicable.
This flow provides a seamless way to query escalation policies and view on-call users directly from Google Chat using the Xurrent IMR bot.
You can unlink your account by typing /settings in your Google Chat, and clicking on Unlink in front of your name in the pop-up that appears
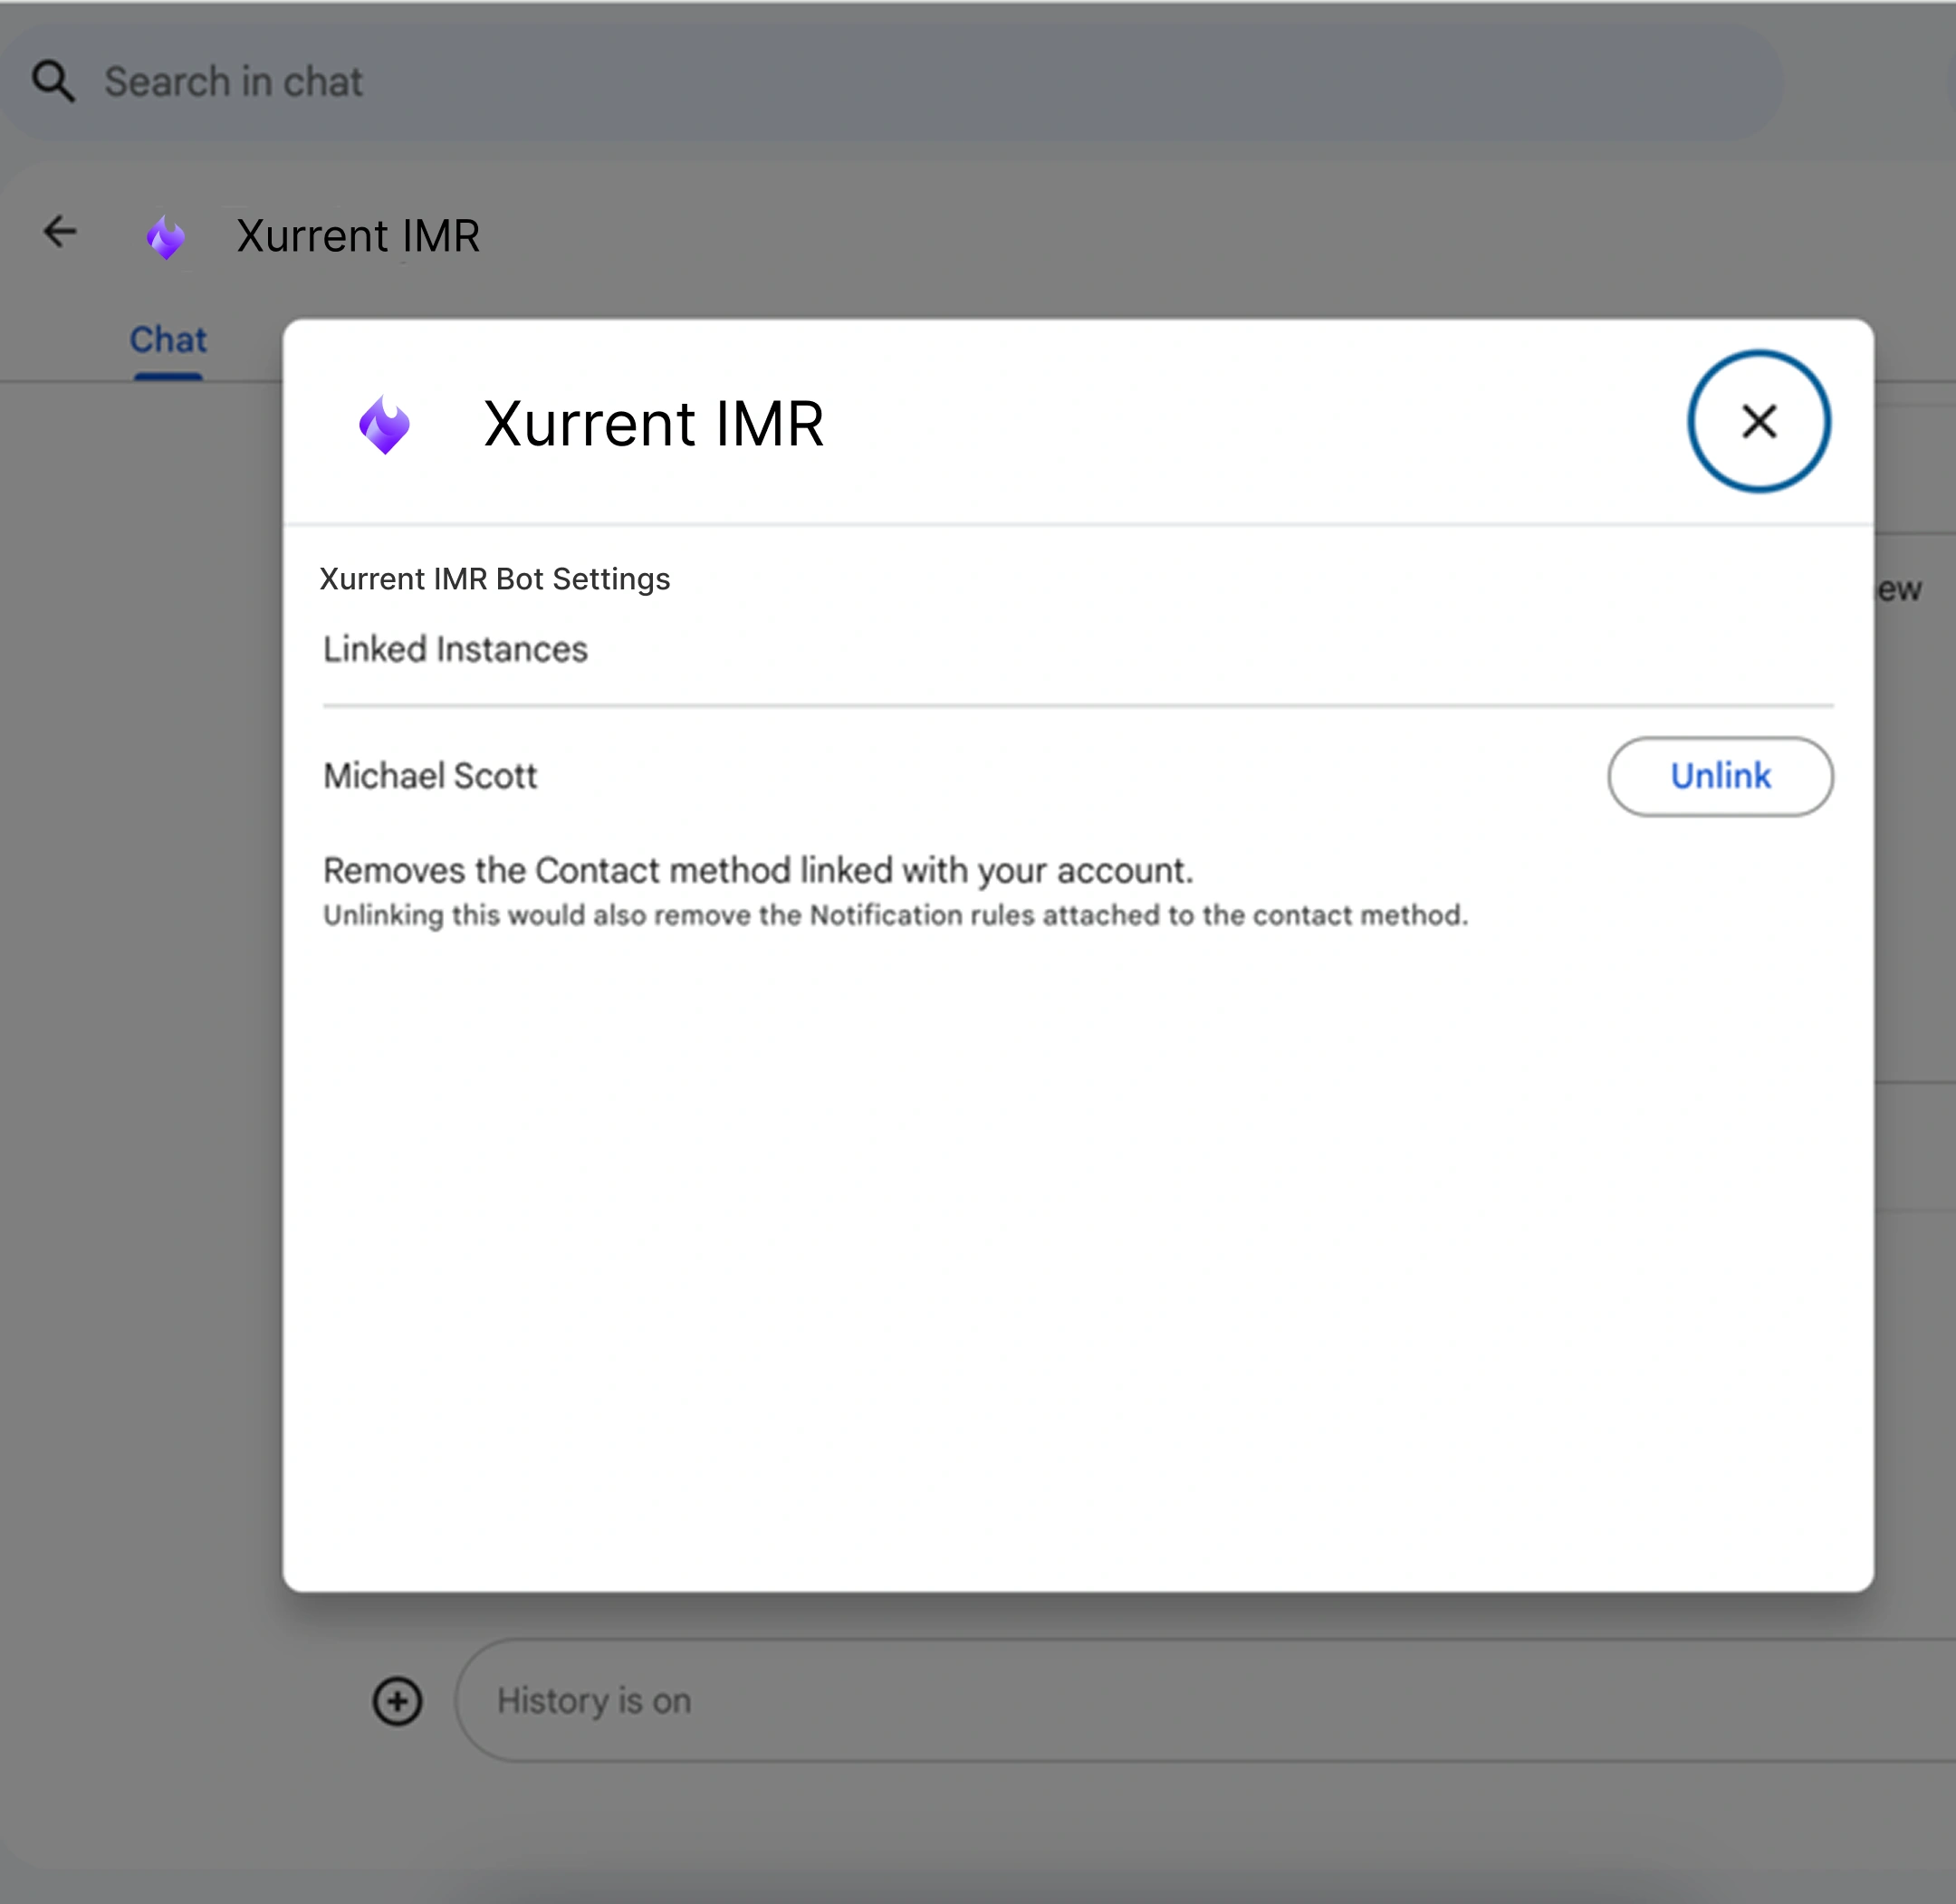
Note: You do not need a paid Xurrent IMR account to receive Xurrent IMR alerts on Google Chat. Subscribers of any plan are eligible to receive unlimited free alerts on Google Chat, just like Slack and Microsoft Teams
The Google Chat Space Creation integration automatically creates a dedicated Google Chat space for every incident. Once configured for a service, each new incident on that service spins up its own space - named from a template you define - so responders get a focused place to collaborate.
Setup is a short three-step flow, launched directly from the Google Chat bot:
After setup, each integration can be viewed and reconfigured from its integration details page inside the dashboard.
Note Saving creates one integration per selected service. Services that already have a space-creation integration are skipped, so it is safe to re-run the flow.
This step is performed once by your Google Workspace administrator before the integration can create spaces in your organisation.
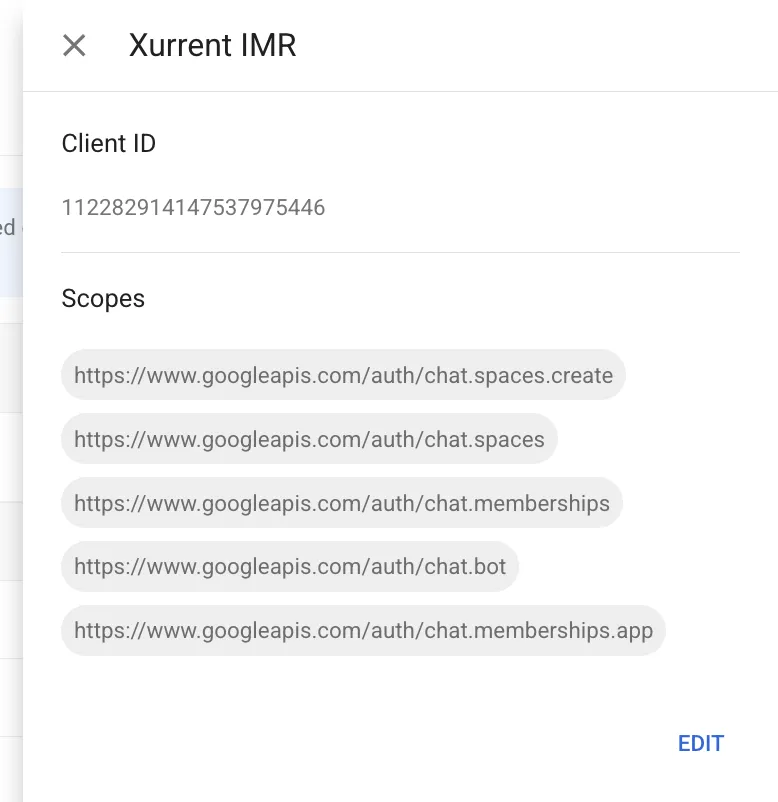
The space-creation feature uses a service account to create and manage Google Chat spaces on behalf of your organisation. Your Workspace admin must authorise this service account via Domain-Wide Delegation.
Steps
112282914147537975446 OAuth scopes(see below)https://www.googleapis.com/auth/chat.spaces.create,
https://www.googleapis.com/auth/chat.spaces,
https://www.googleapis.com/auth/chat.memberships,
https://www.googleapis.com/auth/chat.bot,
https://www.googleapis.com/auth/chat.memberships.appNote — Propagation can take up to a few minutes. If space creation fails immediately after setup, wait 5–10 minutes and retry.
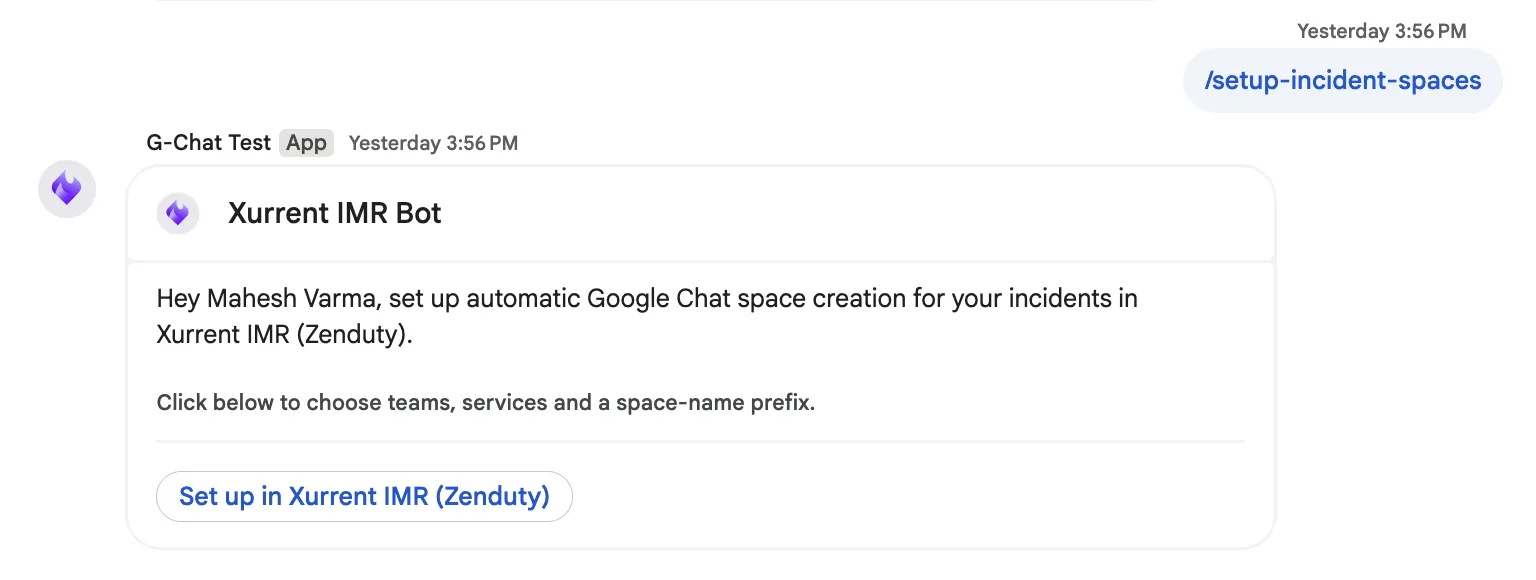
In Google Chat, run the setup command in a conversation with the bot:
/setup-incident-spaces
The Xurrent IMR bot replies with a setup card. Click “Set up in Xurrent IMR (Zenduty)” to open the configuration page in your browser.
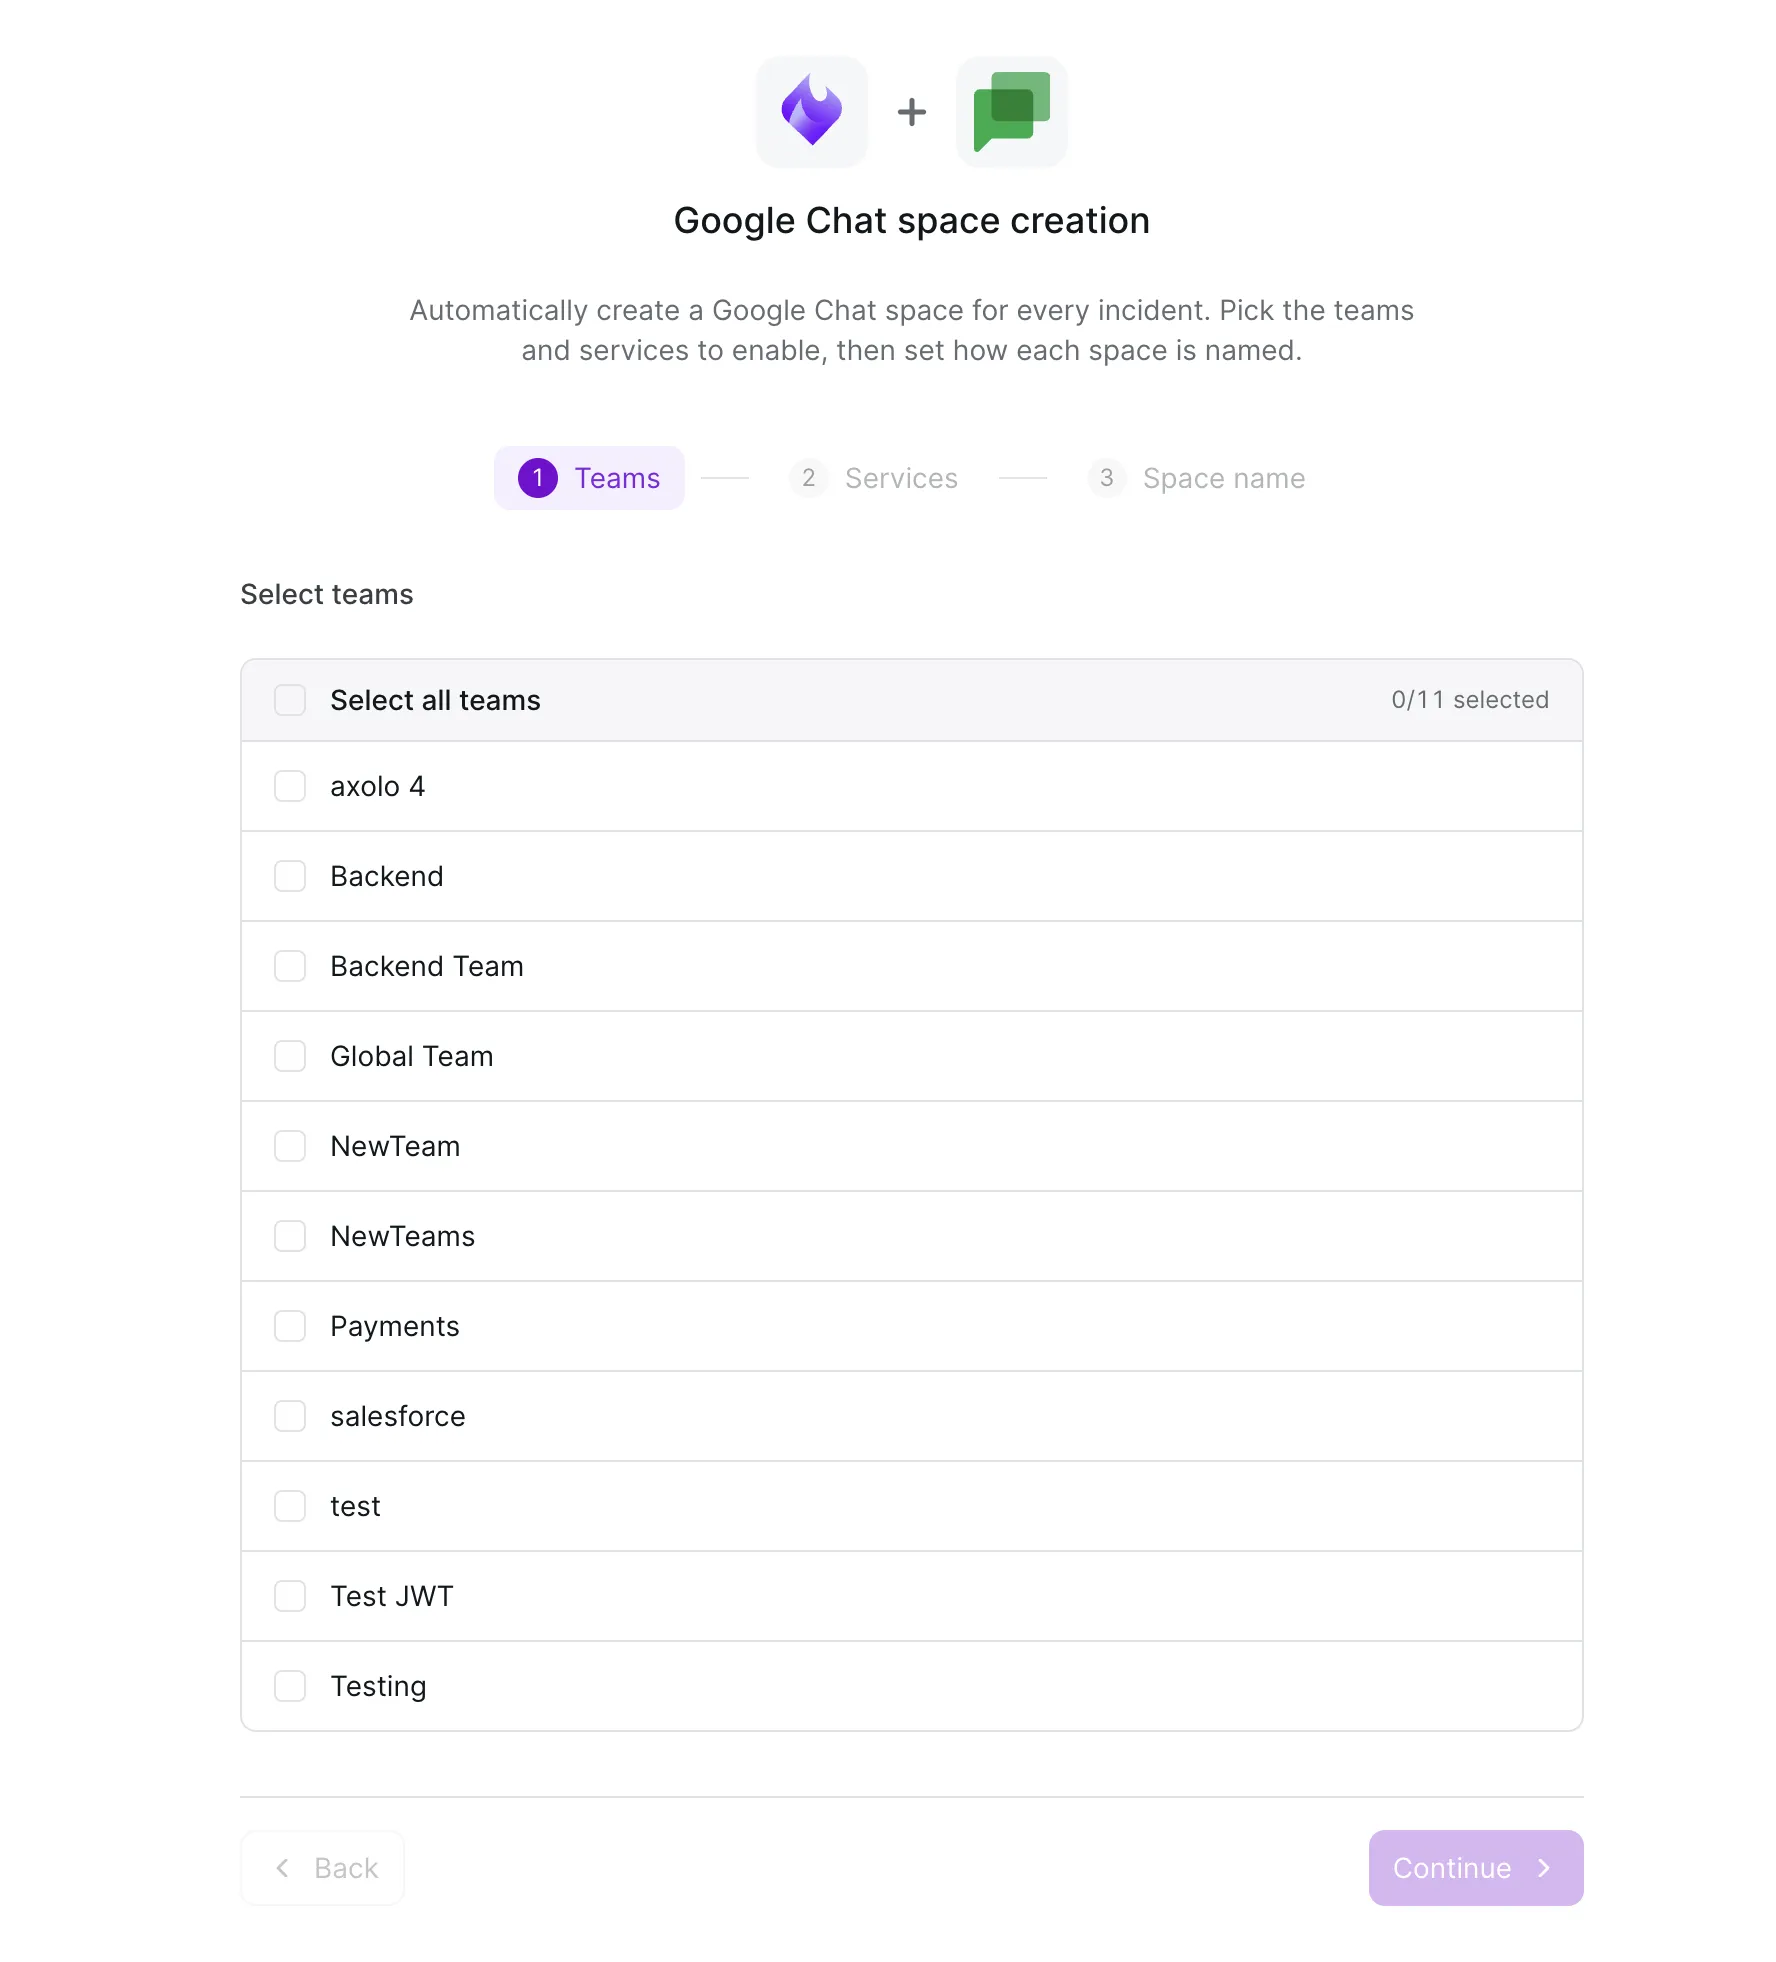
The first step lists the teams you’re allowed to configure. Tick each team you want to enable, or use “Select all teams” to choose every team at once. The counter on the right shows how many are selected.
Click Continue to move on to services.
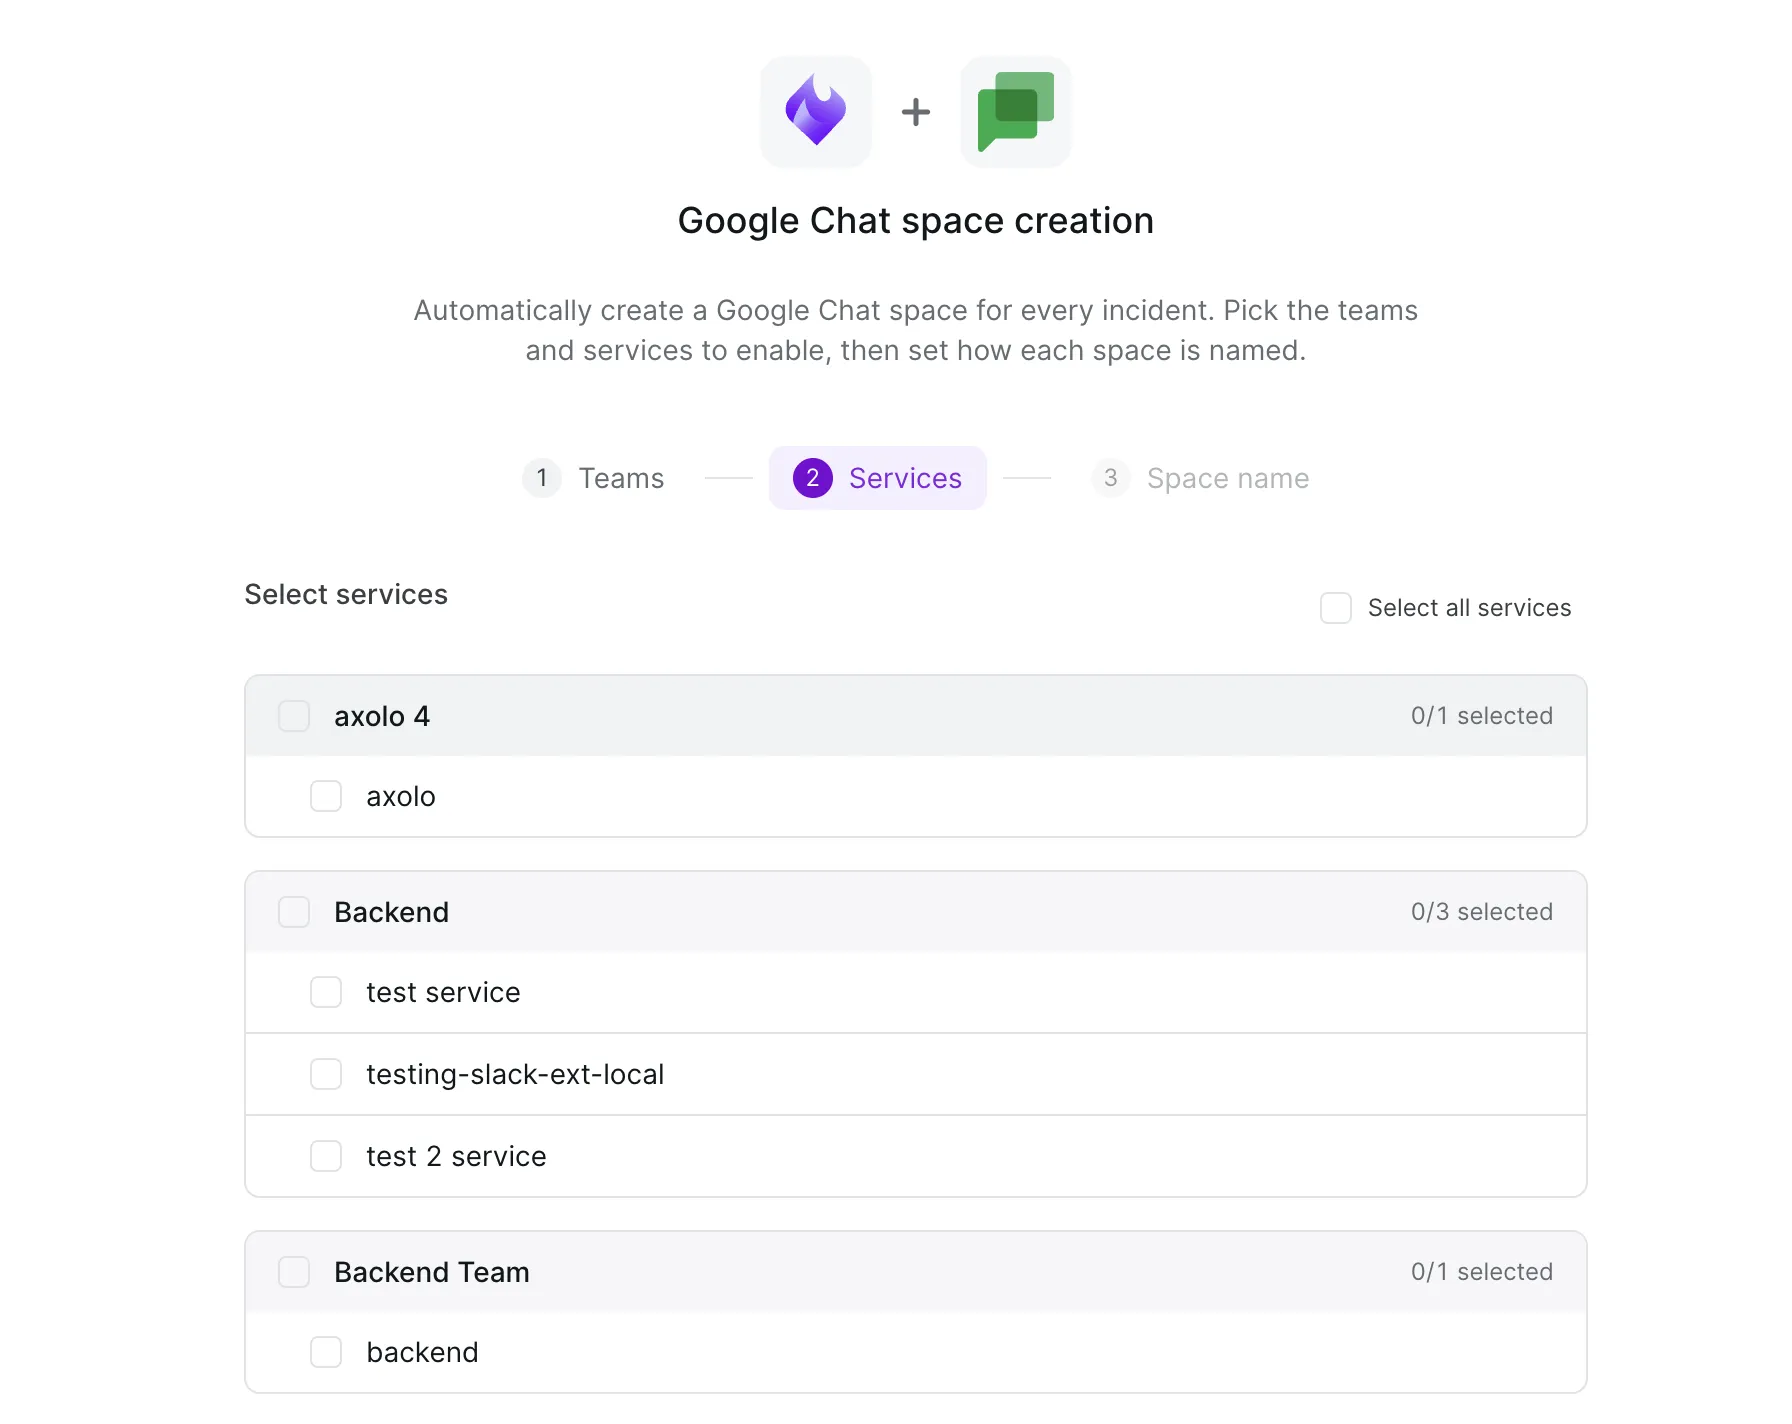
Services are grouped under their team. Select individual services, use a team’s header checkbox to select all of that team’s services, or use “Select all services” to select everything across all teams. Each group shows its own selected/total count.
Click Continue to set the space name.
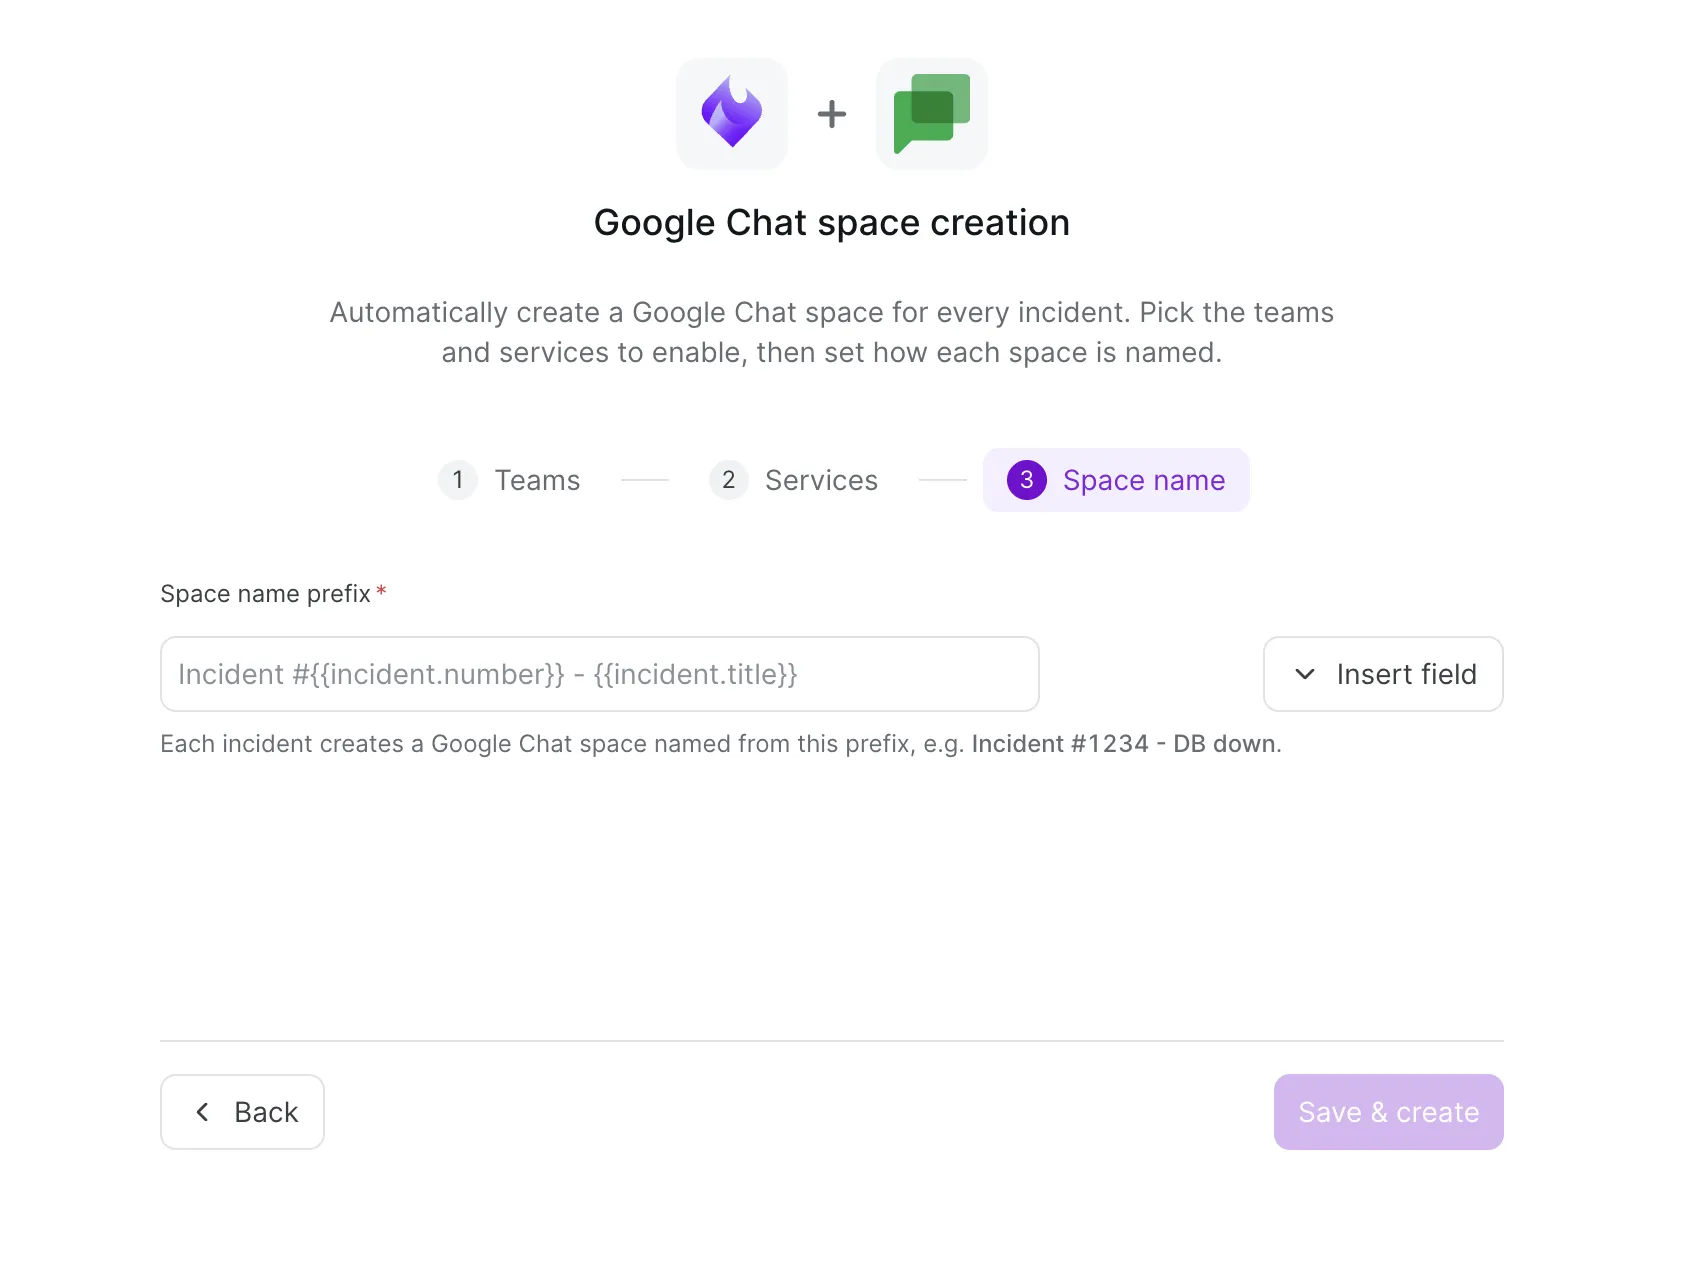
Define how each incident’s Google Chat space is named. Type a prefix and insert dynamic incident fields using the “Insert field” picker - clicking a field inserts its token at the cursor.
Example template:
Incident #{{incident.number}} - {{incident.title}}
which produces a space named, for example:
Incident #1234 - DB down
Click Save & create to finish.
A confirmation toast appears - “Created N integration(s)” - and you are returned to the Zenduty dashboard. Services that already had the integration are skipped and not counted.
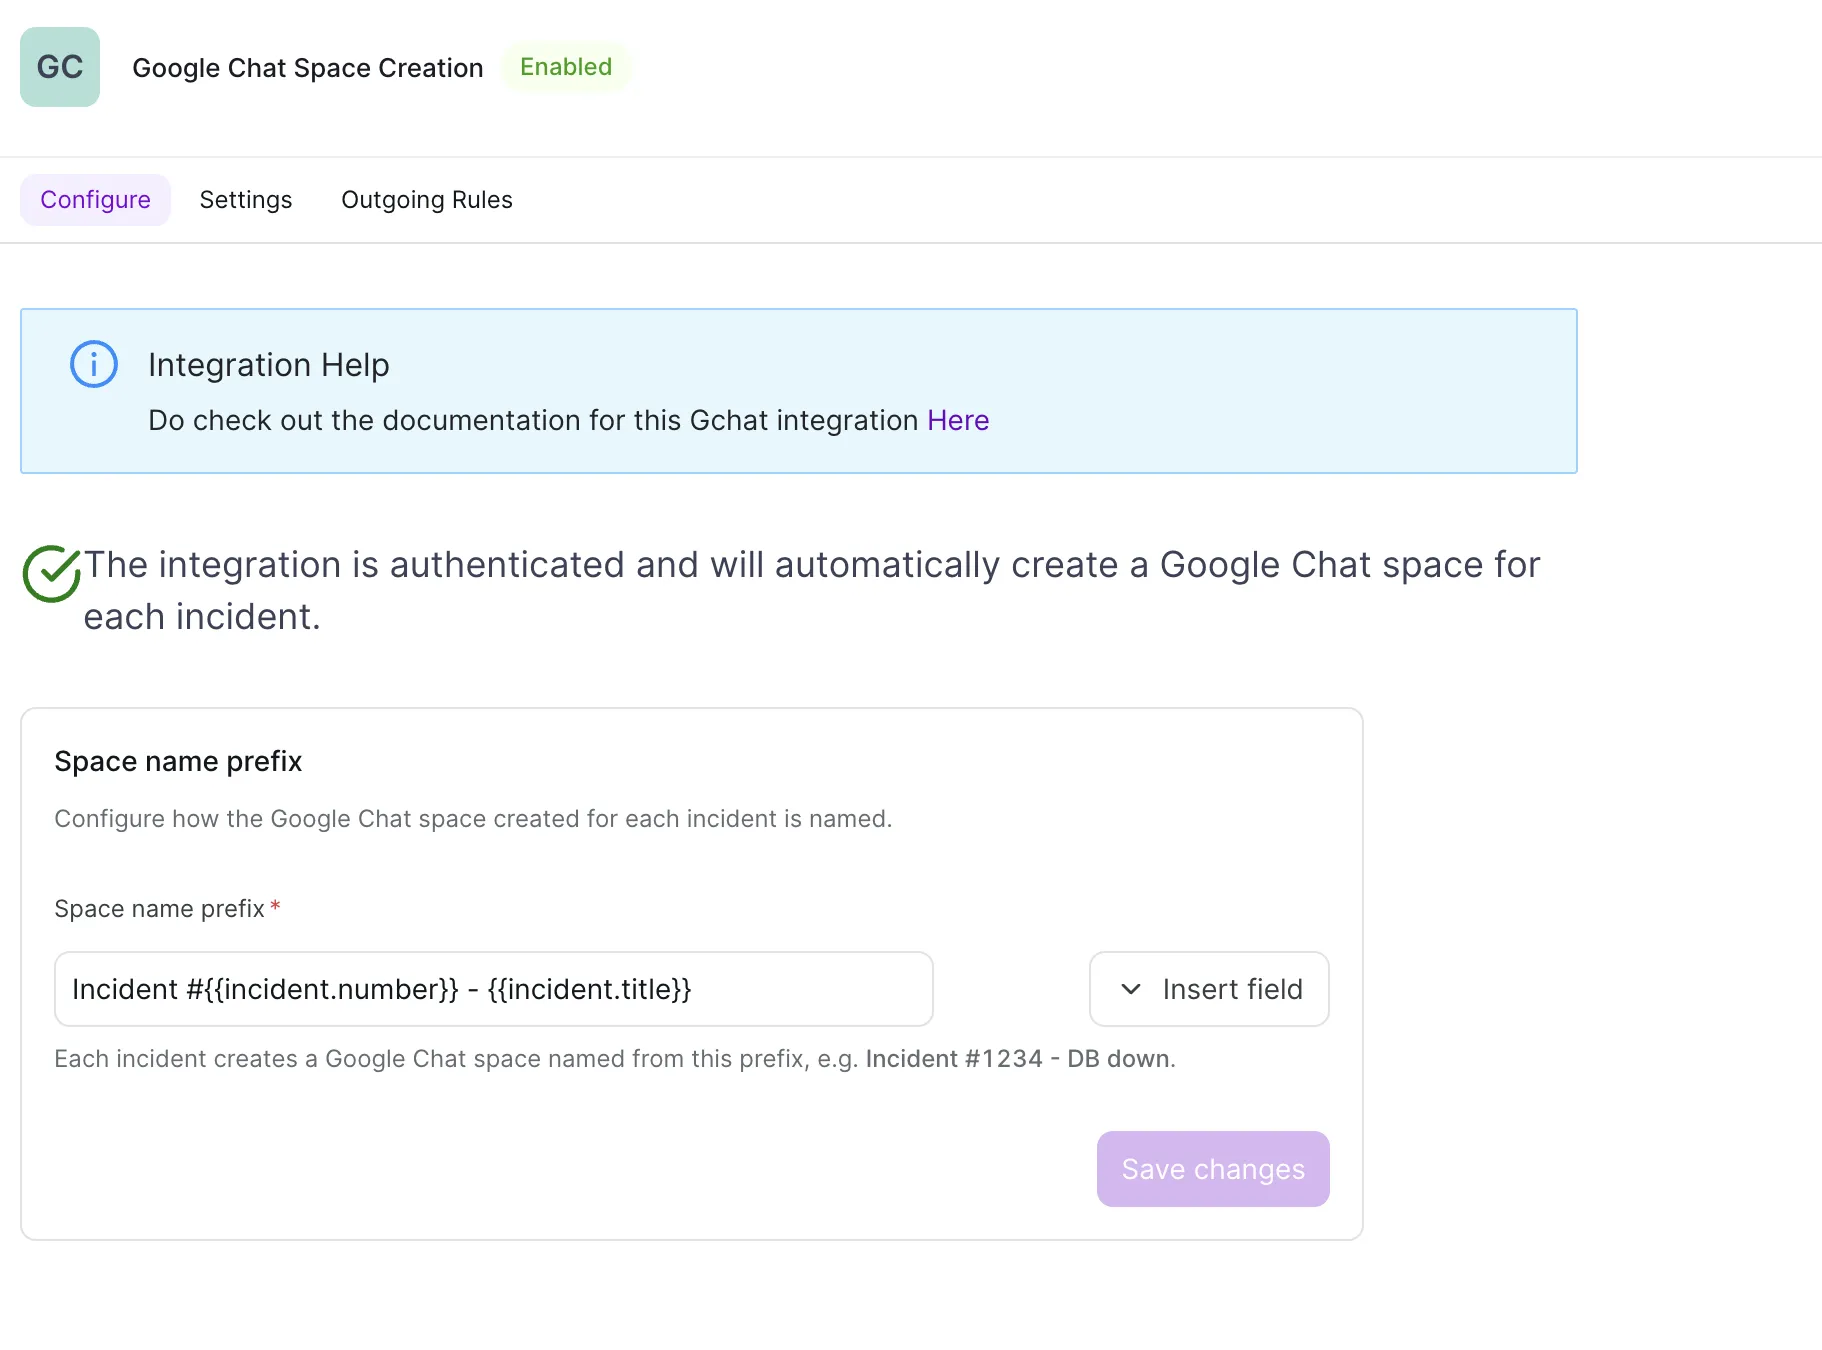
Each created integration can be managed from its integration details page in the dashboard (the Google Chat integration under the service). For space-creation integrations, this page shows a configurable space-name prefix.
Space-creation integrations show a confirmation that the integration is authenticated and will automatically create a Google Chat space for each incident. (This differs from the classic Google Chat integration, which instead shows the single connected Space ID.)



.webp)
.webp)