.webp)

Blog
Insights & updates from our experts
Resolve plant floor and IT issues before they disrupt production.

Stay audit-ready while resolving issues and reducing operational risk.
Resolve issues quickly with an AI-powered system that automates ticketing.
Resolve issues quickly with an AI-powered system that automates ticketing.
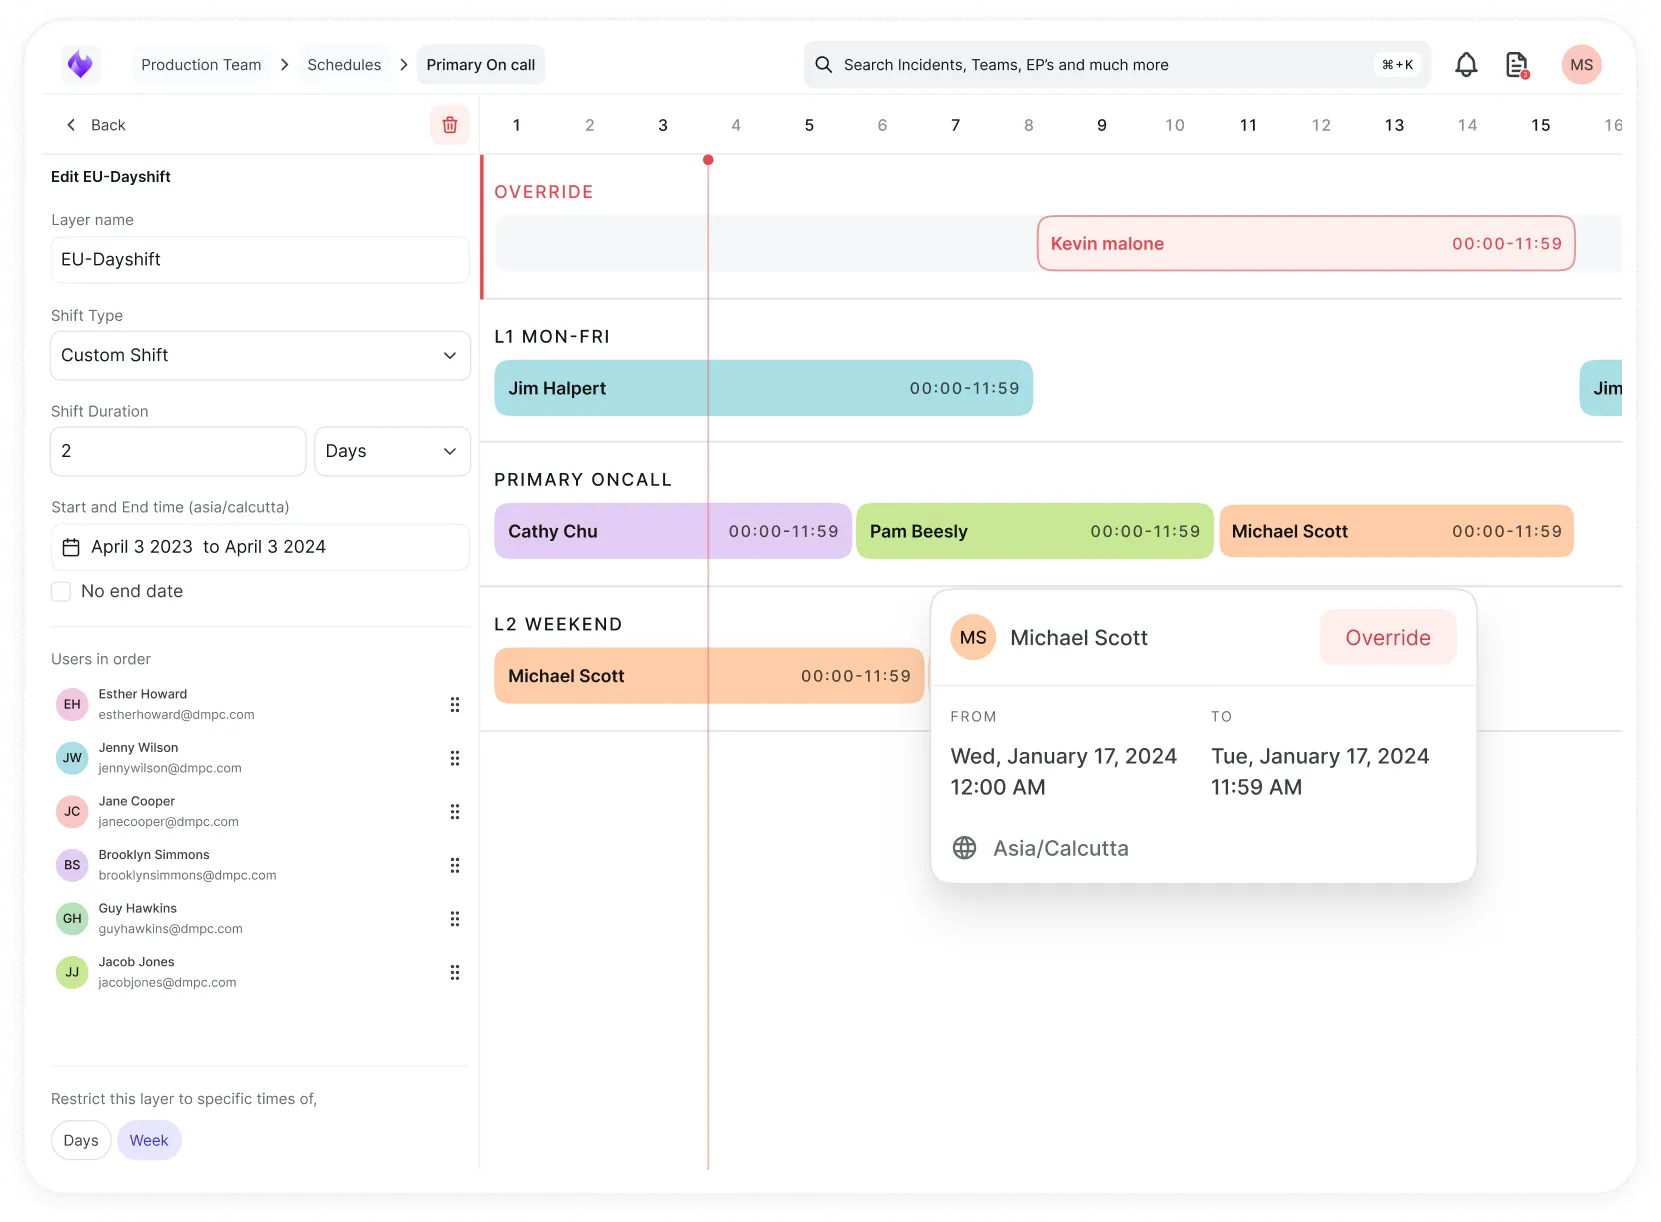
Simplify on-call scheduling, automate escalations, and reduce burnout.
Automate postmortems, AI summaries, and post-incident workflows
We're here to help

The integration with Atlassian Jira using the Xurrent Integration Service is

The integration with Atlassian Jira using the Xurrent Integration Service is

The integration with Atlassian Jira using the Xurrent Integration Service is

The integration with Atlassian Jira using the Xurrent Integration Service is

The integration with Atlassian Jira using the Xurrent Integration Service is

The integration with Atlassian Jira using the Xurrent Integration Service is

The integration with Atlassian Jira using the Xurrent Integration Service is

The integration with Atlassian Jira using the Xurrent Integration Service is
Resolve issues quickly with an AI-powered system that automates ticketing.
Resolve issues quickly with an AI-powered system that automates ticketing.
Simplify on-call scheduling, automate escalations, and reduce burnout.
Automate postmortems, AI summaries, and post-incident workflows
Resolve plant floor and IT issues before they disrupt production.
Stay audit-ready while resolving issues and reducing operational risk.

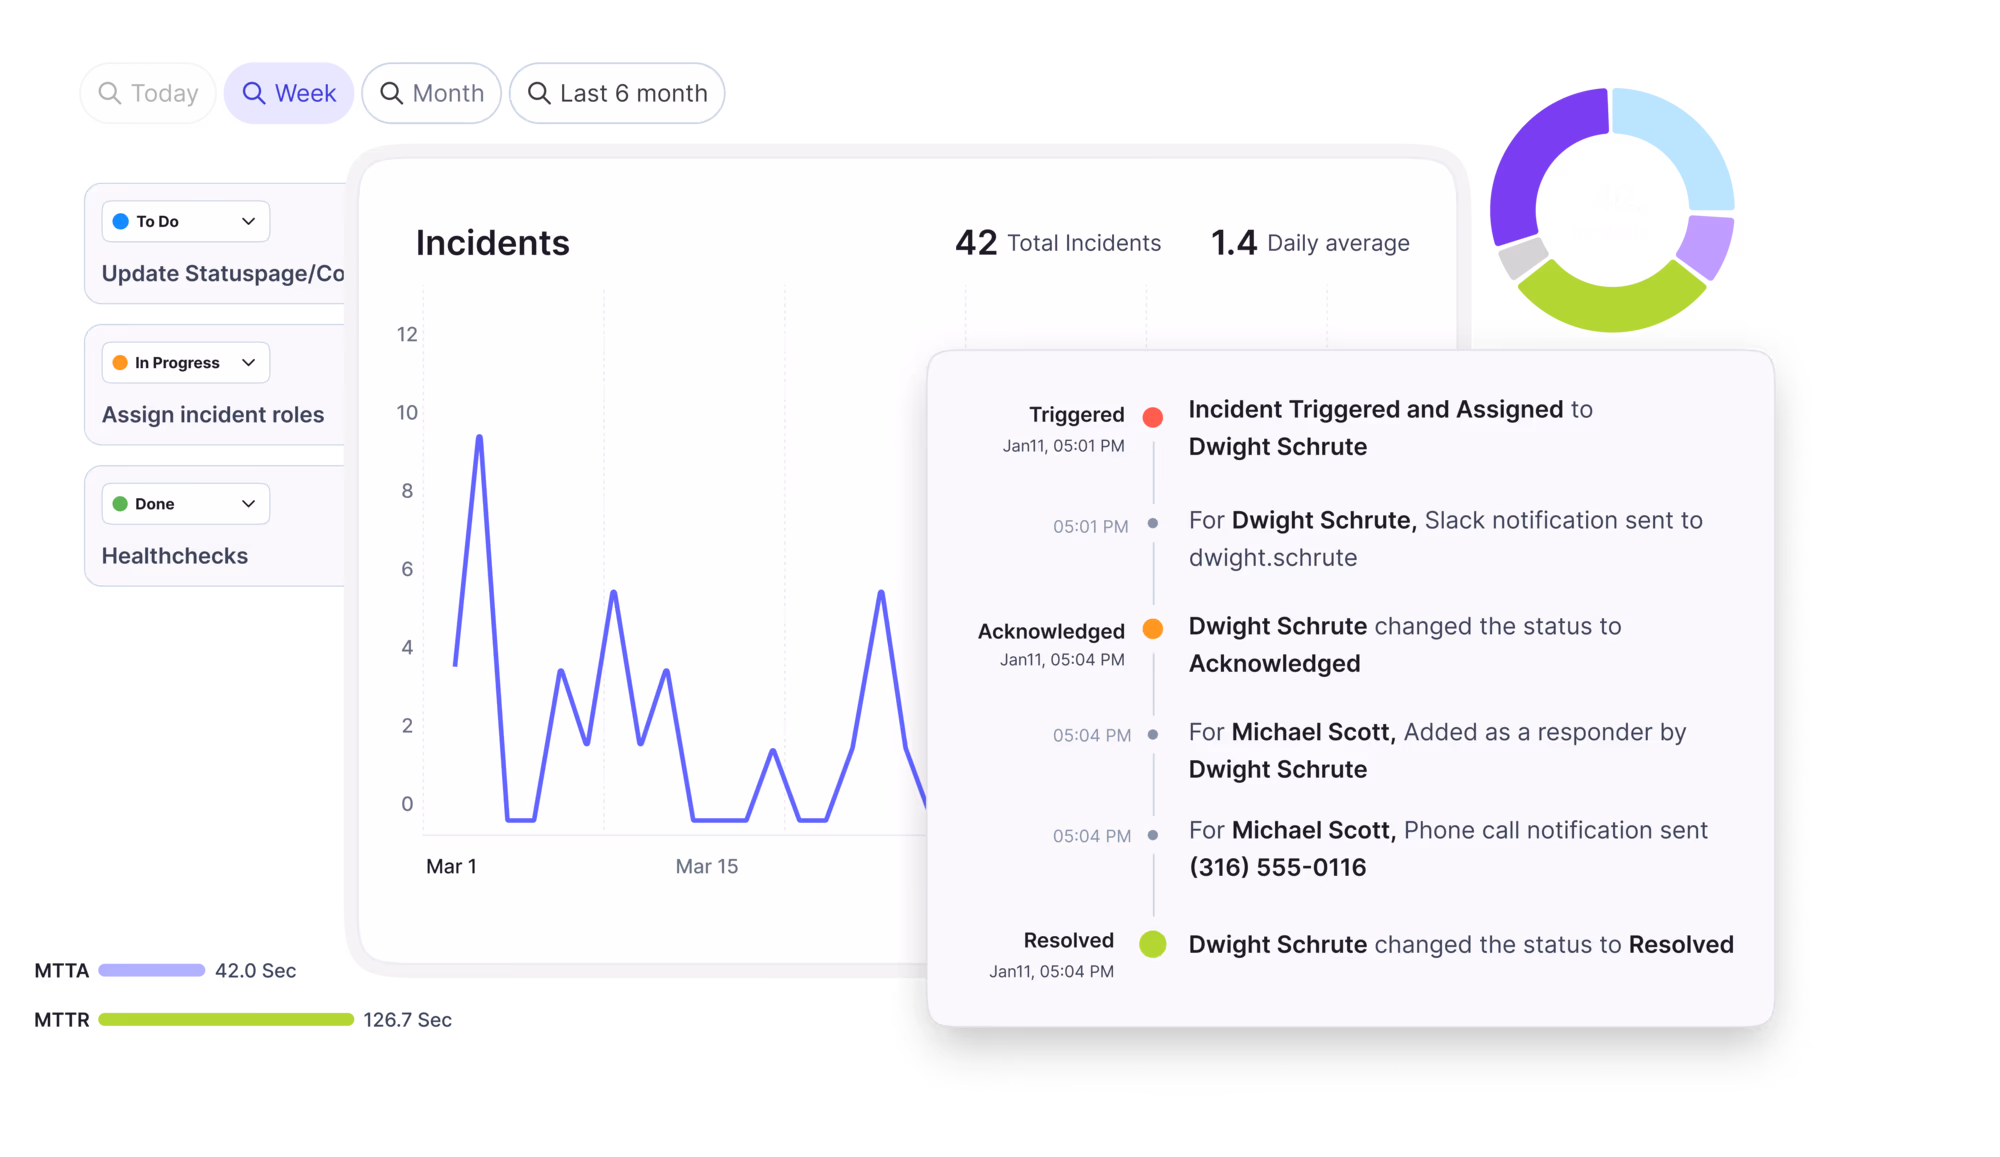
Detect, respond, and resolve incidents fast to cut downtime and MTTR.

Keep your store online, even during your biggest sales moments.

Protect patient data and resolve issues fast, so care teams stay focused on care.

Standardize service delivery across every store and channel.

We are here to help 24/7

Connect with other Xurrent Users

Get insights and tips on how to get the most out of Xurrent

Apps, APIs, and updates

Xurrent service functionality
Eliminate manual tasks, optimize workflows, and deliver faster resolutions.
Learn how organizations have reduced downtime, improved 50% MTTA & MTTR, and cut costs with Xurrent IMR.
Discover Xurrent IMR's quick support, bidirectional integrations with Jira and Slack, and more cohesive incident response capabilities compared to Opsgenie.
Understand why users value Xurrent IMR for its intuitive interface, efficient incident alerting, customizable On-call schedules, and escalations.
This GitHub sync feature enables you to move solutions or solution changes from one environment to another.
Syncing iPaaS Solutions with GitHub
Use the Xurrent iPaaS GitHub App to manage iPaaS solutions in GitHub. It synchronizes and promotes changes across multiple iPaaS environments (for example: QA EU, QA US, Prod EU, Prod US) automatically whenever you push to a configured branch.
Each region and stage (QA, Production) has its own dedicated GitHub App. You install the required apps on your GitHub organization and grant them access to the repositories that contain your iPaaS solutions.
When you push changes to a branch that is linked to an iPaaS solution:
A common setup is:
main branch → staging/integration branch used for developmentqa branch → synced to all QA environmentsprod branch → synced to all Production environmentsBefore you begin, ensure you have:
For more details, see GitHub's documentation on Installing a GitHub App.
Create a new solution in your iPaaS instance as usual. This initial version will become the baseline for version control in GitHub.
From the solution page in iPaaS:
.zip fileOn your local machine:
.gitignore file to exclude unnecessary system and temporary files from version control. You can use the recommended template provided in Appendix A — .gitignore template for iPaaS solutions.README.md describing the solution and its environmentsYour repository should contain:
.gitignore fileREADME.mdAppendix A — .gitignore template for iPaaS solutions:
# Editors / IDEs
.idea/
.vscode/
*.swp
*.swo

# OS
.DS_Store
Thumbs.dbCreate a new repository in GitHub for the solution.
From inside your local directory, initialize the repository and push the initial version to the staging (main) branch.
This initial commit establishes the base version of the solution and does not directly deploy to QA or Production environments.
git init
git add .
git commit -m "Initial commit"
git branch -M main
git remote add origin <repository-url>
git push -u origin main
This creates the main branch as the staging branch, which will later be used to promote changes to qa and prod through pull requests.
Install the appropriate GitHub App for each environment (region + stage) you want to sync with. Each environment uses a dedicated app, so you manage access to each one independently.
QA apps use a green iPaaS logo so you can recognize them.
QA Table :
Production Table :
The apps are not yet listed on the GitHub Marketplace, so install them directly using the URLs above.
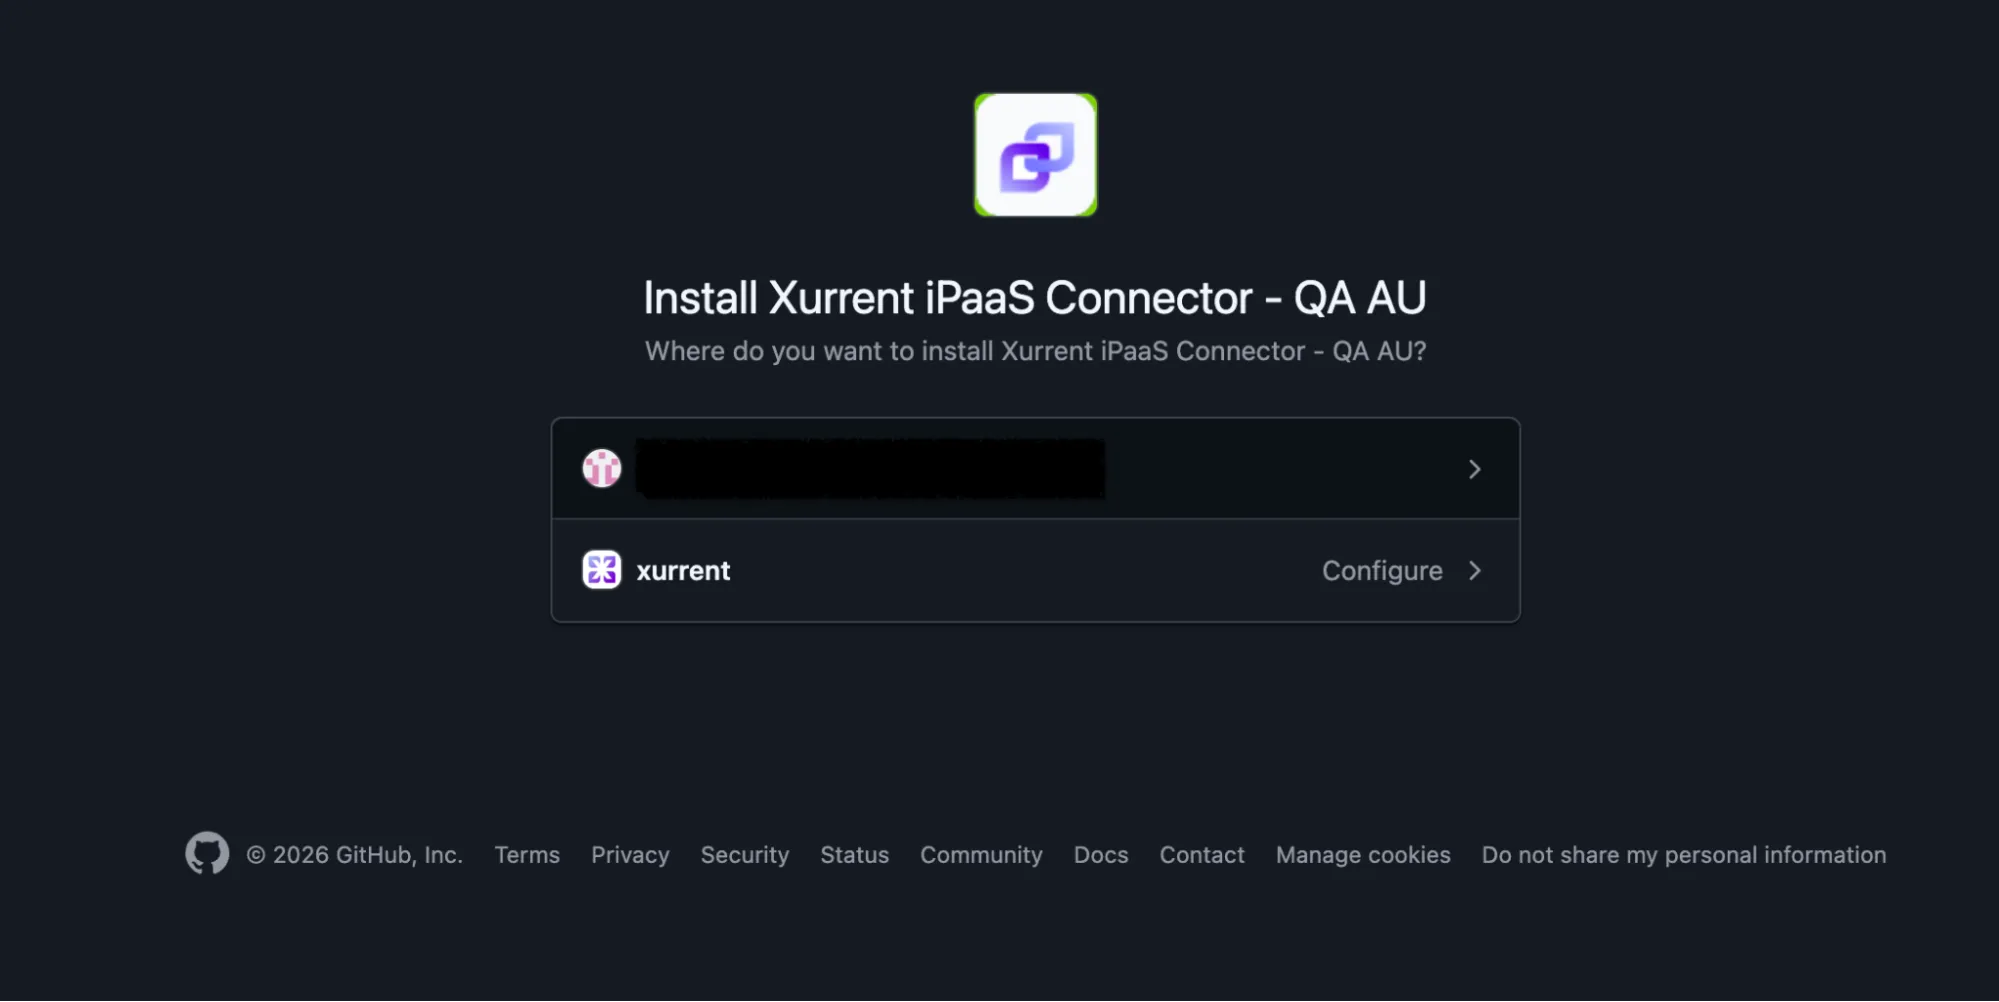
During installation, GitHub prompts you to choose which repositories the app can access. Select Only select repositories and grant access only to repositories that contain iPaaS solutions.

Only allowing the apps access to selected repositories:
You can modify the list of authorized repositories at any time from your GitHub settings.
If you have already installed the iPaaS GitHub App and are adding a new solution repository:
Each environment-specific app that should synchronize the solution must have access to the repository.
For example, if a solution is deployed to:
then all QA and Production GitHub Apps must be granted access to the repository.
Repeat the following steps for each iPaaS environment (every region and stage combination) where the solution needs to be synchronized:
qa for QA environmentsprod for Production environments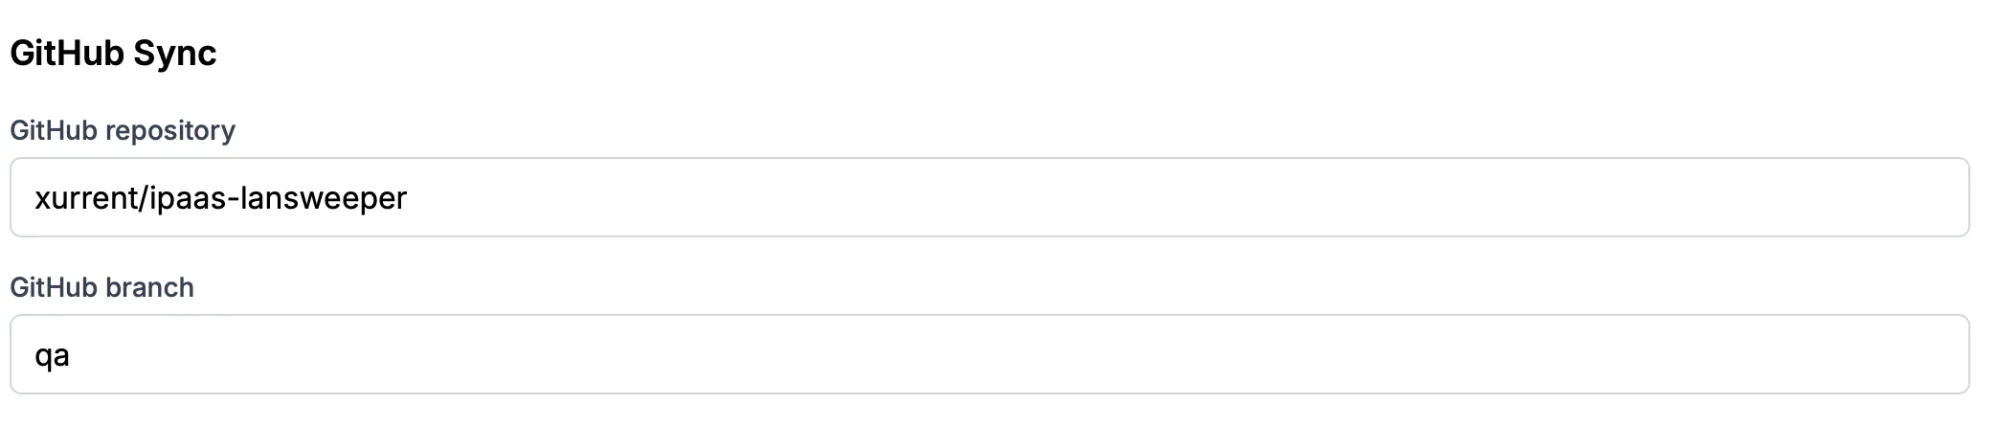
Note: The branch does not need to exist in GitHub at this point. It will be created and pushed in the next step.
Create and push the environment branches that match the branch names configured in iPaaS.
Example:
git checkout -b qa
git push -u origin qa
git checkout main
git checkout -b prod
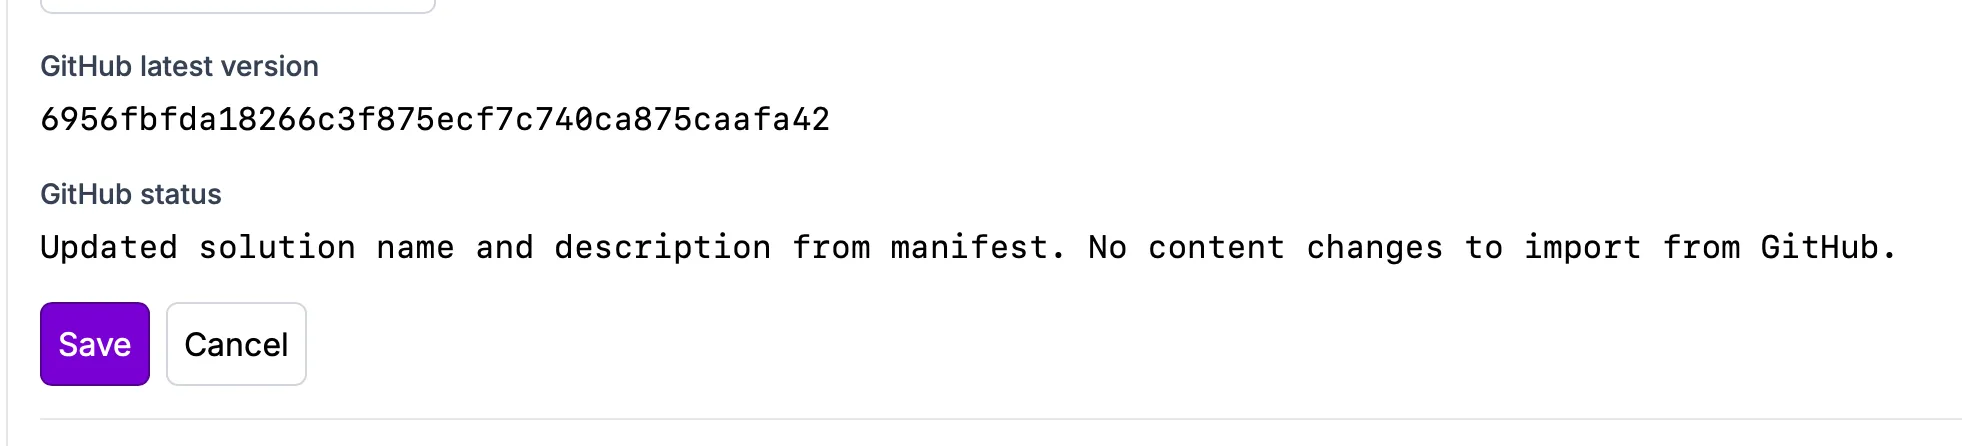
git push -u origin prodAfter pushing the branches, wait a few moments and refresh the solution edit page in iPaaS. Synchronization occurs asynchronously, so there may be a short delay before the update appears.
Once synchronization is complete, you should see:
Make changes to the solution in iPaaS using the Draft version.
Use Send shipment to validate the changes before exporting the solution.
Optional (if required):
Once validation is complete:
.zip file from iPaaSUnzip the exported solution into your local repository and commit the changes to the staging branch (main).
git add .
git commit -m "Update solution"
git push origin mainIn GitHub:
main → qaMerging triggers iPaaS synchronization to all QA environments.
Verify in iPaaS QA environments:
After QA validation, in GitHub:
qa → prodMerging triggers synchronization to all Production environments.
Confirm in Production iPaaS environments:
If validation fails, the imported version is saved as a Draft so you can complete any required configuration in the iPaaS UI.
Examples of validation issues include:
Once you complete the required changes in iPaaS, you can promote the solution as usual.


.webp)
.webp)
.webp)