.webp)


Blog
Insights & updates from our experts
Resolve issues quickly with an AI-powered system that automates ticketing.

Resolve issues quickly with an AI-powered system that automates ticketing.

Resolve issues quickly with an AI-powered system that automates ticketing.

Resolve issues quickly with an AI-powered system that automates ticketing.
Resolve issues quickly with an AI-powered system that automates ticketing.
Resolve issues quickly with an AI-powered system that automates ticketing.
Simplify on-call scheduling, automate escalations, and reduce burnout.
Automate postmortems, AI summaries, and post-incident workflows
We're here to help

The integration with Atlassian Jira using the Xurrent Integration Service is

The integration with Atlassian Jira using the Xurrent Integration Service is

The integration with Atlassian Jira using the Xurrent Integration Service is

The integration with Atlassian Jira using the Xurrent Integration Service is

The integration with Atlassian Jira using the Xurrent Integration Service is

The integration with Atlassian Jira using the Xurrent Integration Service is

The integration with Atlassian Jira using the Xurrent Integration Service is

The integration with Atlassian Jira using the Xurrent Integration Service is
Resolve issues quickly with an AI-powered system that automates ticketing.
Resolve issues quickly with an AI-powered system that automates ticketing.
Simplify on-call scheduling, automate escalations, and reduce burnout.
Automate postmortems, AI summaries, and post-incident workflows
Resolve issues quickly with an AI-powered system that automates ticketing.
Resolve issues quickly with an AI-powered system that automates ticketing.
Resolve issues quickly with an AI-powered system that automates ticketing.
Resolve issues quickly with an AI-powered system that automates ticketing.

We are here to help 24/7

Connect with other Xurrent Users

Get insights and tips on how to get the most out of Xurrent

Apps, APIs, and updates

Xurrent service functionality
Eliminate manual tasks, optimize workflows, and deliver faster resolutions.
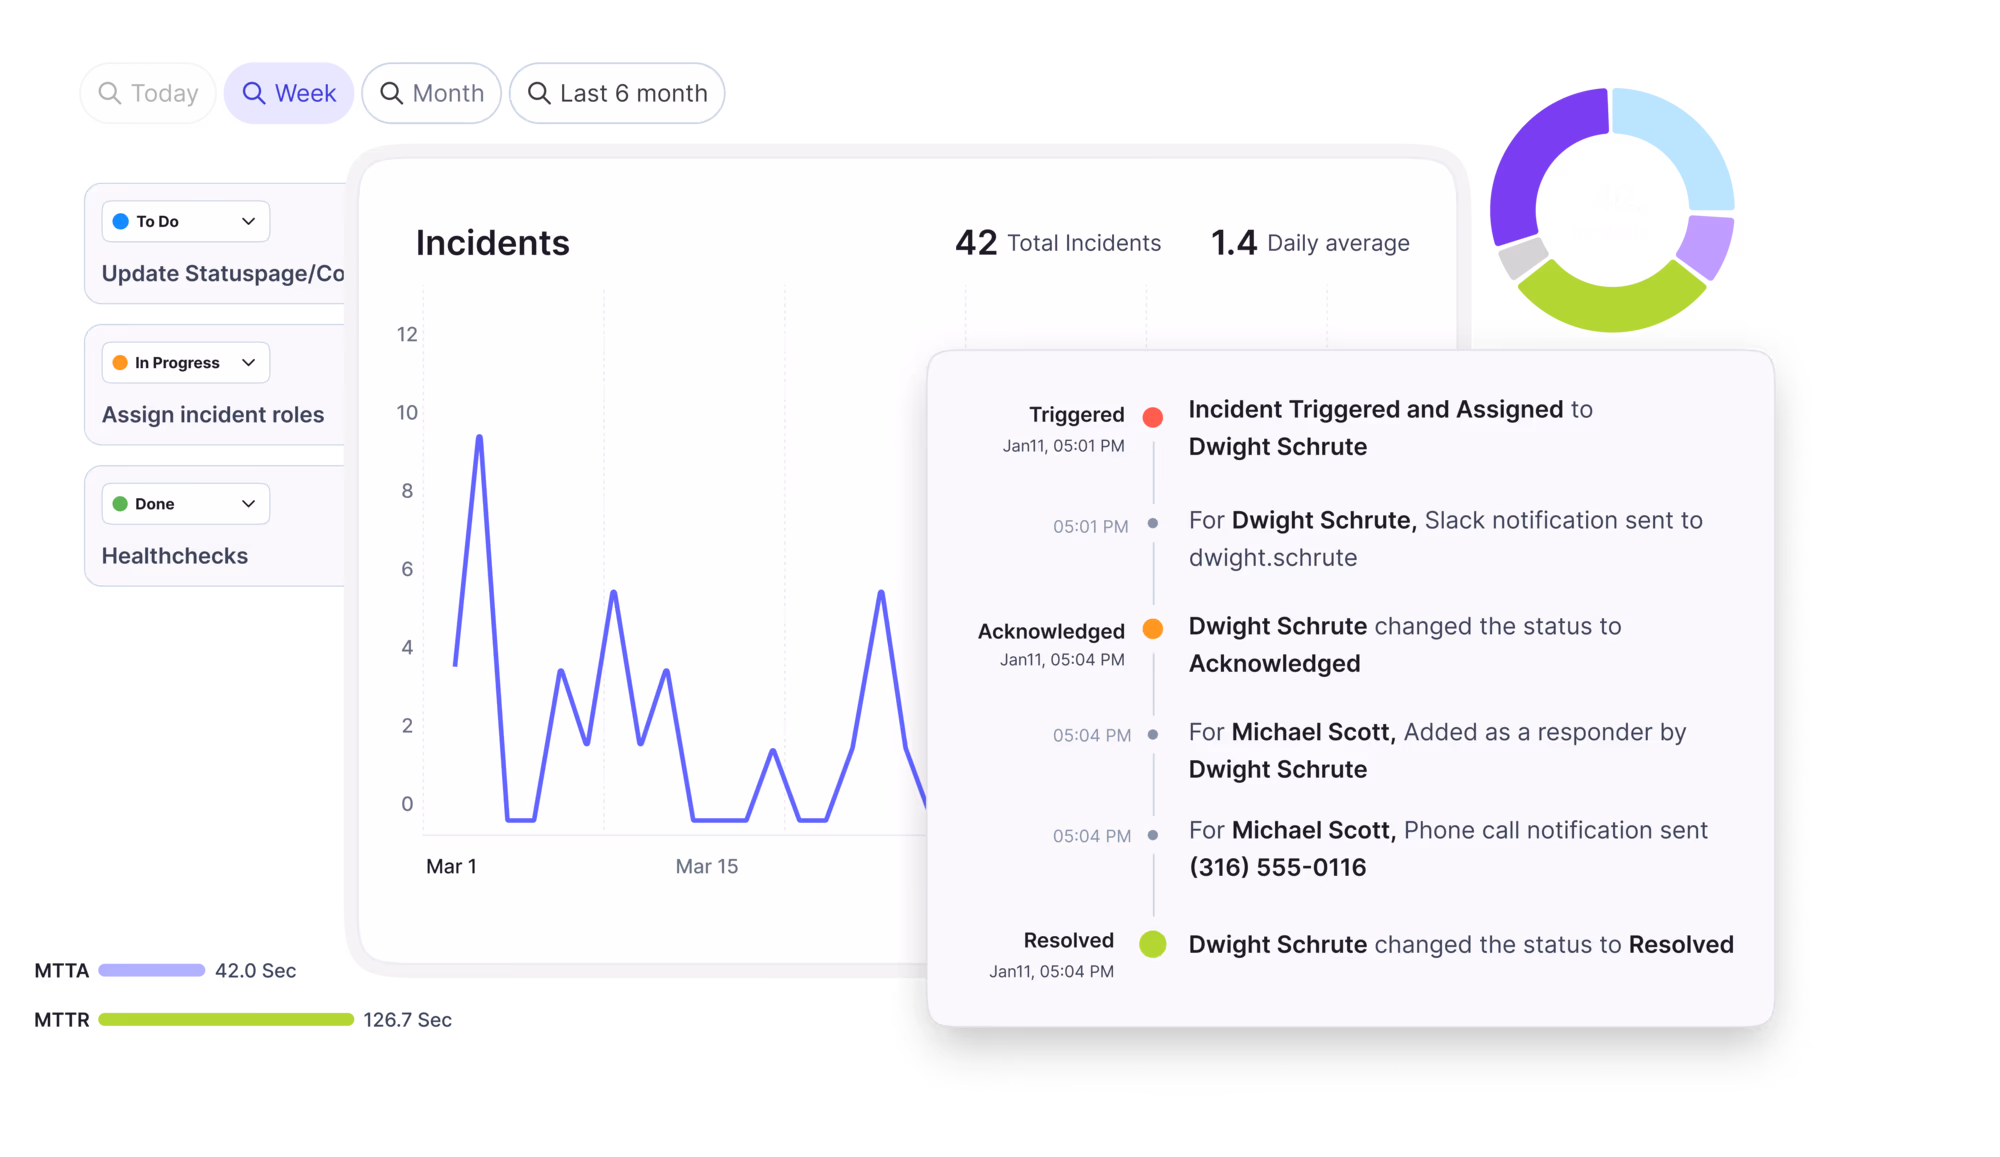
Learn how organizations have reduced downtime, improved 50% MTTA & MTTR, and cut costs with Xurrent IMR.
Discover Xurrent IMR's quick support, bidirectional integrations with Jira and Slack, and more cohesive incident response capabilities compared to Opsgenie.
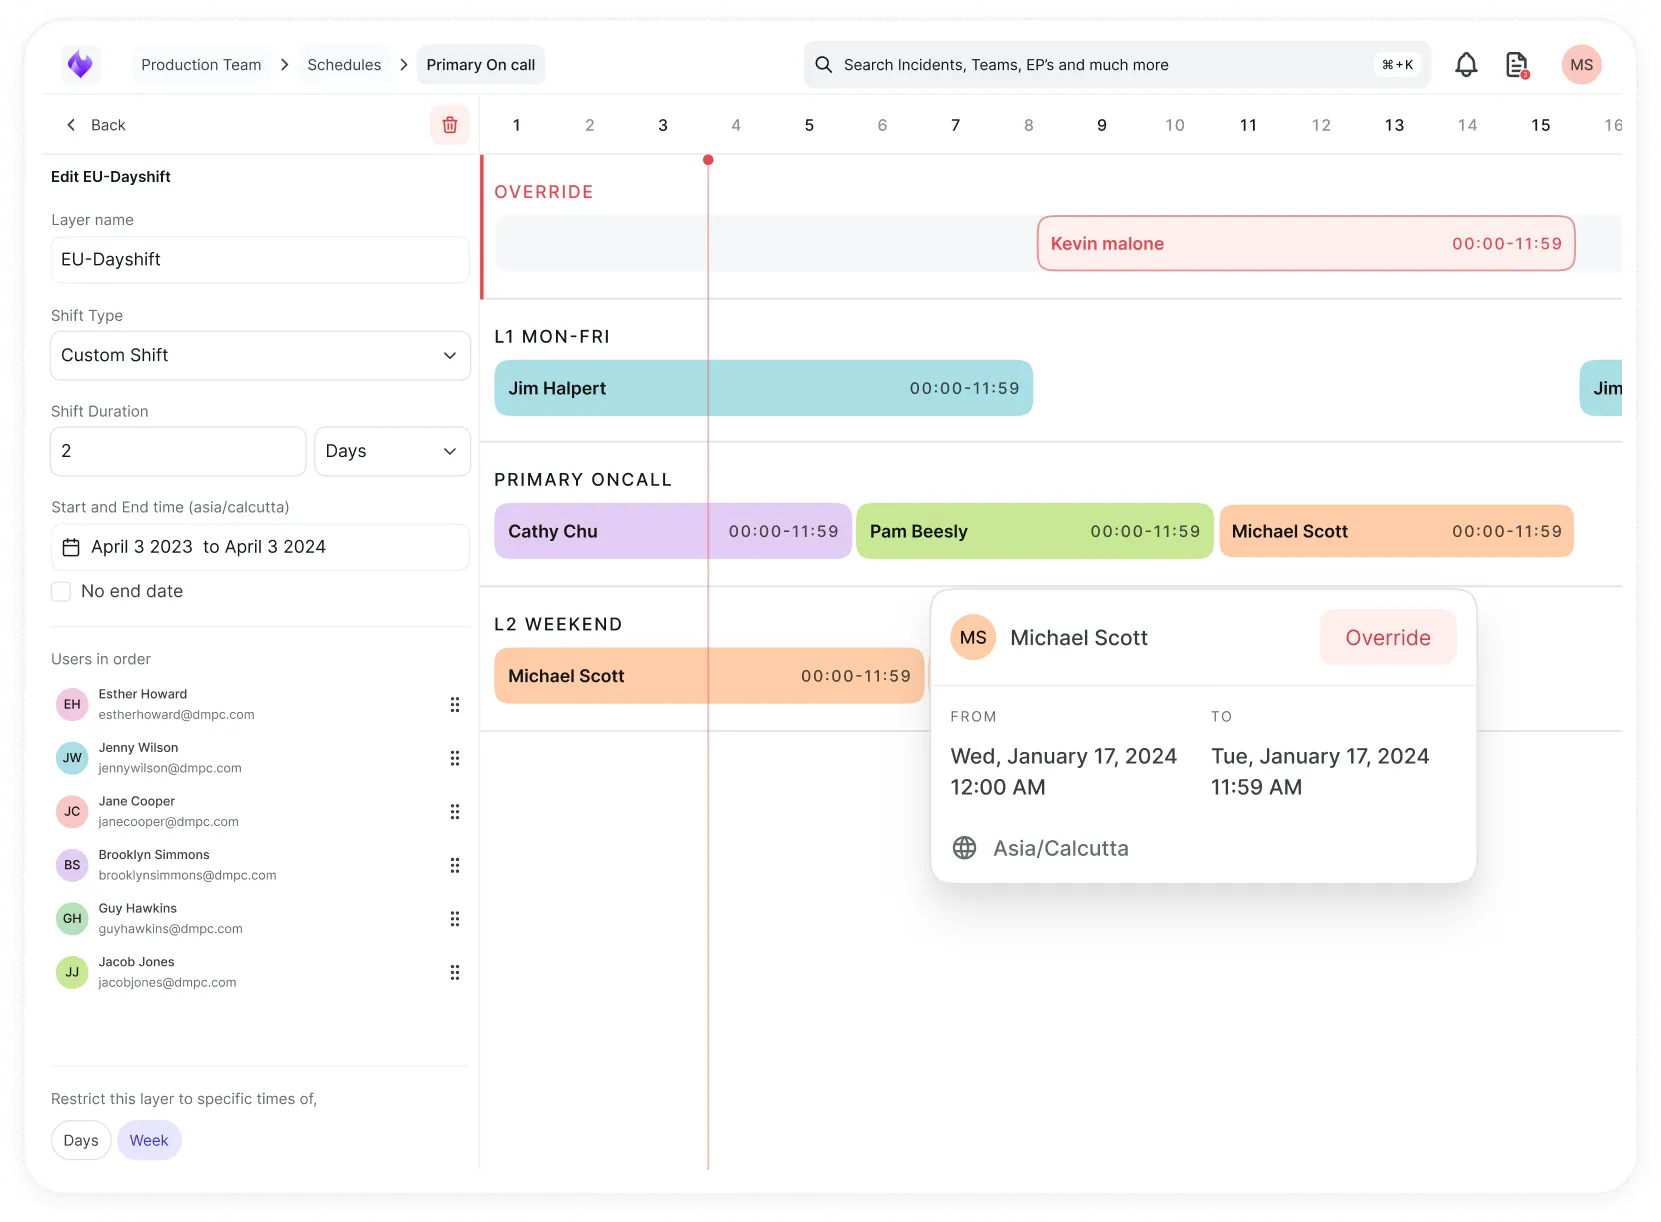
Understand why users value Xurrent IMR for its intuitive interface, efficient incident alerting, customizable On-call schedules, and escalations.

DKIM setup secures outbound email by adding DNS records and enabling authenticated signing.
The Xurrent service makes it possible to sign outbound email messages using a DomainKeys Identified Mail (DKIM) key generated for your organization. DKIM signing increases email security and helps prevent email spoofing.
It is recommended to use a DKIM domain key generated for your organization on all outbound email messages. If email signing is not turned on with a DKIM domain key of your organization, Xurrent signs all outbound email messages with this default DKIM domain key: d=4me.com.
DKIM signing of outbound email messages for your organization's Xurrent account can be set up using the following steps:
In the "Email Policy" section of the Settings console, click on the Set up DKIM button. The "Generate New DKIM Keys" popup window is shown:
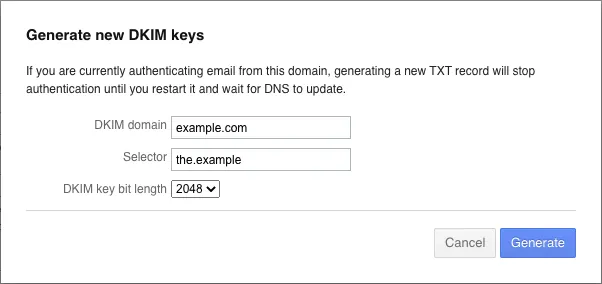
Populate the following fields:
Click on the Generate button.
The "Enhanced security for outbound email messages (DKIM)" popup window is shown:
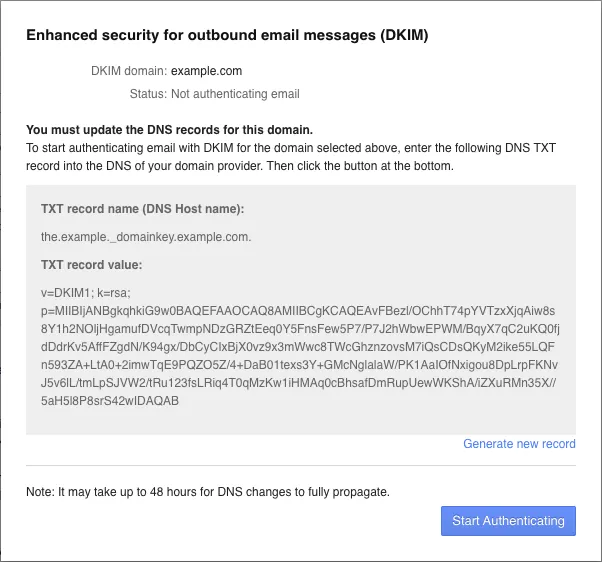
Copy the TXT record name and value. They are needed for the next step.
Create a new DKIM record in the public DNS server of the external domain. The exact steps will vary depending on DNS provider.
Complete the following steps to verify the new DNS settings for the DKIM record:
nslookup -type=txt <selector>._domainkey.<dkim-domain>dig <selector>._domainkey.<dkim-domain> TXTFor example:$ dig +short default._domainkey.4me.com TXT
Once the new DNS entry is created and has propagated, move on to the next step.
In the "Email Policy" section of the Settings console, click on the Set up DKIM button. The "Enhanced security for outbound email messages (DKIM)" popup window is shown, see the screenshot above.
Click the Start Authenticating button within the popup window. After that, the status "Authenticating email" with a green check mark indicates the DKIM settings and DNS entry were successfully tested and are working properly.
Click once outside the popup window to close the window.
Click on the Save button at the bottom of the "Email Policy" section of the Settings console to complete the DKIM setup.


.webp)
.webp)