.webp)


Blog
Insights & updates from our experts
Resolve issues quickly with an AI-powered system that automates ticketing.

Resolve issues quickly with an AI-powered system that automates ticketing.

Resolve issues quickly with an AI-powered system that automates ticketing.

Resolve issues quickly with an AI-powered system that automates ticketing.
Resolve issues quickly with an AI-powered system that automates ticketing.
Resolve issues quickly with an AI-powered system that automates ticketing.

Simplify on-call scheduling, automate escalations, and reduce burnout.
Automate postmortems, AI summaries, and post-incident workflows
We're here to help

The integration with Atlassian Jira using the Xurrent Integration Service is

The integration with Atlassian Jira using the Xurrent Integration Service is

The integration with Atlassian Jira using the Xurrent Integration Service is

The integration with Atlassian Jira using the Xurrent Integration Service is

The integration with Atlassian Jira using the Xurrent Integration Service is

The integration with Atlassian Jira using the Xurrent Integration Service is

The integration with Atlassian Jira using the Xurrent Integration Service is

The integration with Atlassian Jira using the Xurrent Integration Service is
Resolve issues quickly with an AI-powered system that automates ticketing.
Resolve issues quickly with an AI-powered system that automates ticketing.
Simplify on-call scheduling, automate escalations, and reduce burnout.
Automate postmortems, AI summaries, and post-incident workflows
Resolve issues quickly with an AI-powered system that automates ticketing.
Resolve issues quickly with an AI-powered system that automates ticketing.
Resolve issues quickly with an AI-powered system that automates ticketing.
Resolve issues quickly with an AI-powered system that automates ticketing.

We are here to help 24/7

Connect with other Xurrent Users

Get insights and tips on how to get the most out of Xurrent

Apps, APIs, and updates

Xurrent service functionality
Eliminate manual tasks, optimize workflows, and deliver faster resolutions.
Learn how organizations have reduced downtime, improved 50% MTTA & MTTR, and cut costs with Xurrent IMR.
Discover Xurrent IMR's quick support, bidirectional integrations with Jira and Slack, and more cohesive incident response capabilities compared to Opsgenie.
Understand why users value Xurrent IMR for its intuitive interface, efficient incident alerting, customizable On-call schedules, and escalations.
Jira is a proprietary issue tracking product developed by Atlassian that allows bug tracking and agile project management.
The Jira Cloud Marketplace Connection, just like its on-premises counterpart, enables you to integrate your Jira instance with Xurrent IMR on an account level, map Xurrent IMR Services with Jira Projects, allowing you to create incidents in Xurrent IMR for Jira Issues, and vice-versa, create Jira Issues for Xurrent IMR Incidents with synchronized statuses and notes.
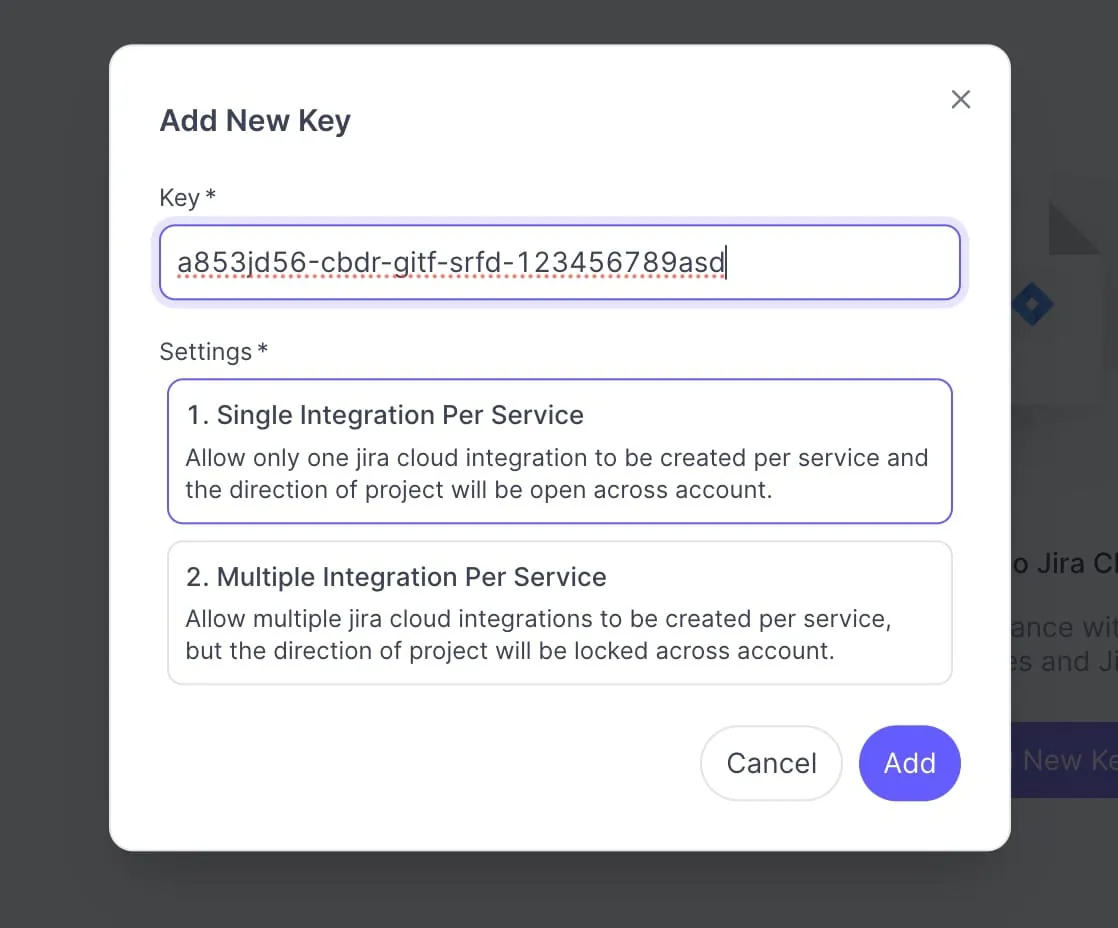
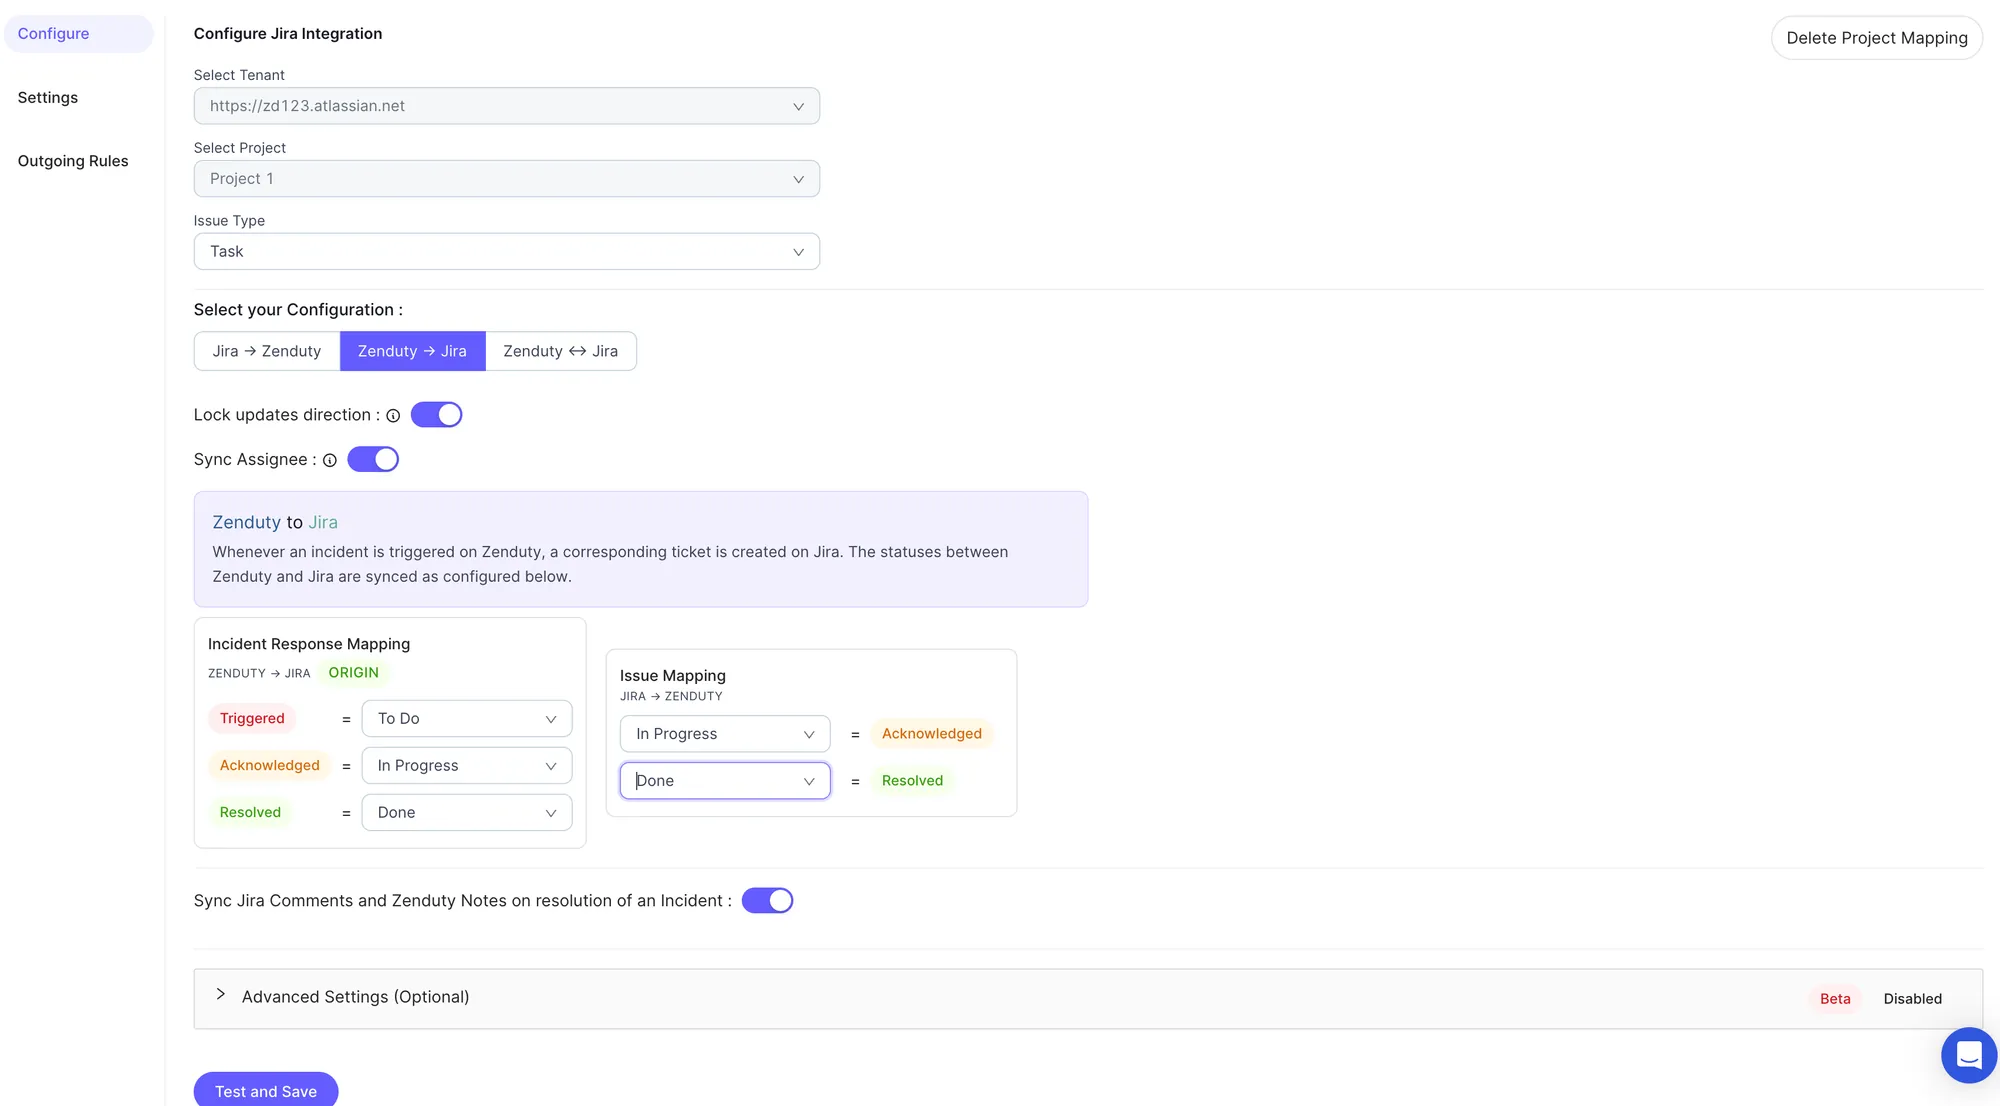

When creating a mapping of Xurrent IMR service to Jira Project via this connection, you will only be able to create it only if there is no Jira Outgoing Integration mapped to that service for that particular project.
To Access the Incoming JIRA Custom fields, one would need to check for the custom fields in the Alert Payload that comes from JIRA.
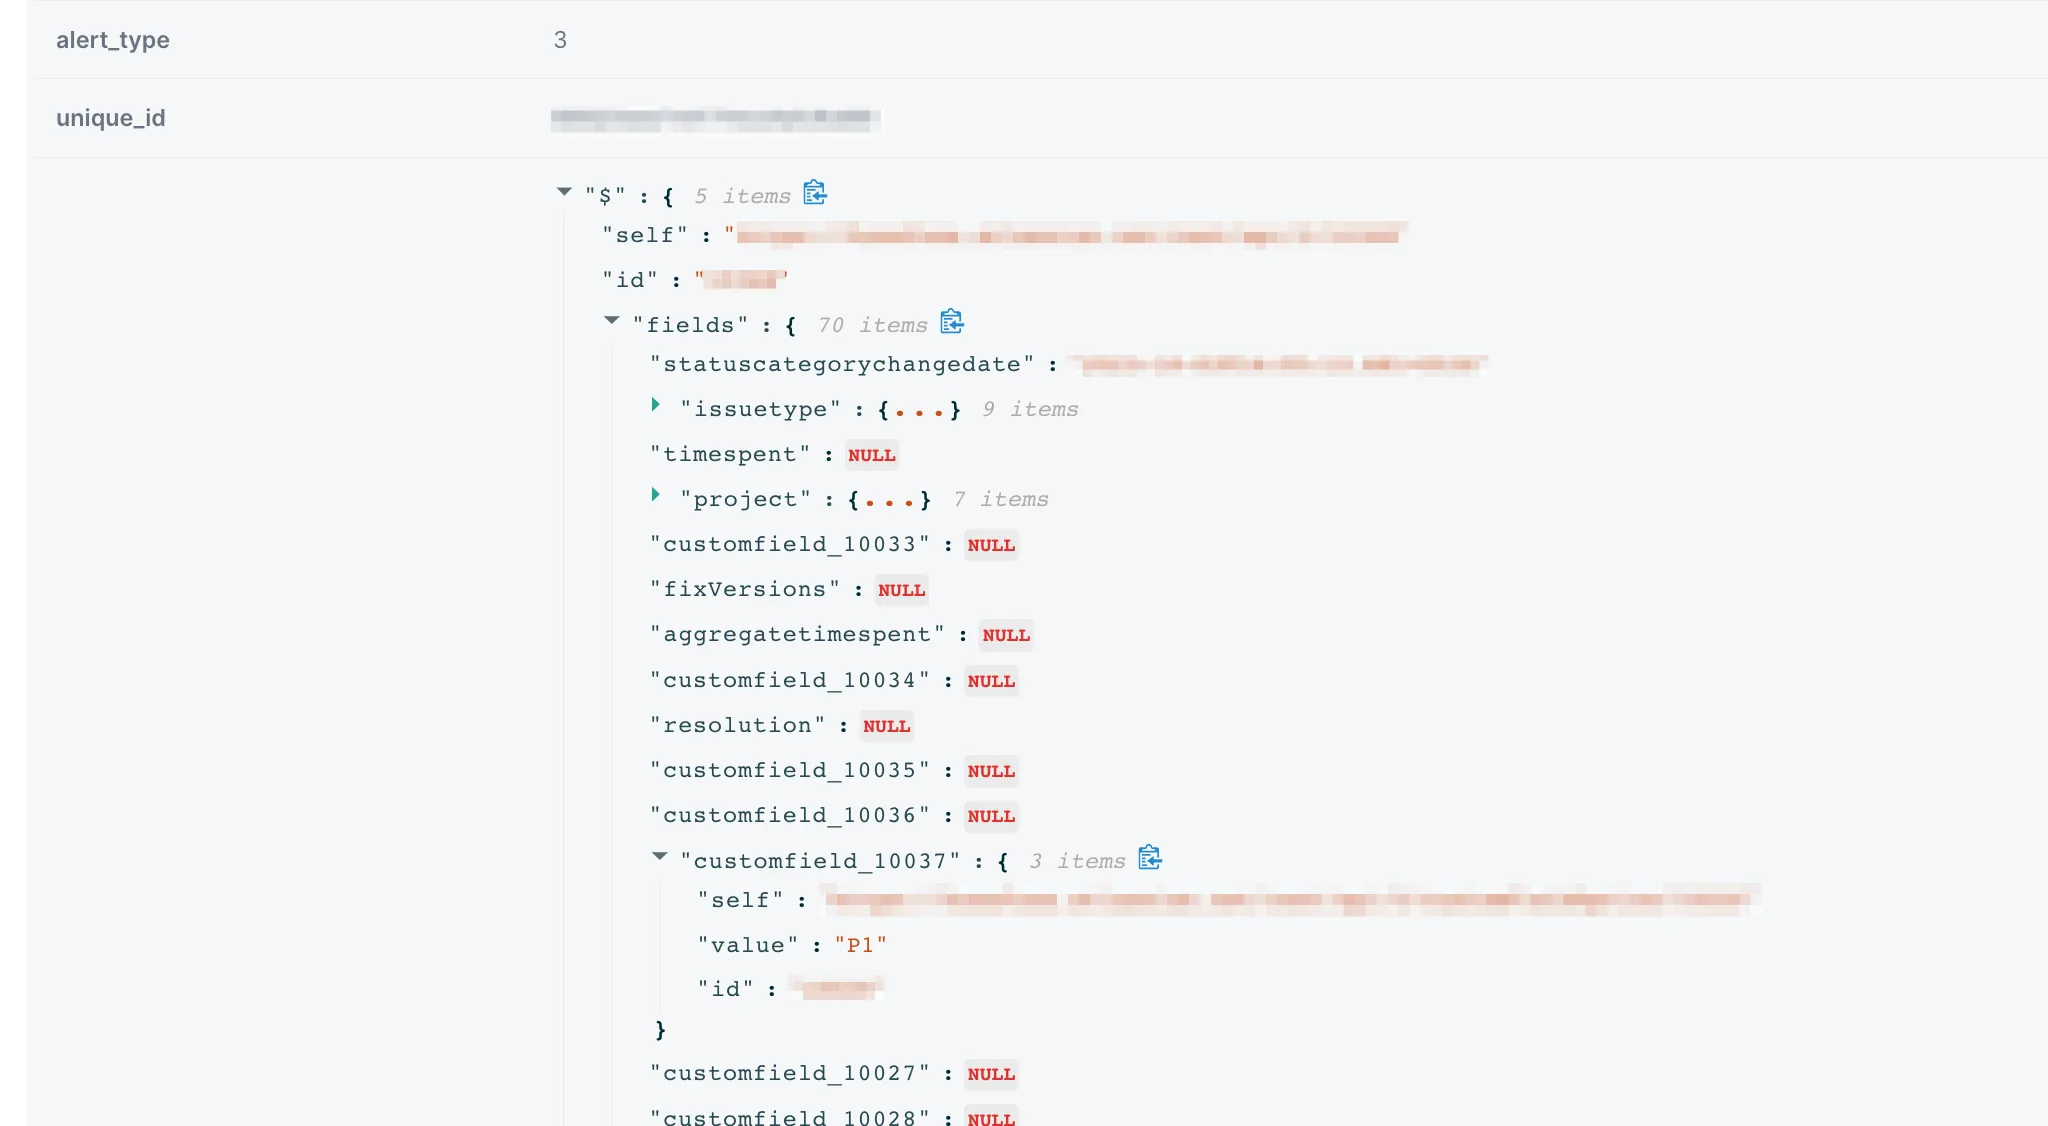
In Alert rules, When either in JIRA Bidirectional (Jira <-> Xurrent IMR) or Incoming JIRA configuration (Jira -> Xurrent IMR)
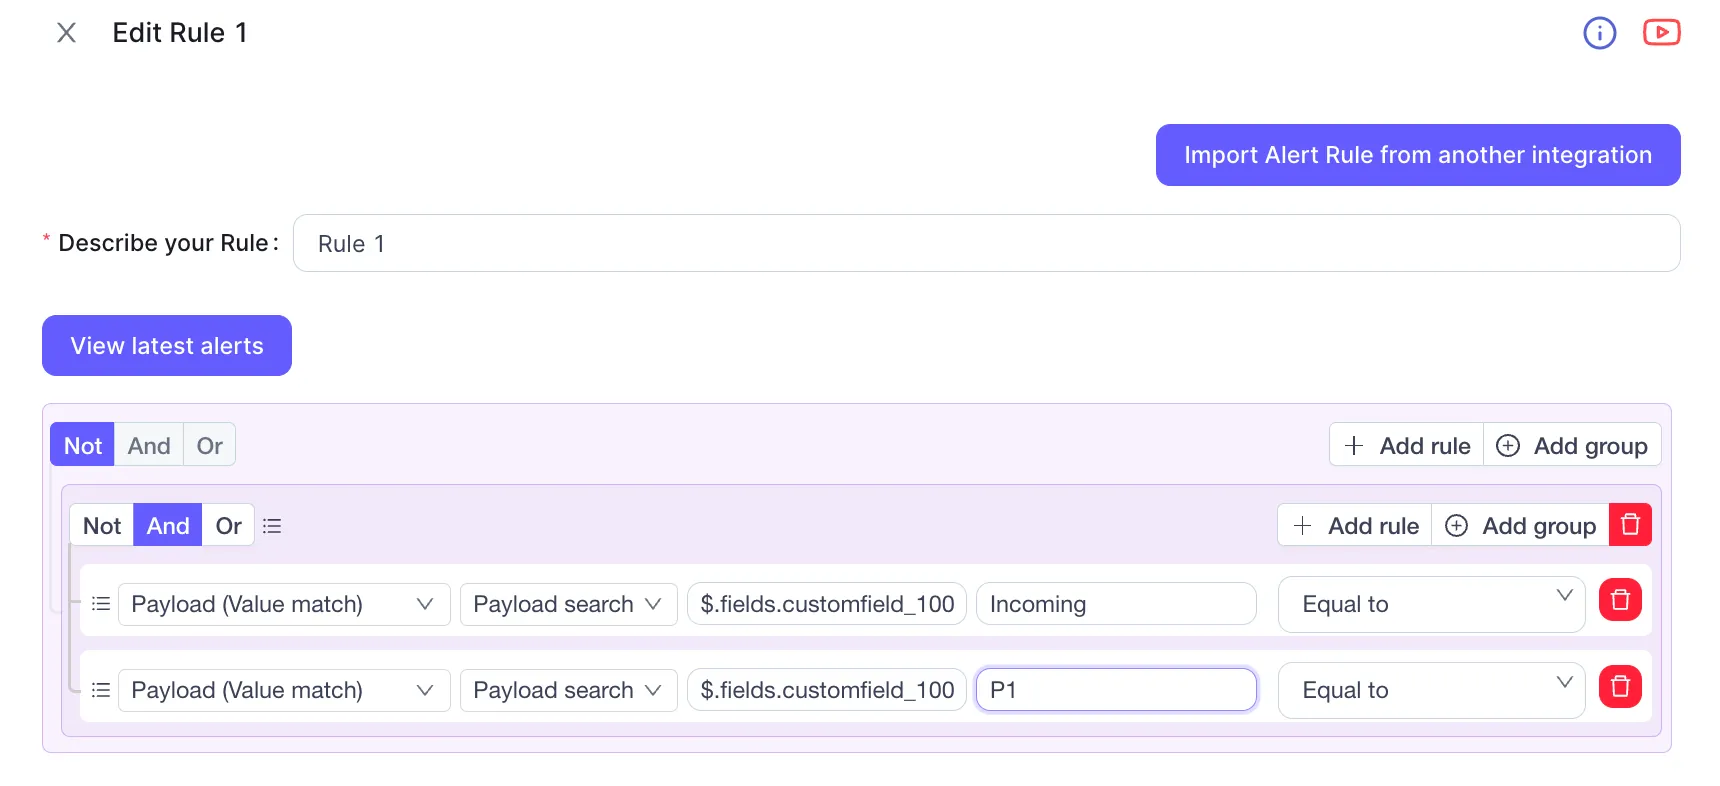
Once we access this, one can essentially have the same functionality that JQL filter provides with Custom Fields.
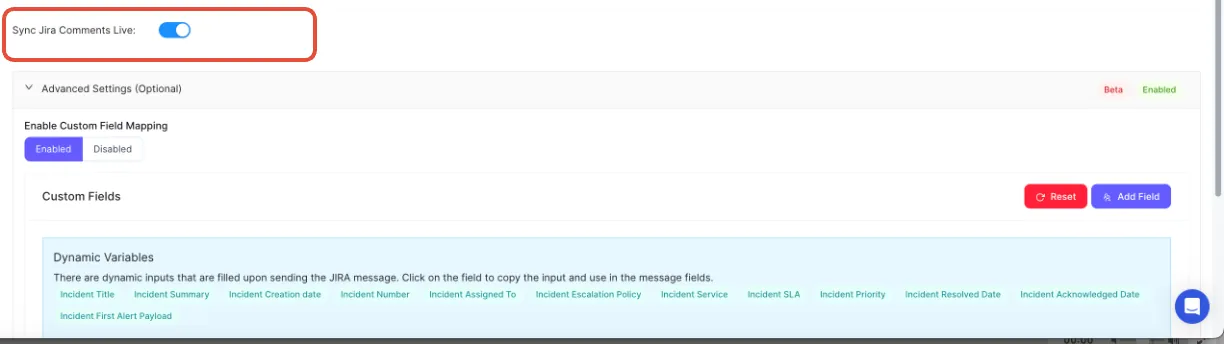
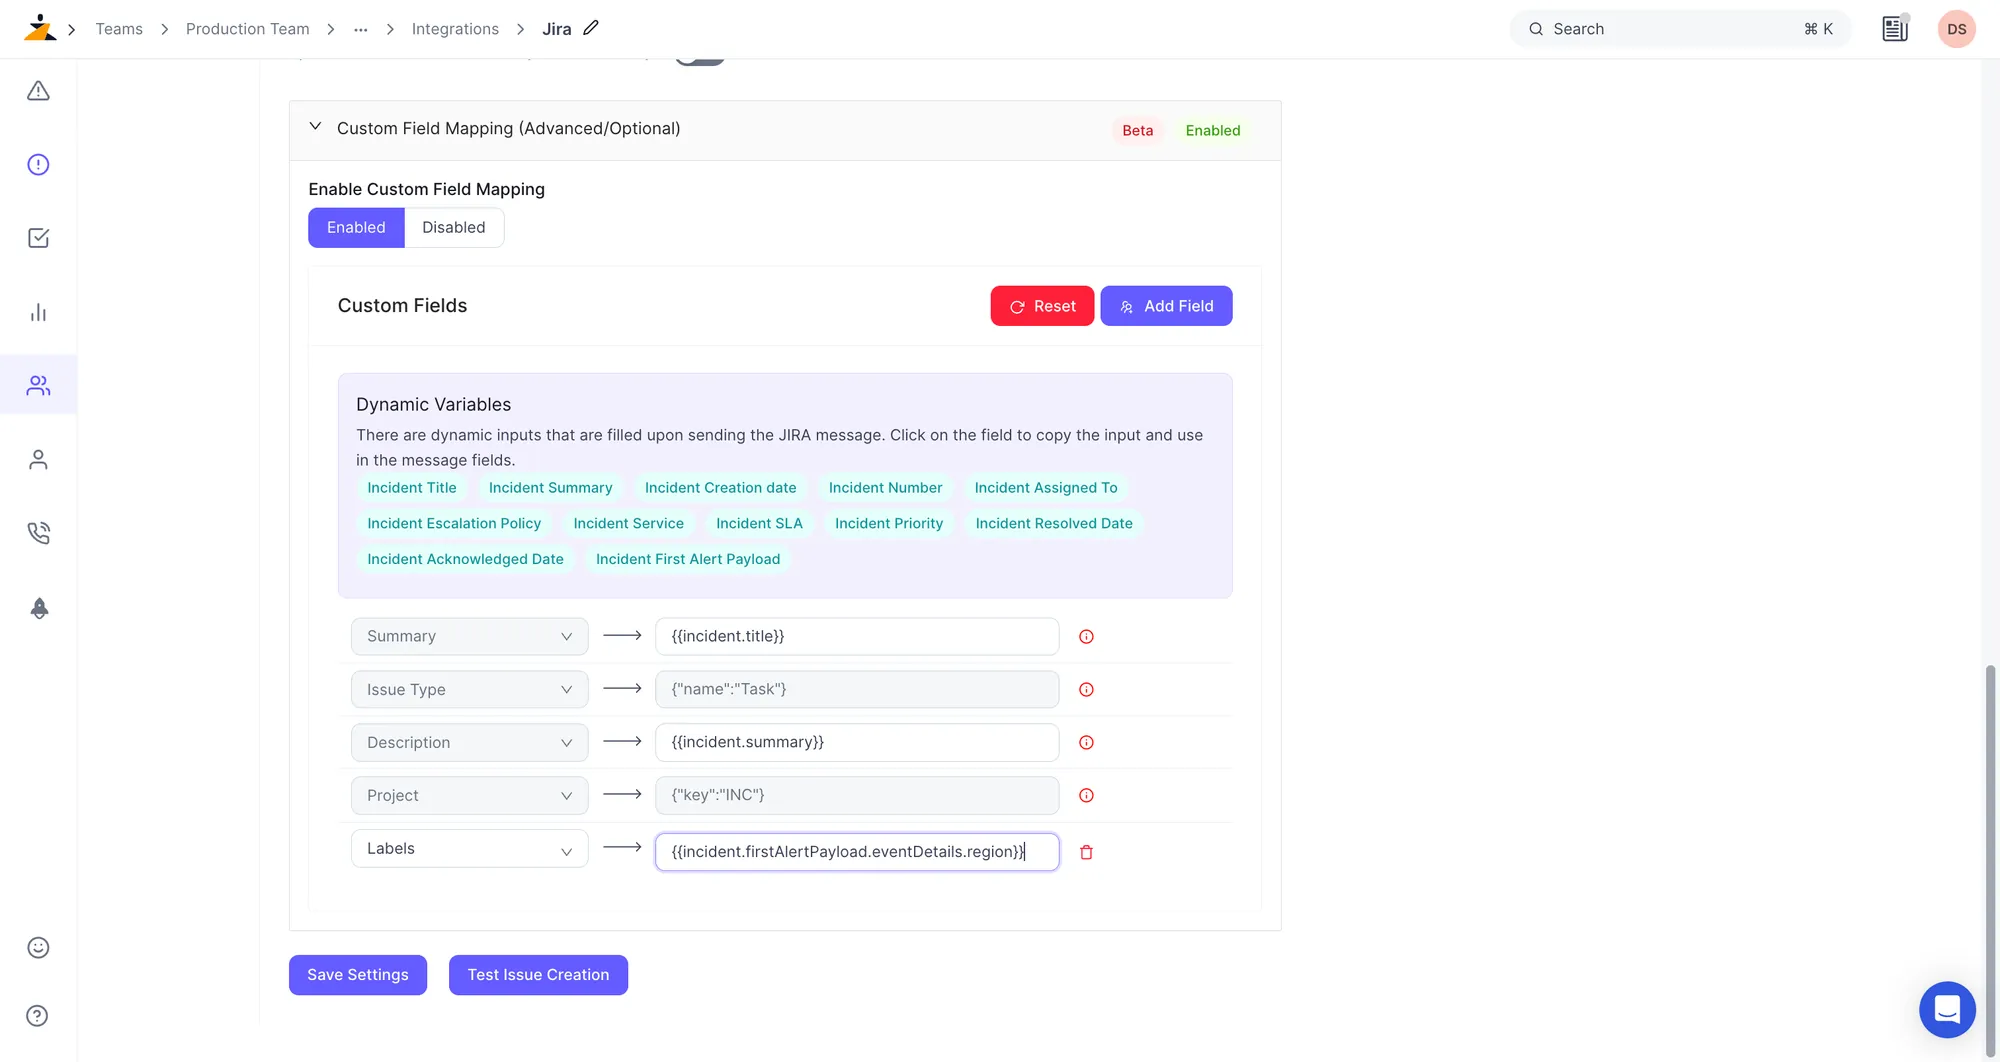
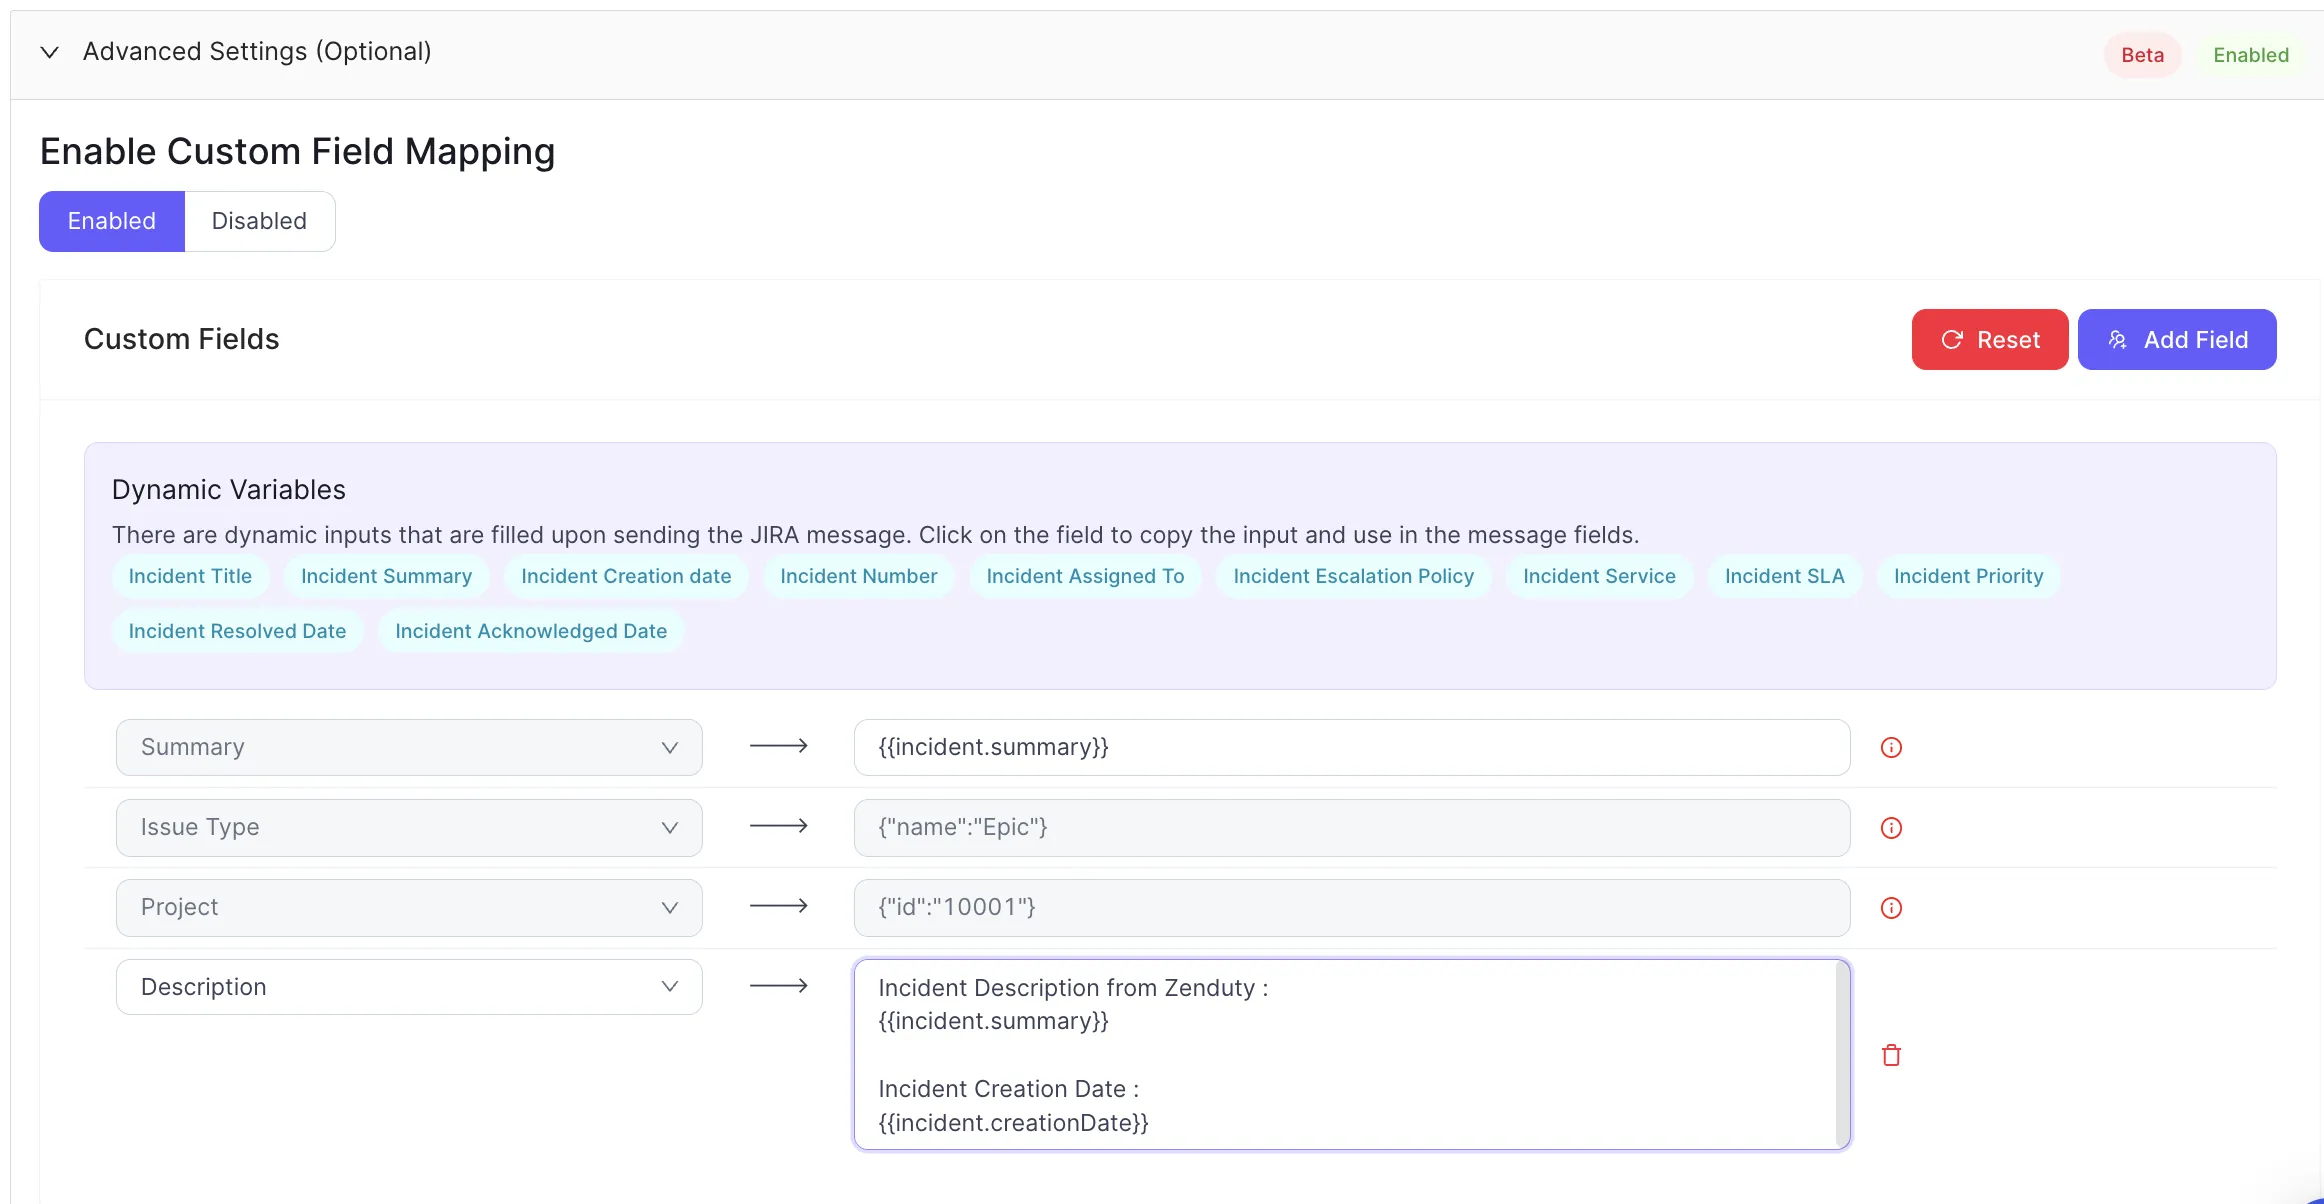
Jira Custom Fields can be used to create/update Jira tickets that need Custom Fields to be set upon creation of an Incident.
In a Default Jira setup, a common use-case for the same is the required Custom field Resolution Notes while closing a Epic Jira Ticket.
Upon activating Jira Custom Fields, the required fields for the given Issue type are automatically added as it needs to be set.
Any additional fields can be set be clicking the Add Field button on the top-right.


.webp)
.webp)