.webp)


Blog
Insights & updates from our experts
Resolve issues quickly with an AI-powered system that automates ticketing.

Resolve issues quickly with an AI-powered system that automates ticketing.

Resolve issues quickly with an AI-powered system that automates ticketing.

Resolve issues quickly with an AI-powered system that automates ticketing.
Resolve issues quickly with an AI-powered system that automates ticketing.
Resolve issues quickly with an AI-powered system that automates ticketing.
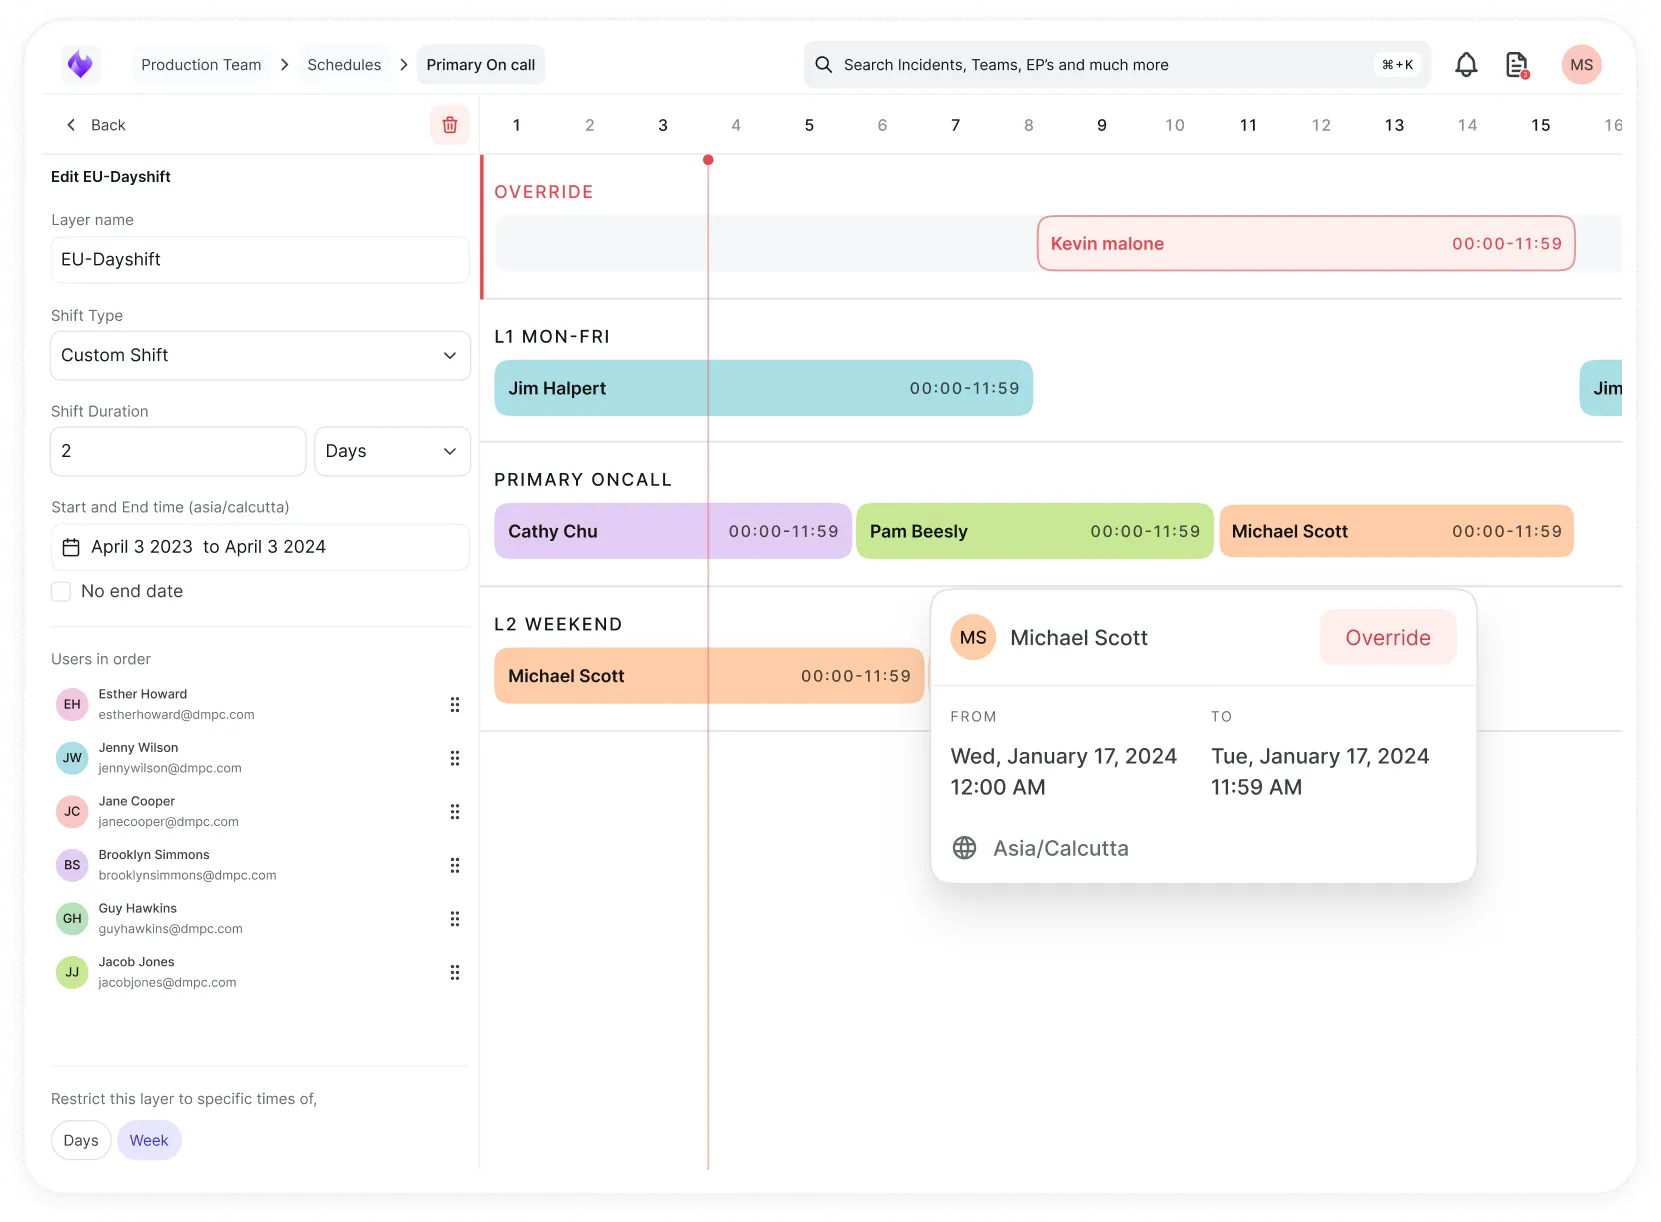
Simplify on-call scheduling, automate escalations, and reduce burnout.
Automate postmortems, AI summaries, and post-incident workflows
We're here to help

The integration with Atlassian Jira using the Xurrent Integration Service is

The integration with Atlassian Jira using the Xurrent Integration Service is

The integration with Atlassian Jira using the Xurrent Integration Service is

The integration with Atlassian Jira using the Xurrent Integration Service is

The integration with Atlassian Jira using the Xurrent Integration Service is

The integration with Atlassian Jira using the Xurrent Integration Service is

The integration with Atlassian Jira using the Xurrent Integration Service is

The integration with Atlassian Jira using the Xurrent Integration Service is
Resolve issues quickly with an AI-powered system that automates ticketing.
Resolve issues quickly with an AI-powered system that automates ticketing.
Simplify on-call scheduling, automate escalations, and reduce burnout.
Automate postmortems, AI summaries, and post-incident workflows
Resolve issues quickly with an AI-powered system that automates ticketing.
Resolve issues quickly with an AI-powered system that automates ticketing.
Resolve issues quickly with an AI-powered system that automates ticketing.
Resolve issues quickly with an AI-powered system that automates ticketing.

We are here to help 24/7

Connect with other Xurrent Users

Get insights and tips on how to get the most out of Xurrent

Apps, APIs, and updates

Xurrent service functionality
Eliminate manual tasks, optimize workflows, and deliver faster resolutions.
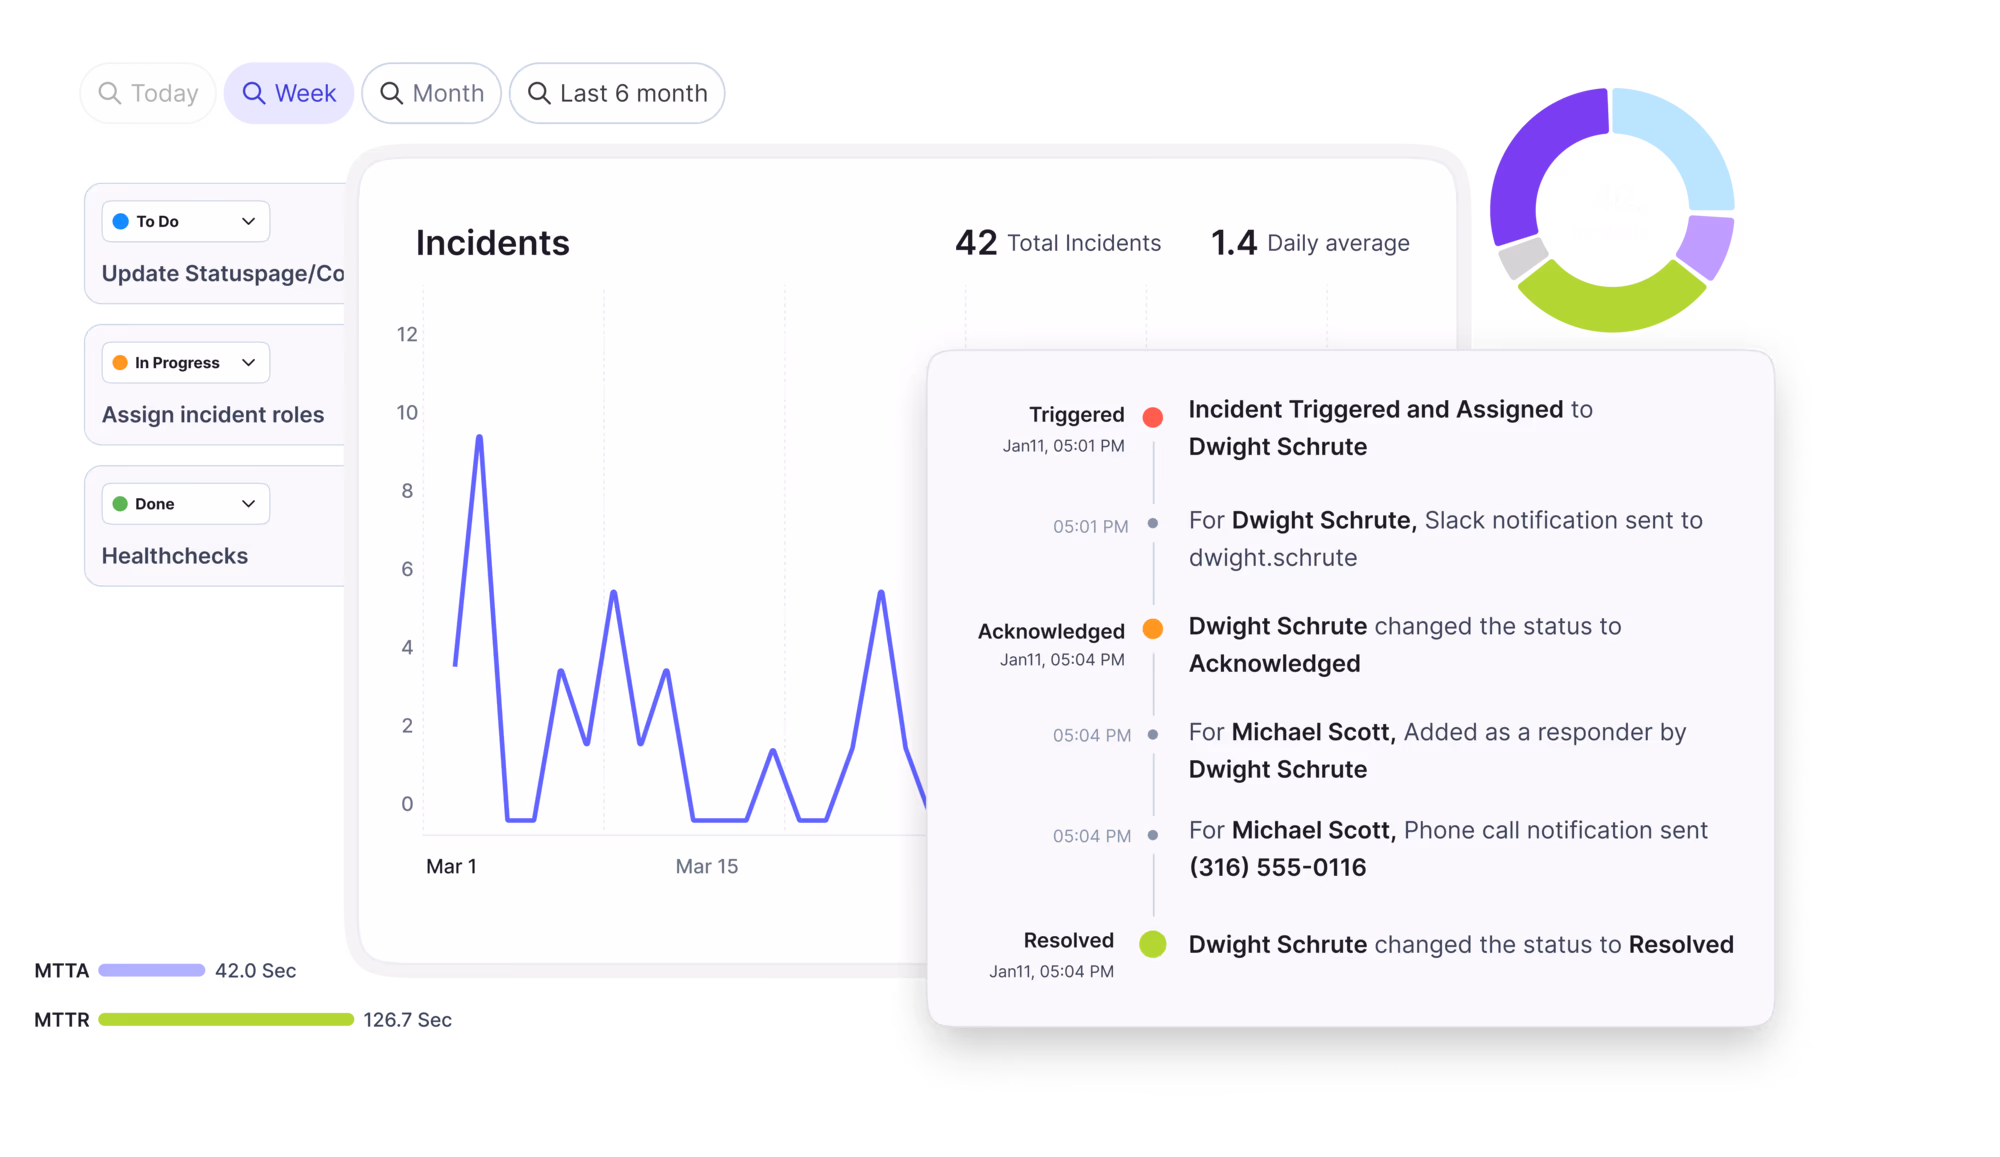
Learn how organizations have reduced downtime, improved 50% MTTA & MTTR, and cut costs with Xurrent IMR.
Discover Xurrent IMR's quick support, bidirectional integrations with Jira and Slack, and more cohesive incident response capabilities compared to Opsgenie.
Understand why users value Xurrent IMR for its intuitive interface, efficient incident alerting, customizable On-call schedules, and escalations.

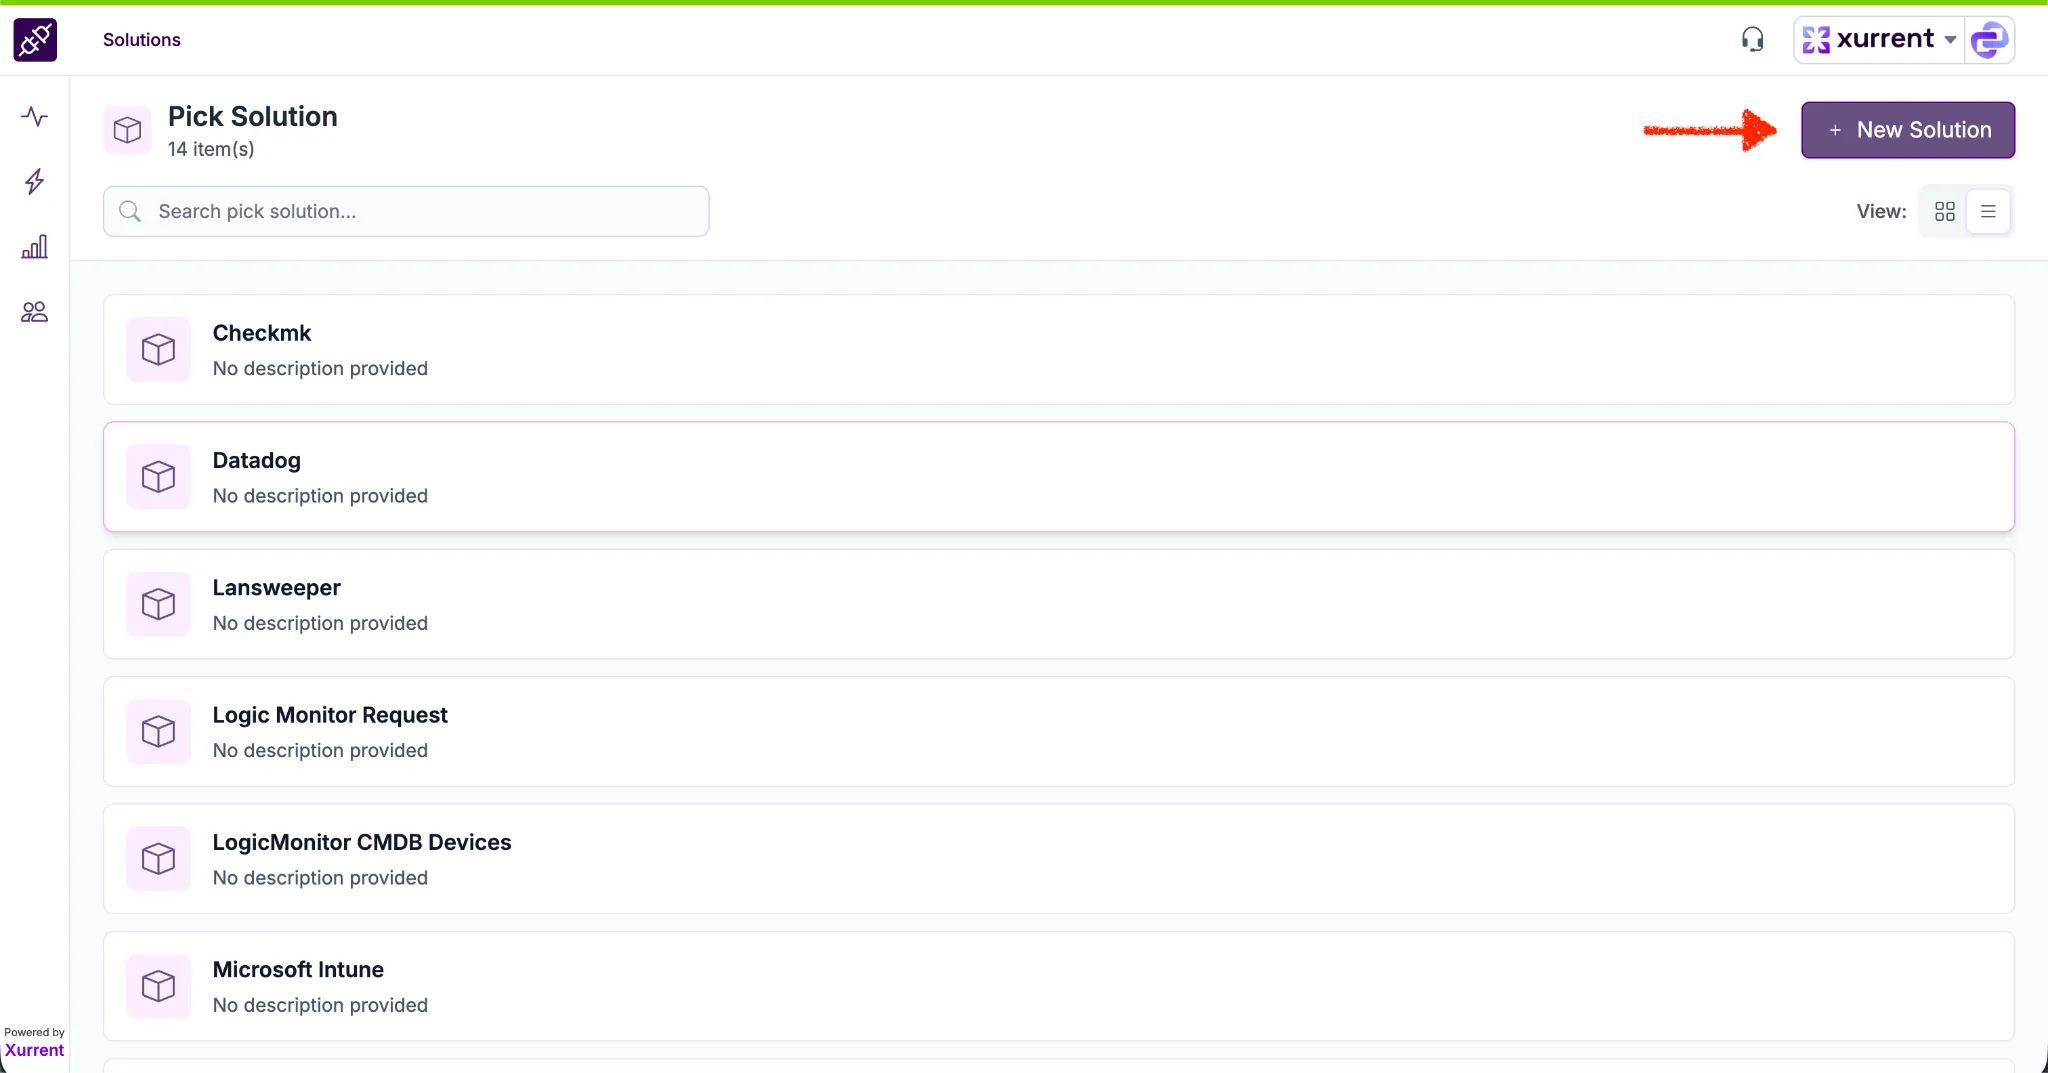
Step-by-step guide to creating your first runbook in iPaaS for automating integrations and workflows.
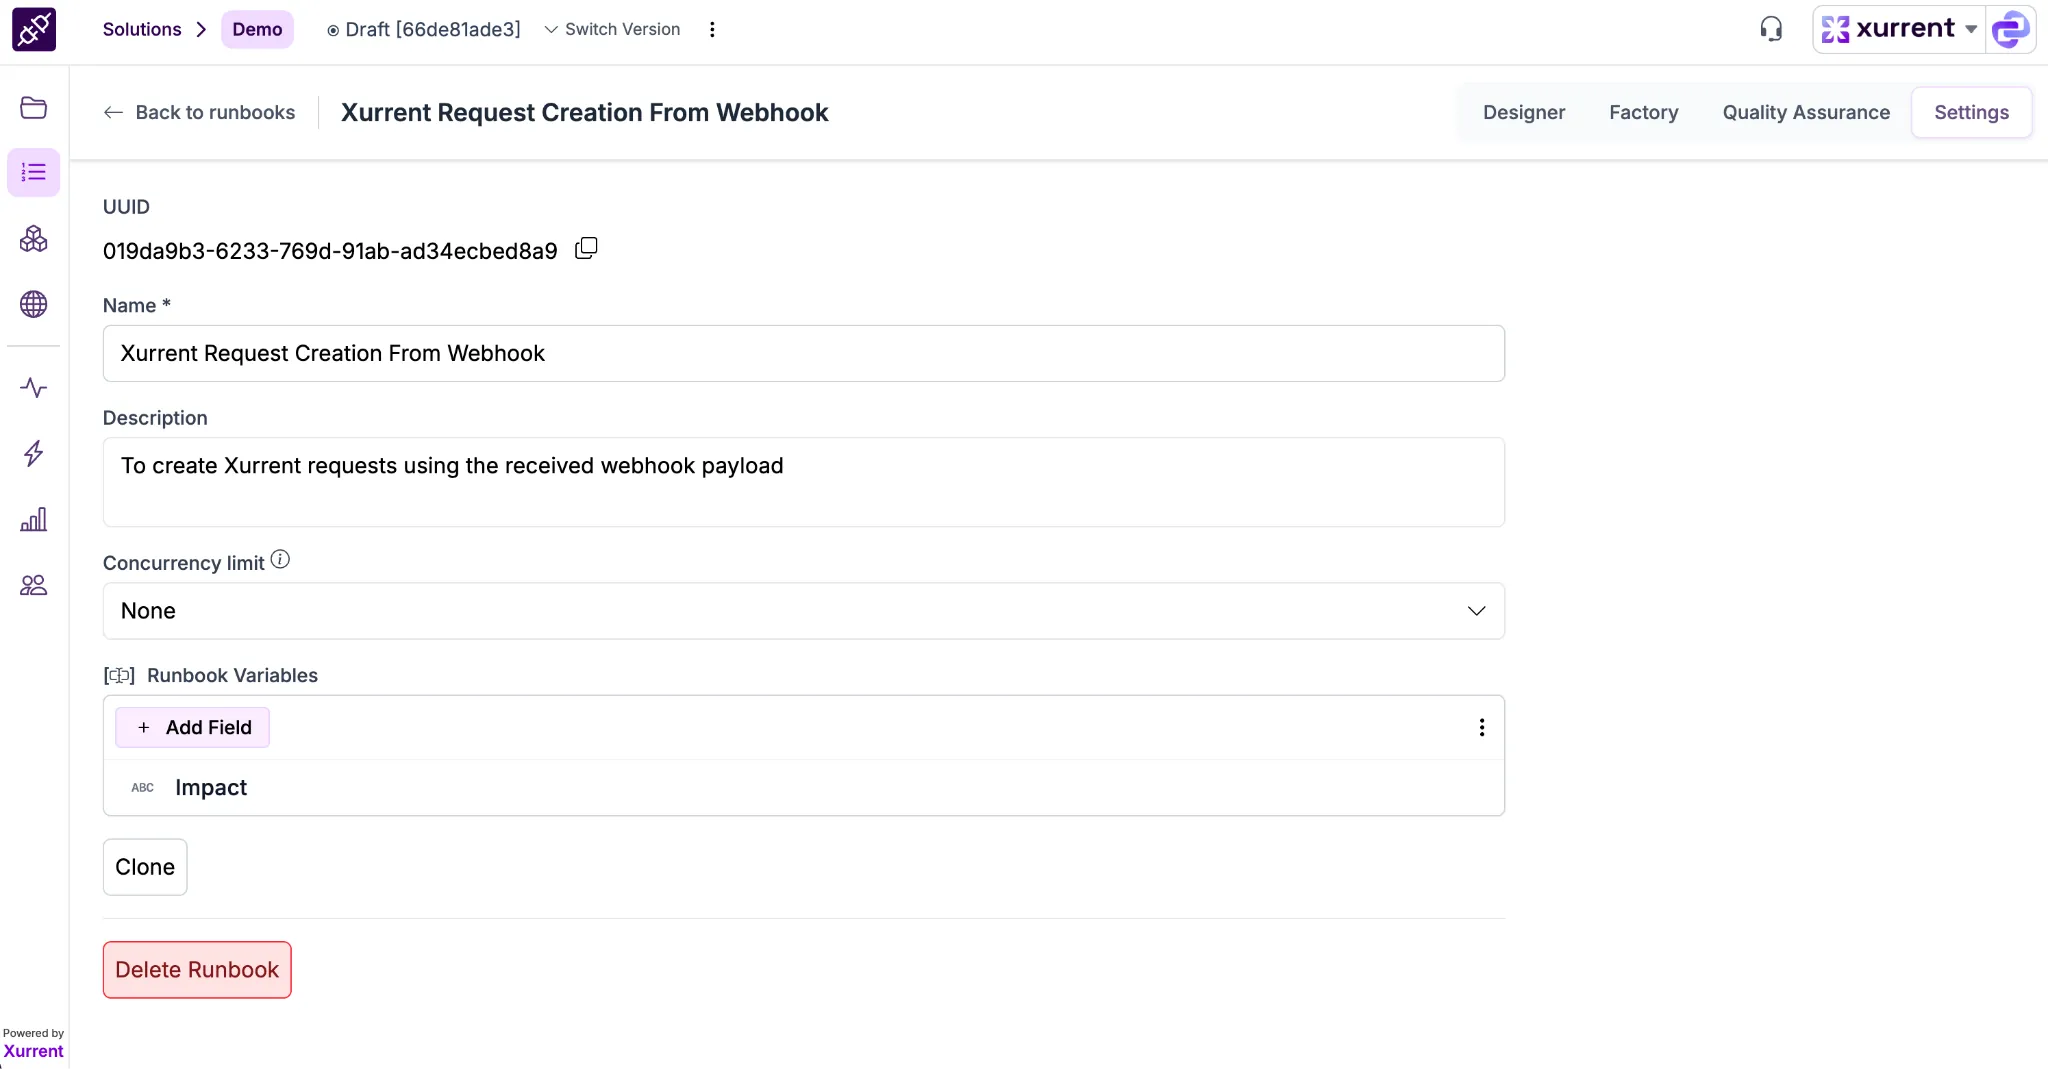
This guide walks you through creating a solution and configuring a runbook to create requests using a JSON payload received via a webhook.
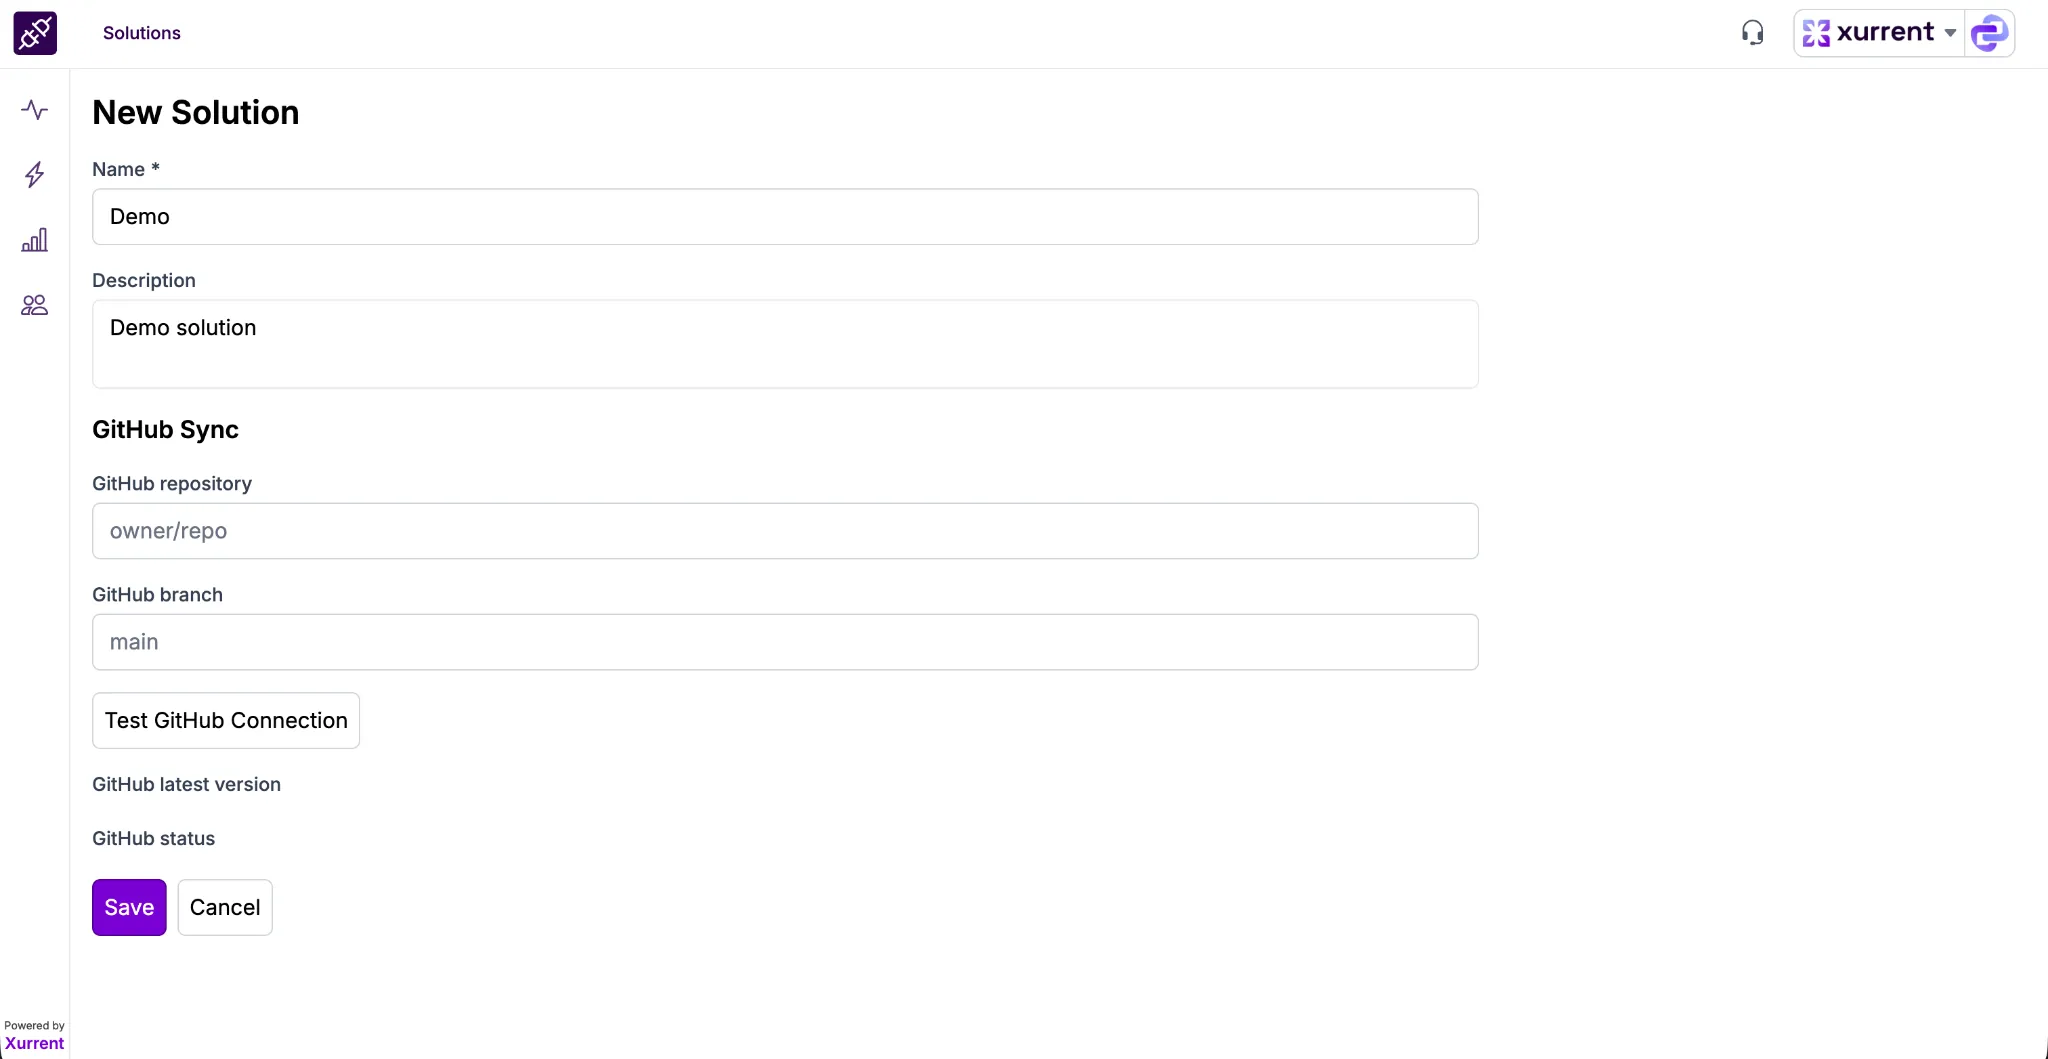
✅ Once saved:
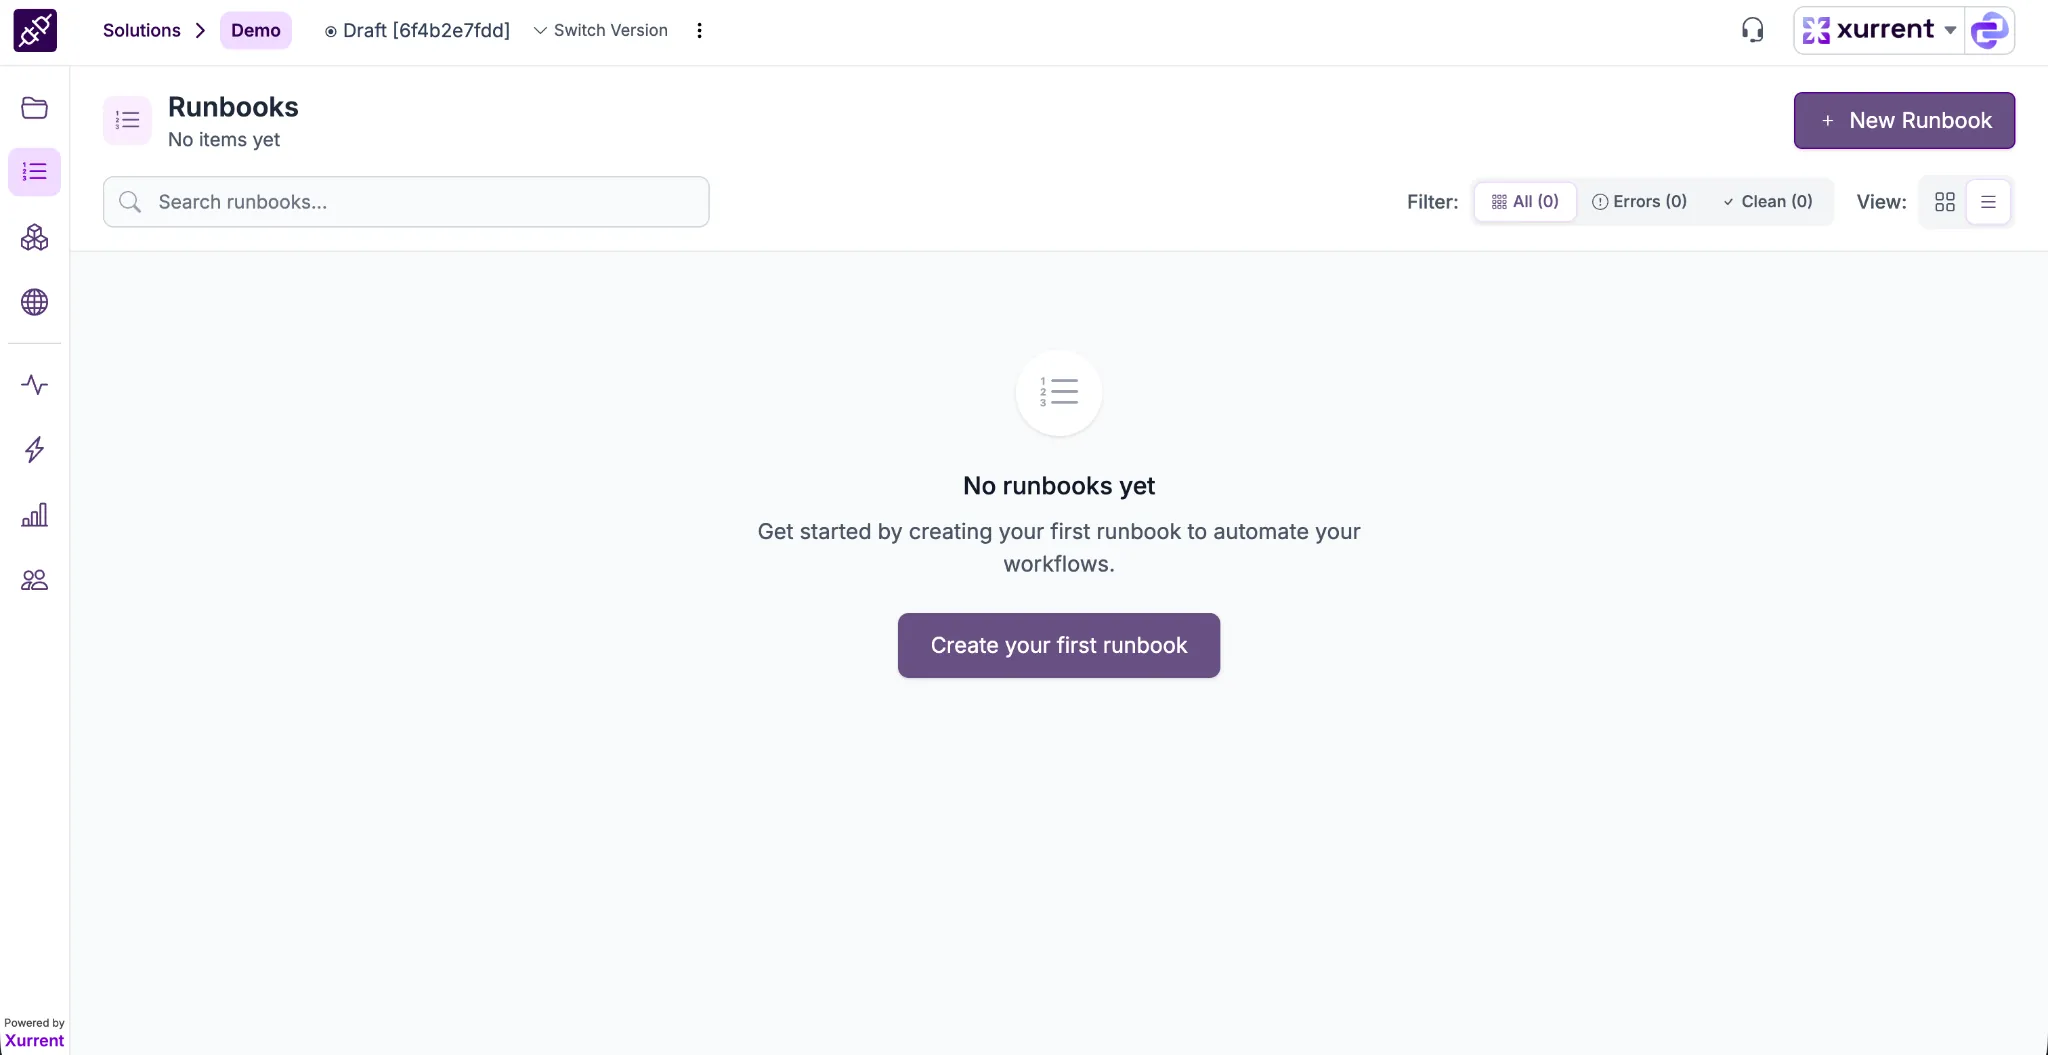
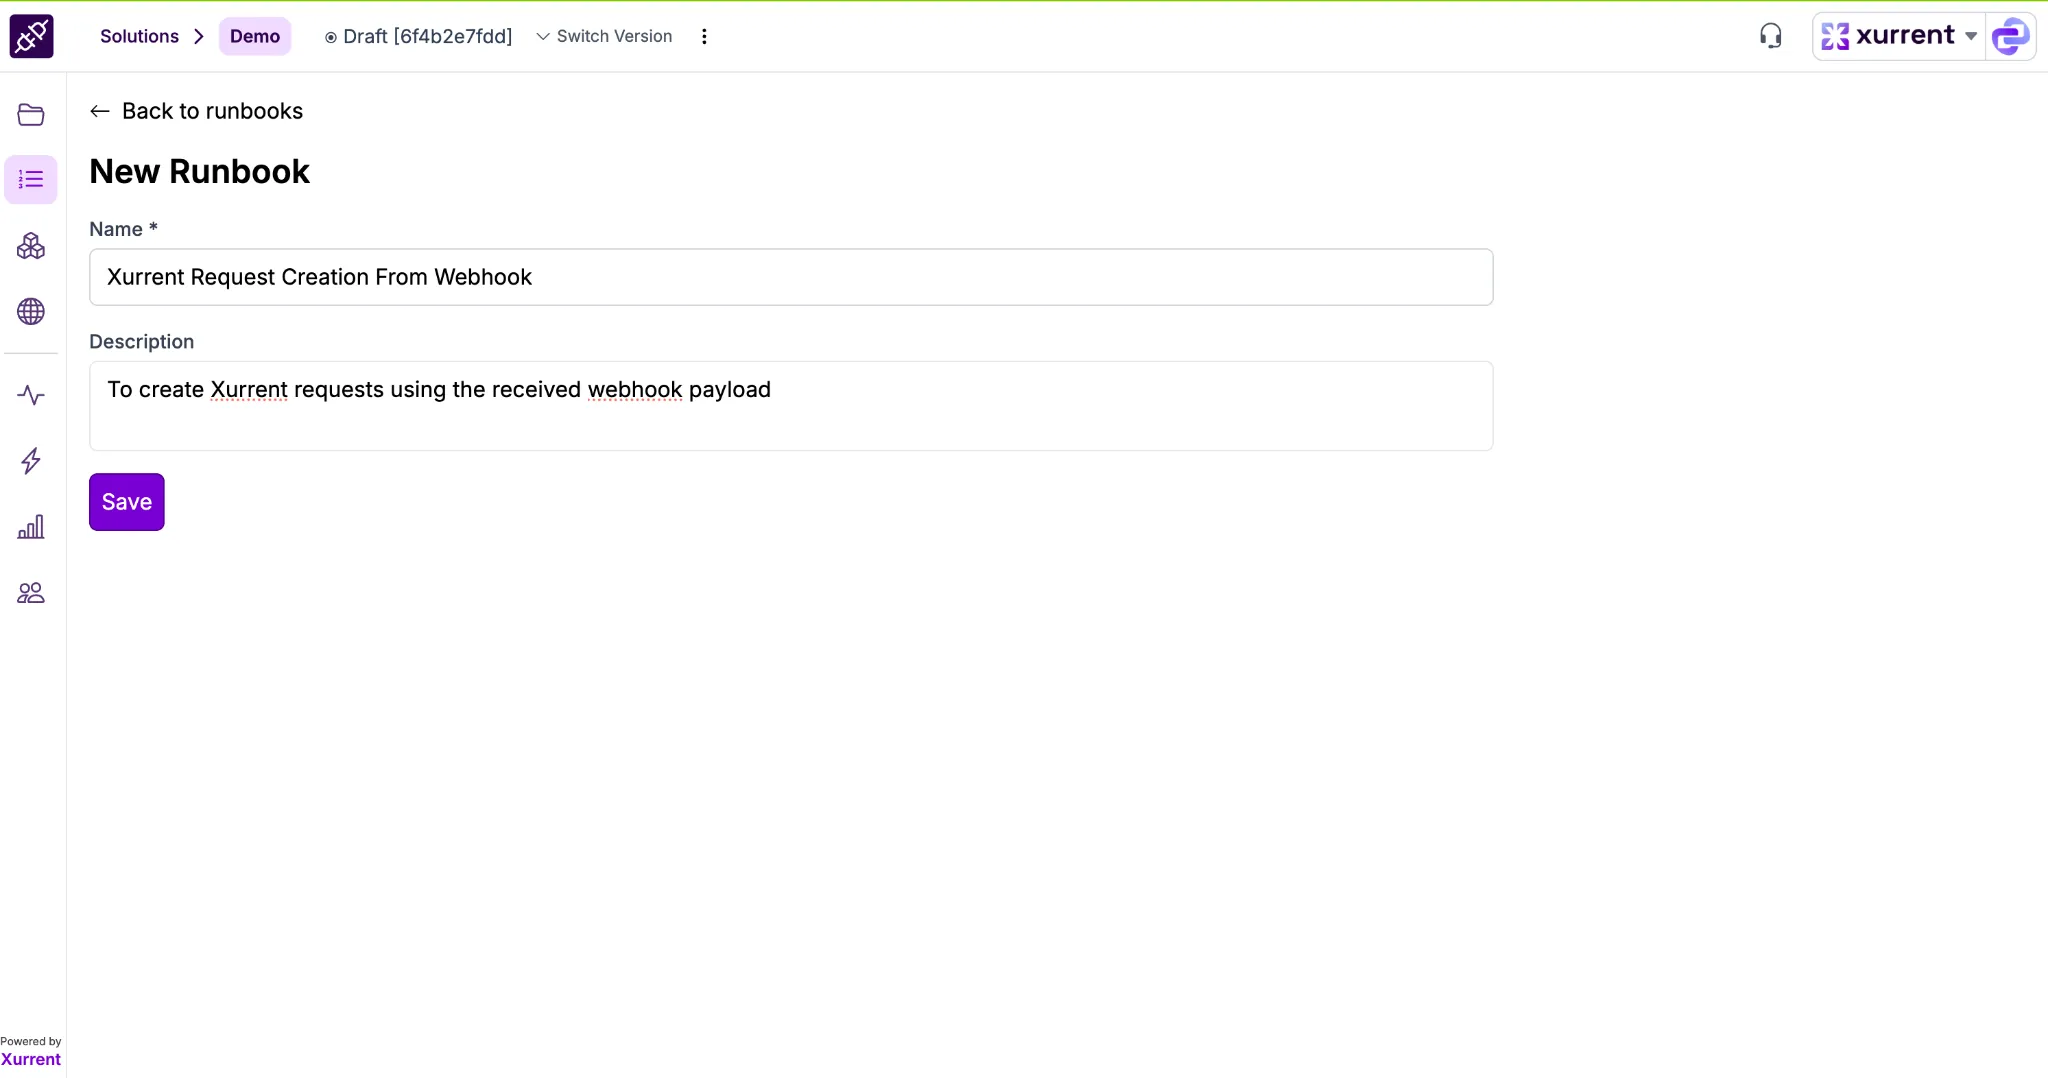
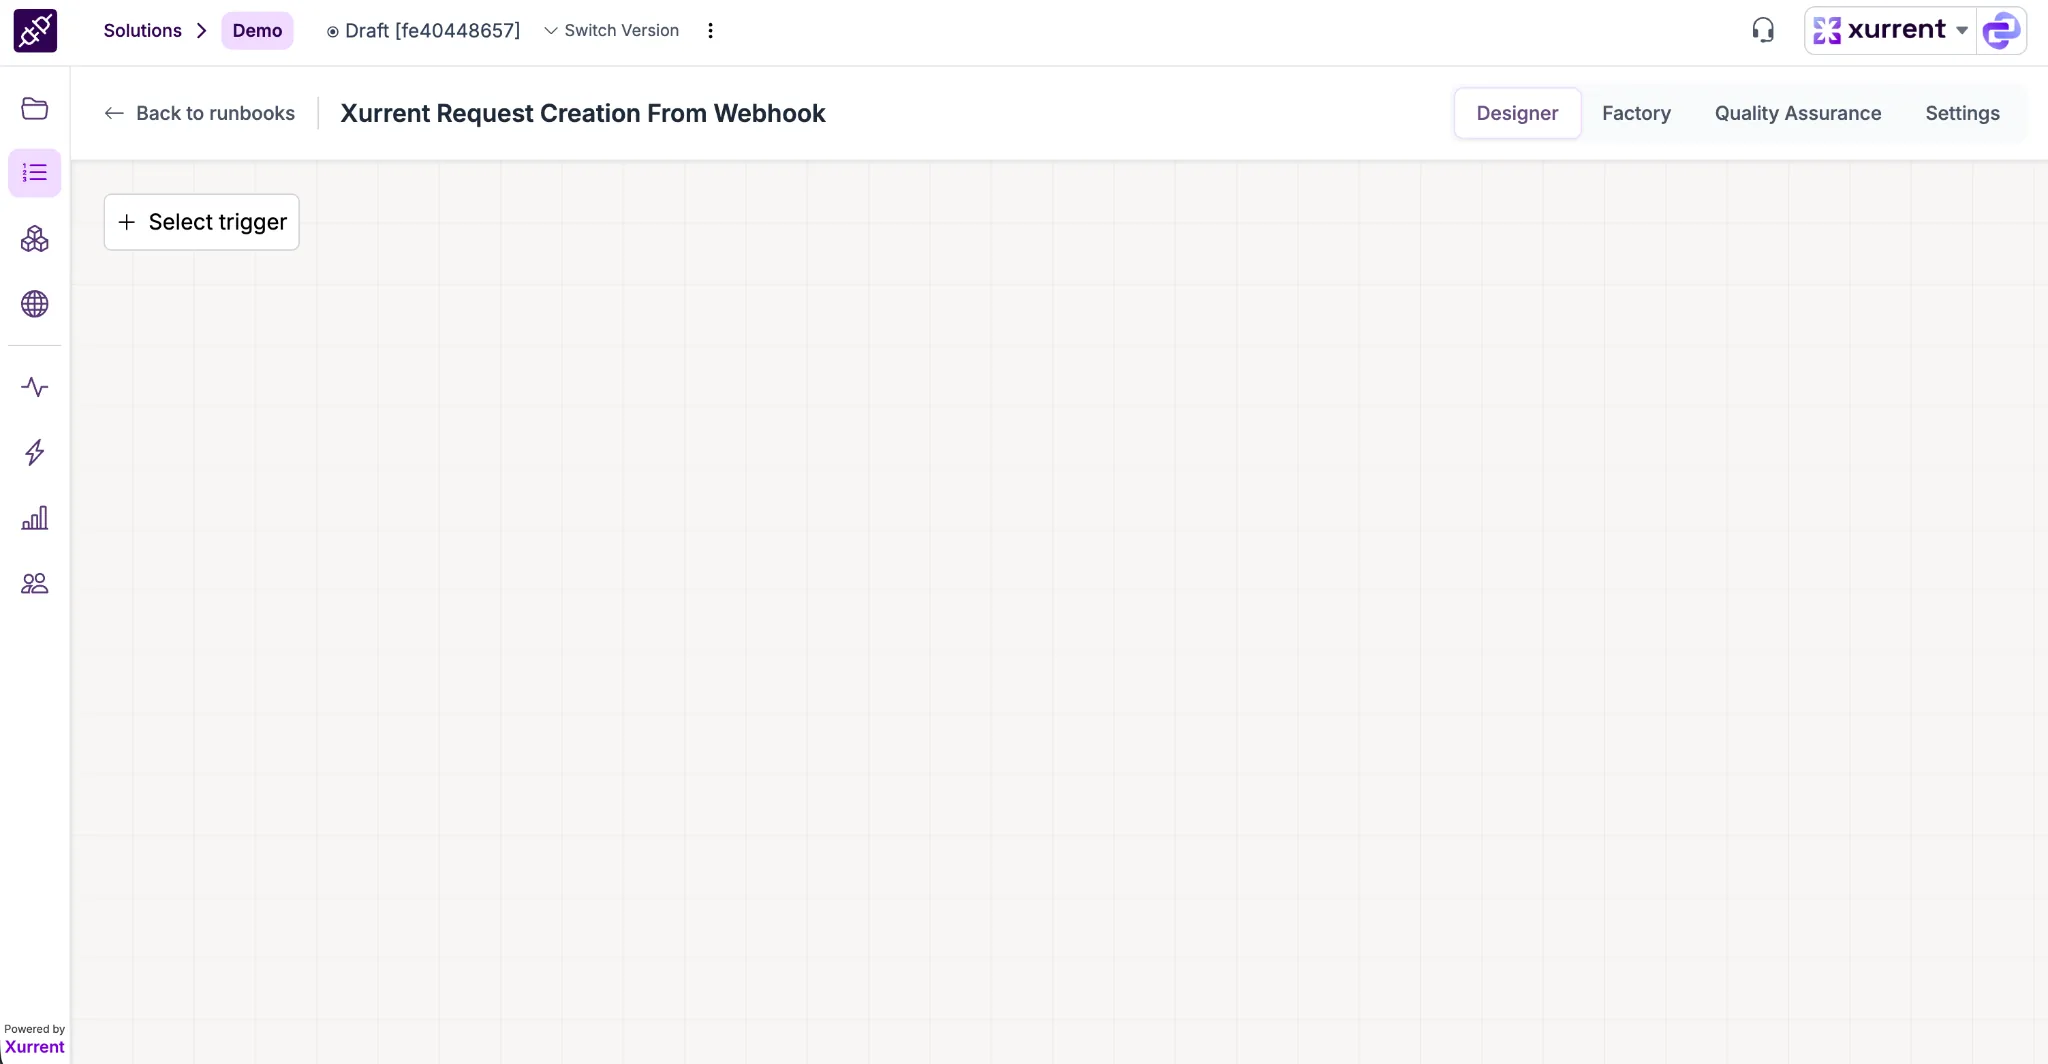
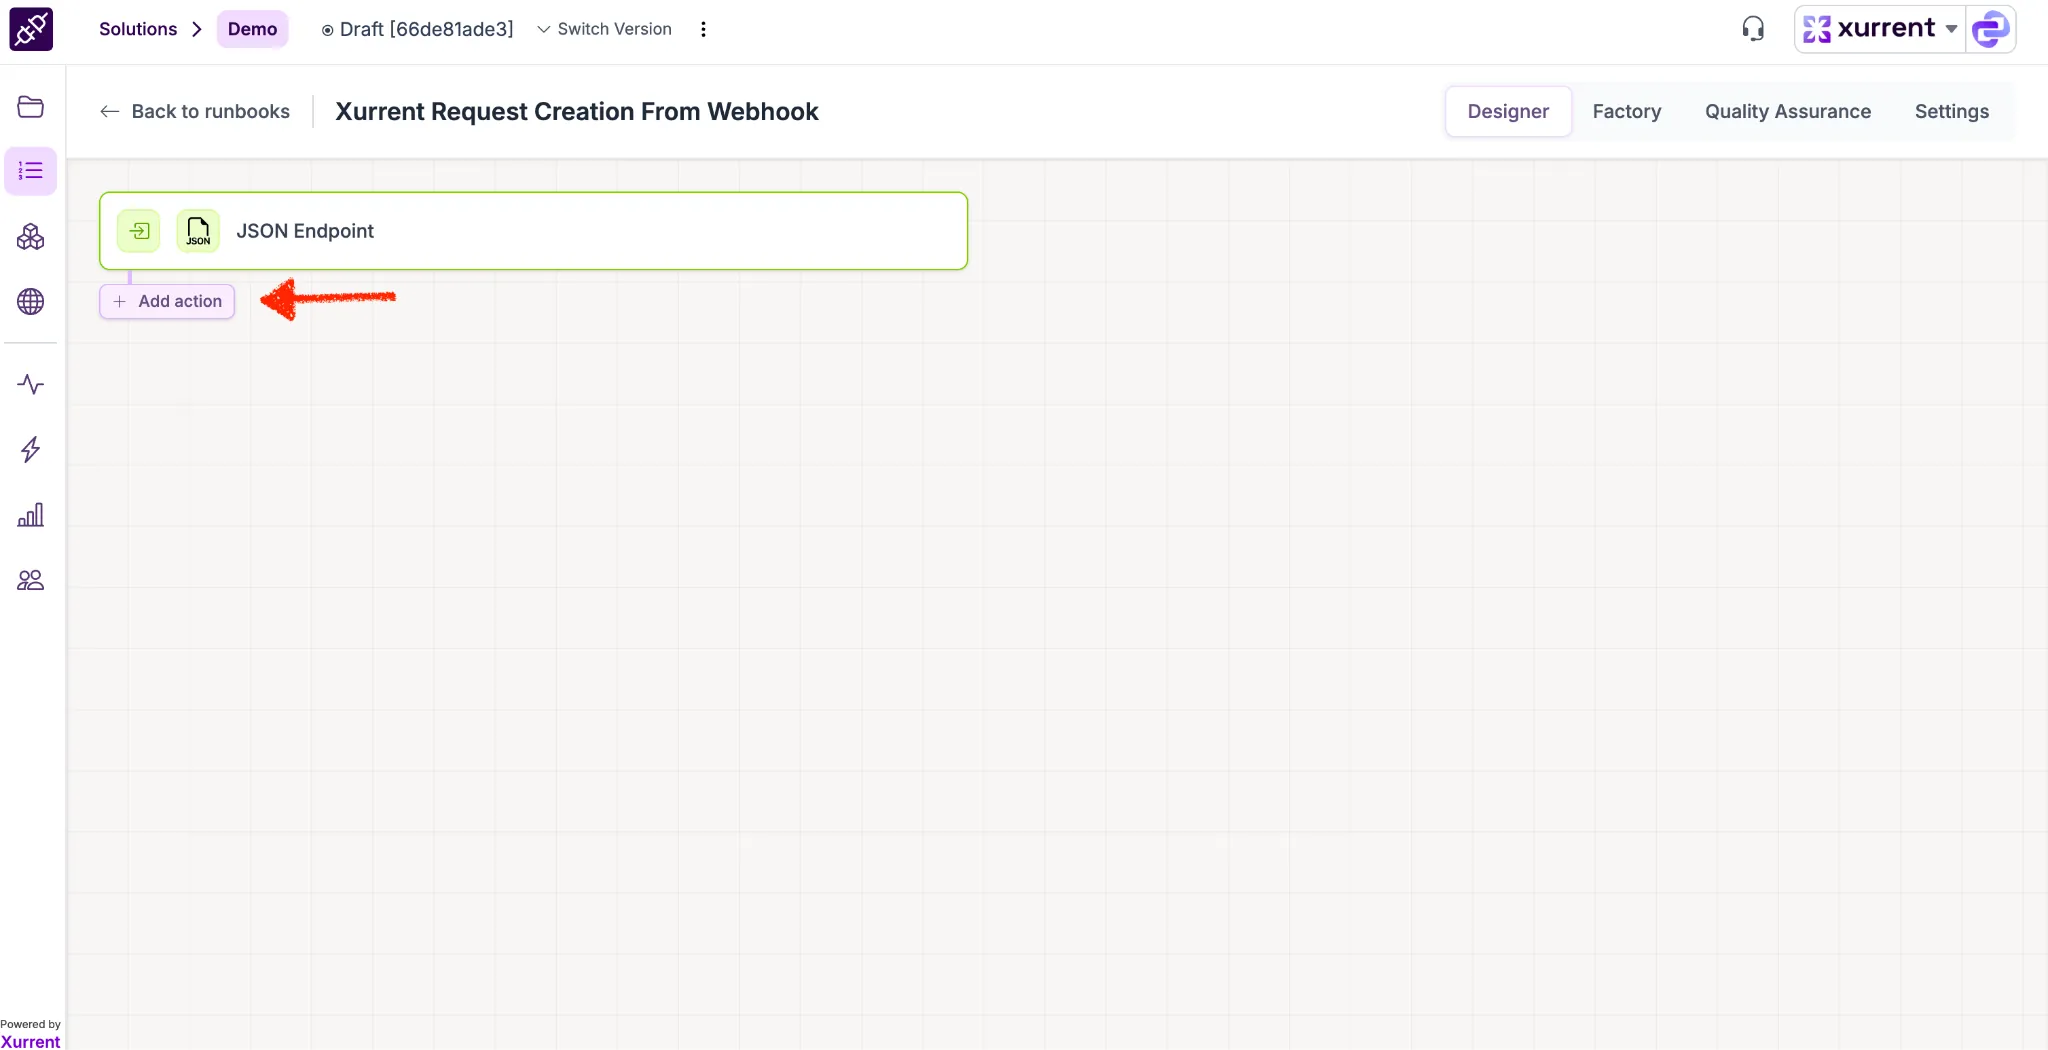
✅ You will be redirected to the Designer page, where you can build your workflow.
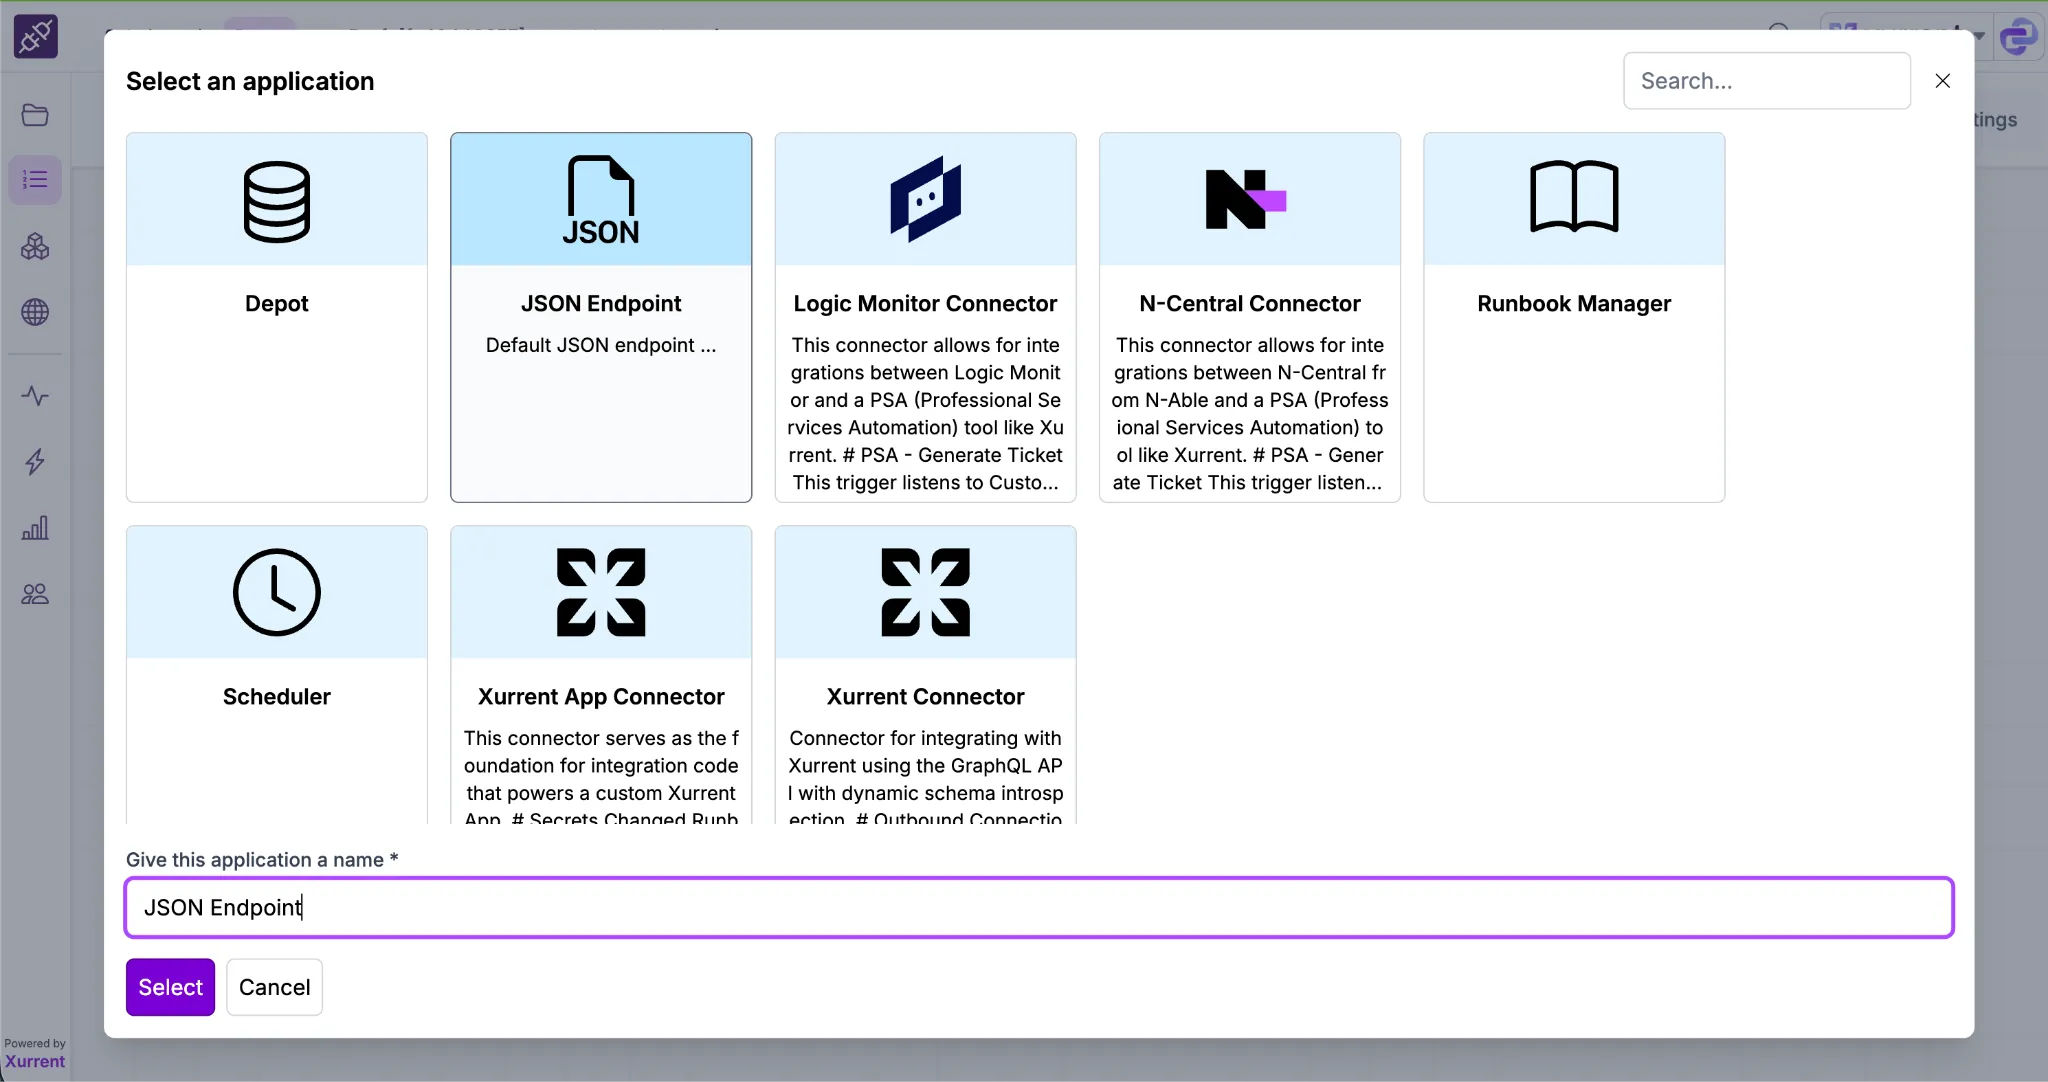

✅ Once selected: The trigger will now be added to the Designer
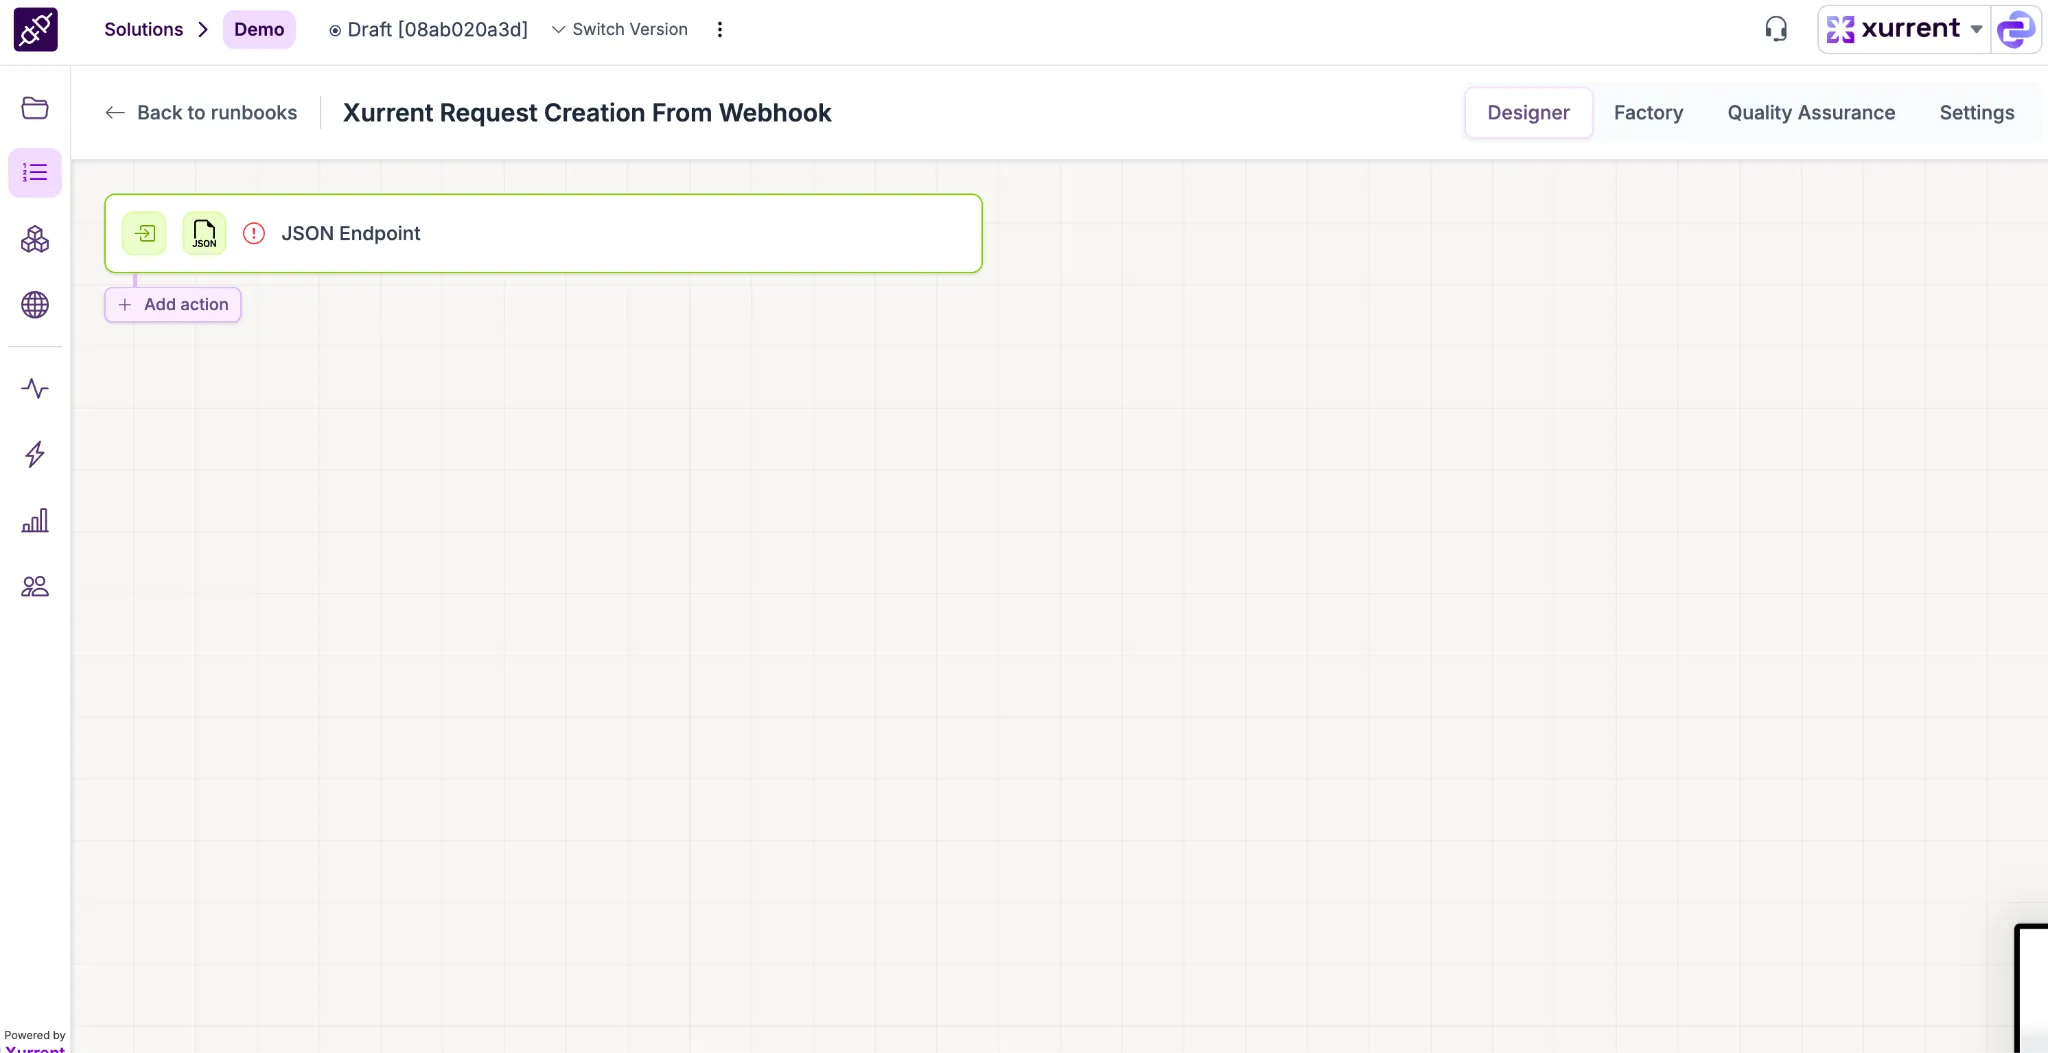
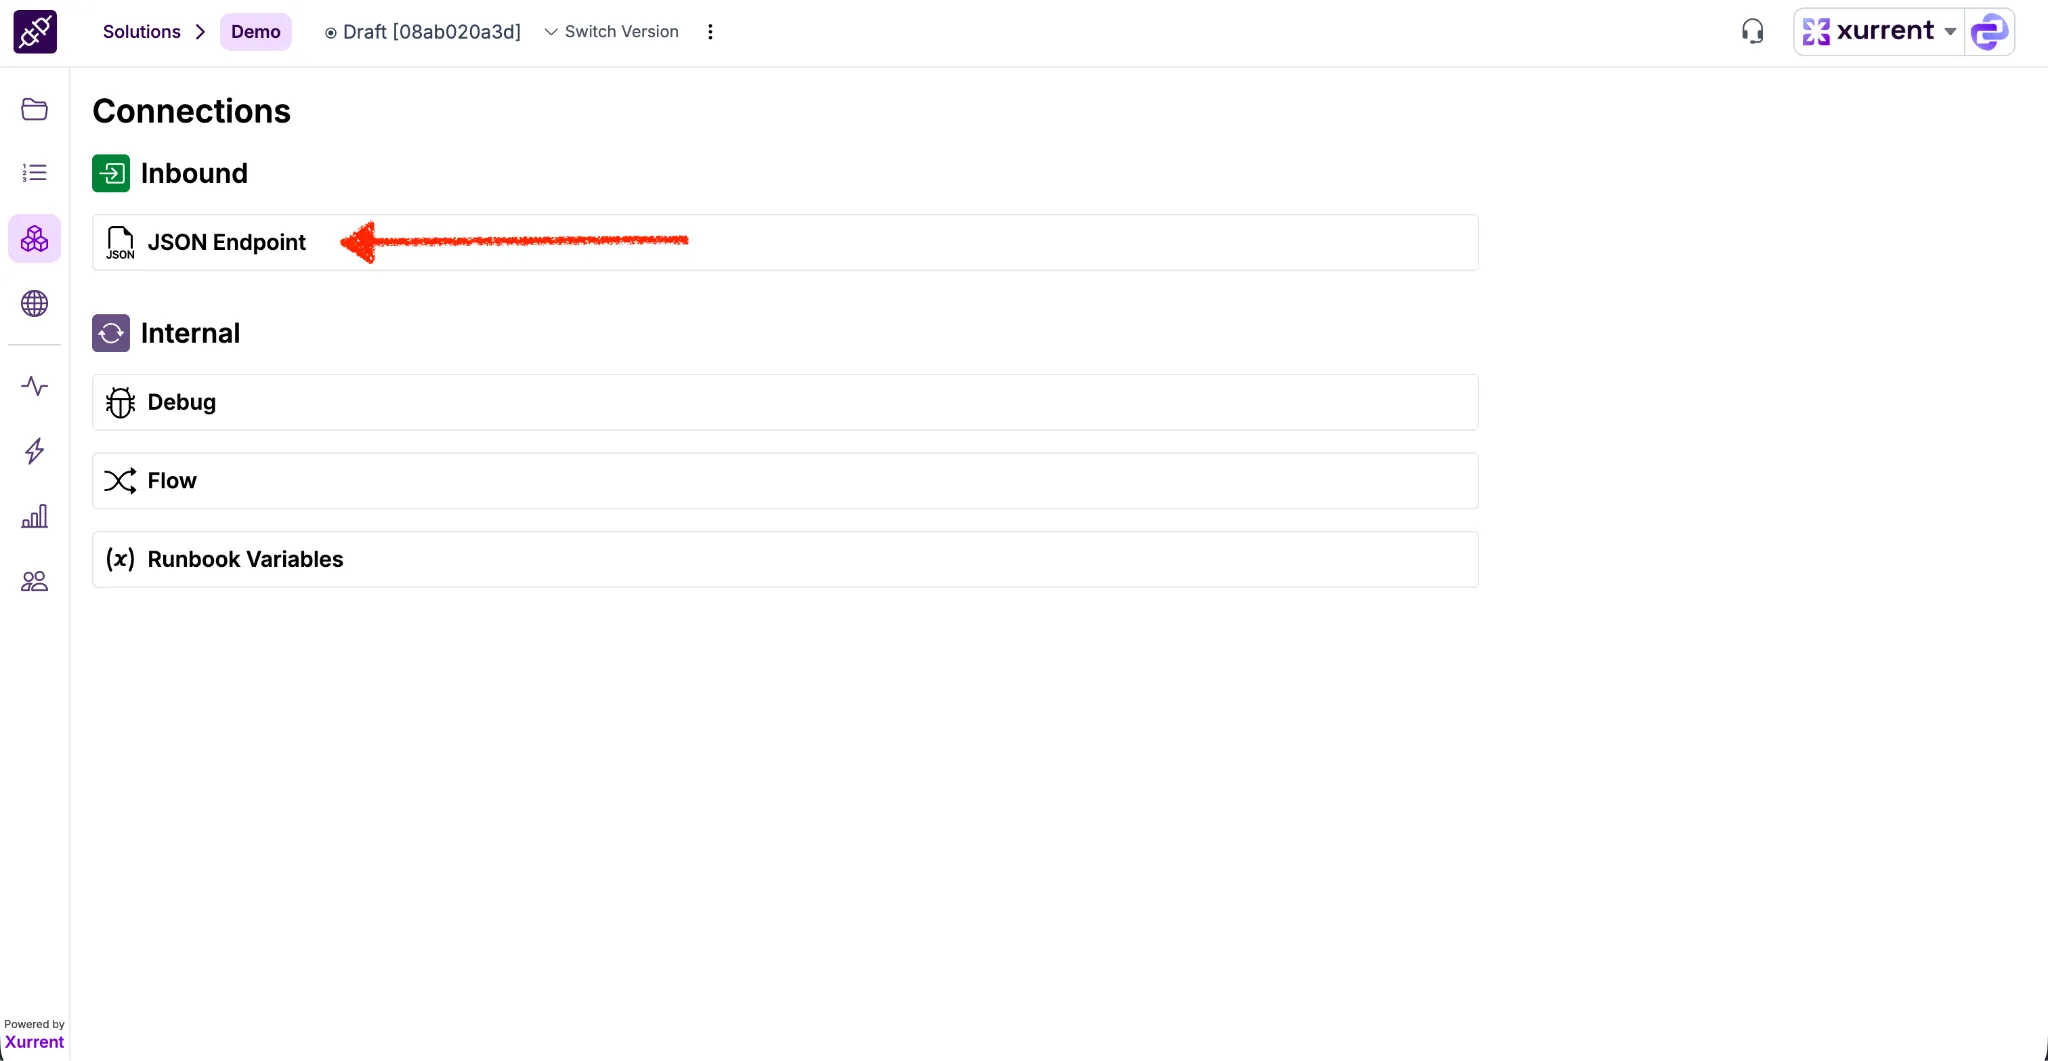
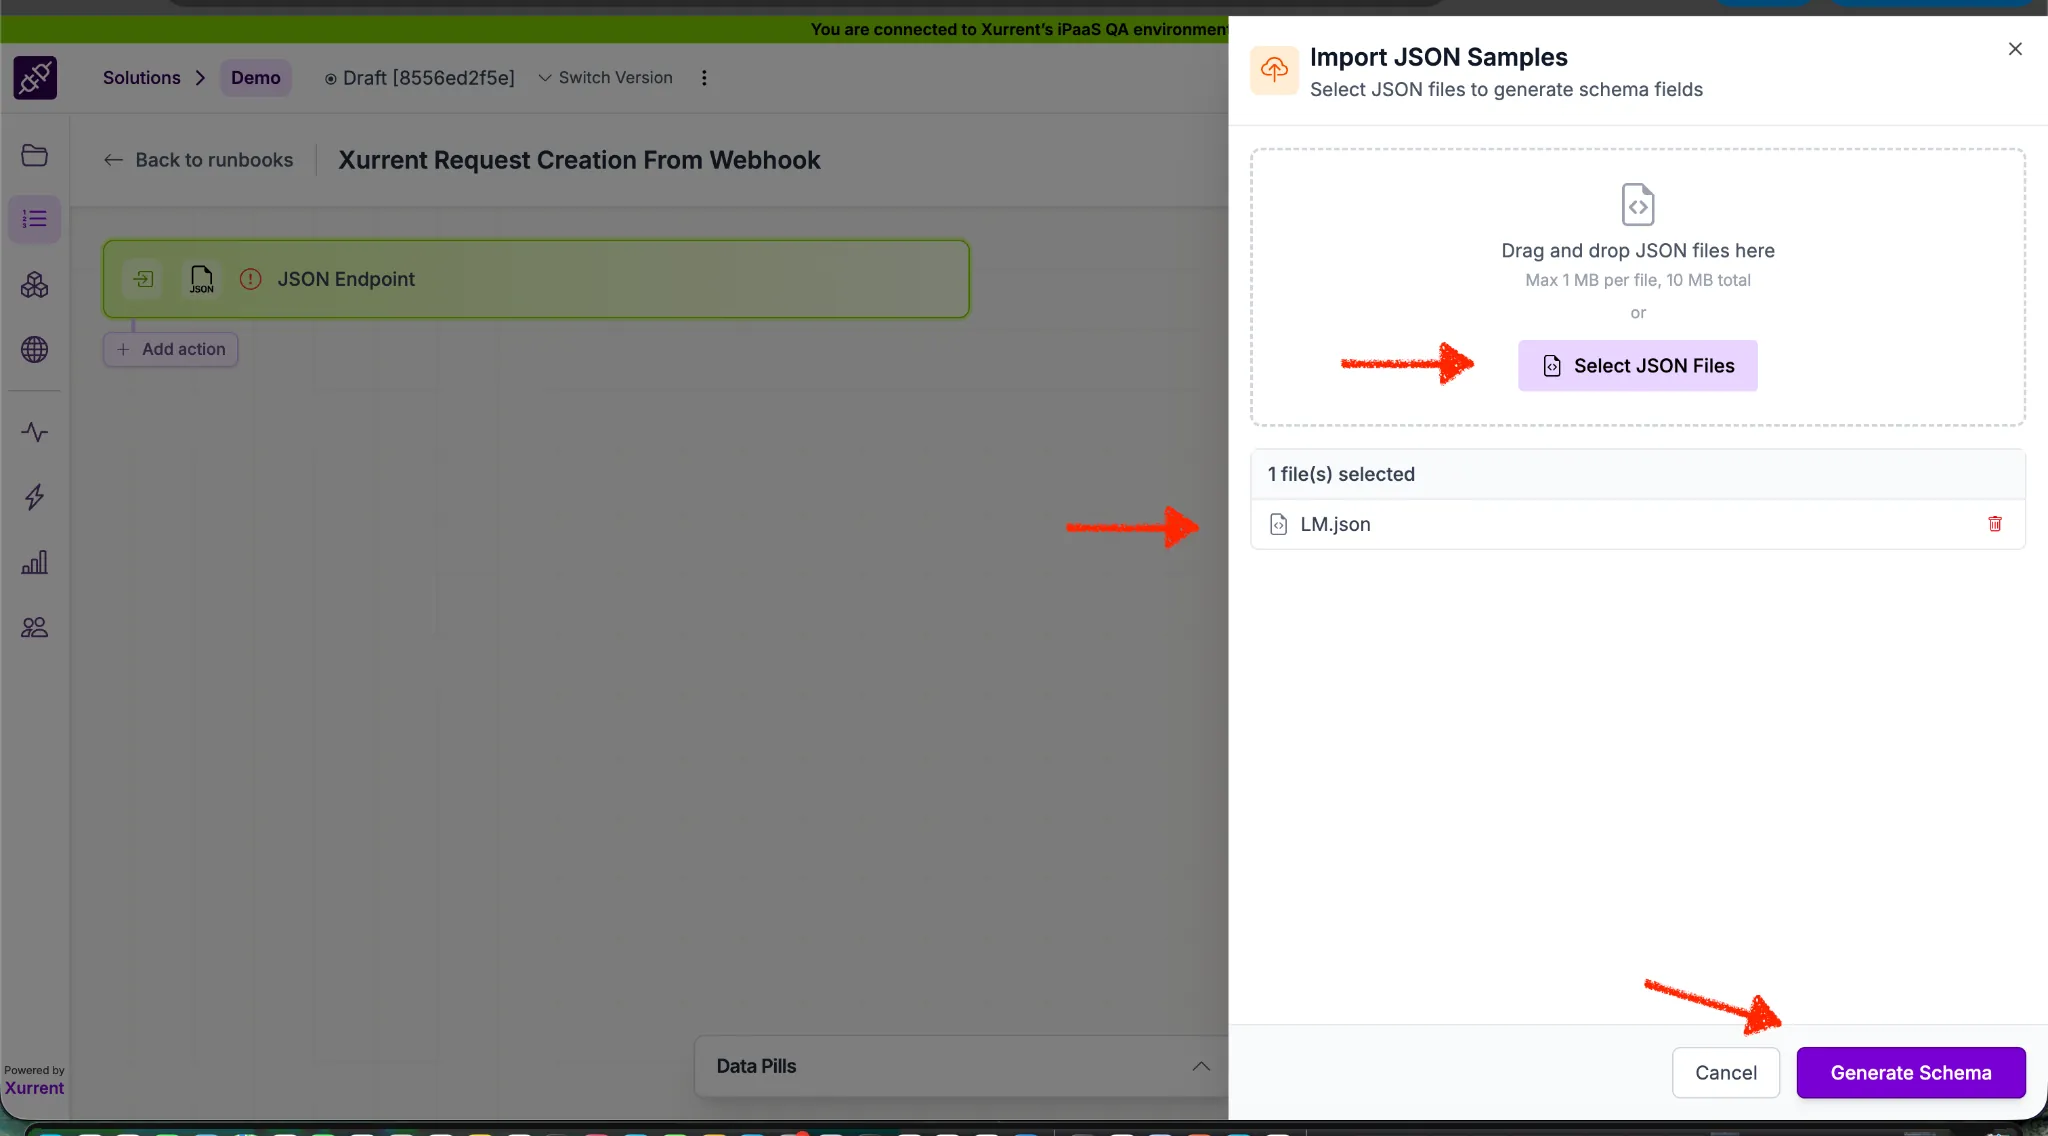
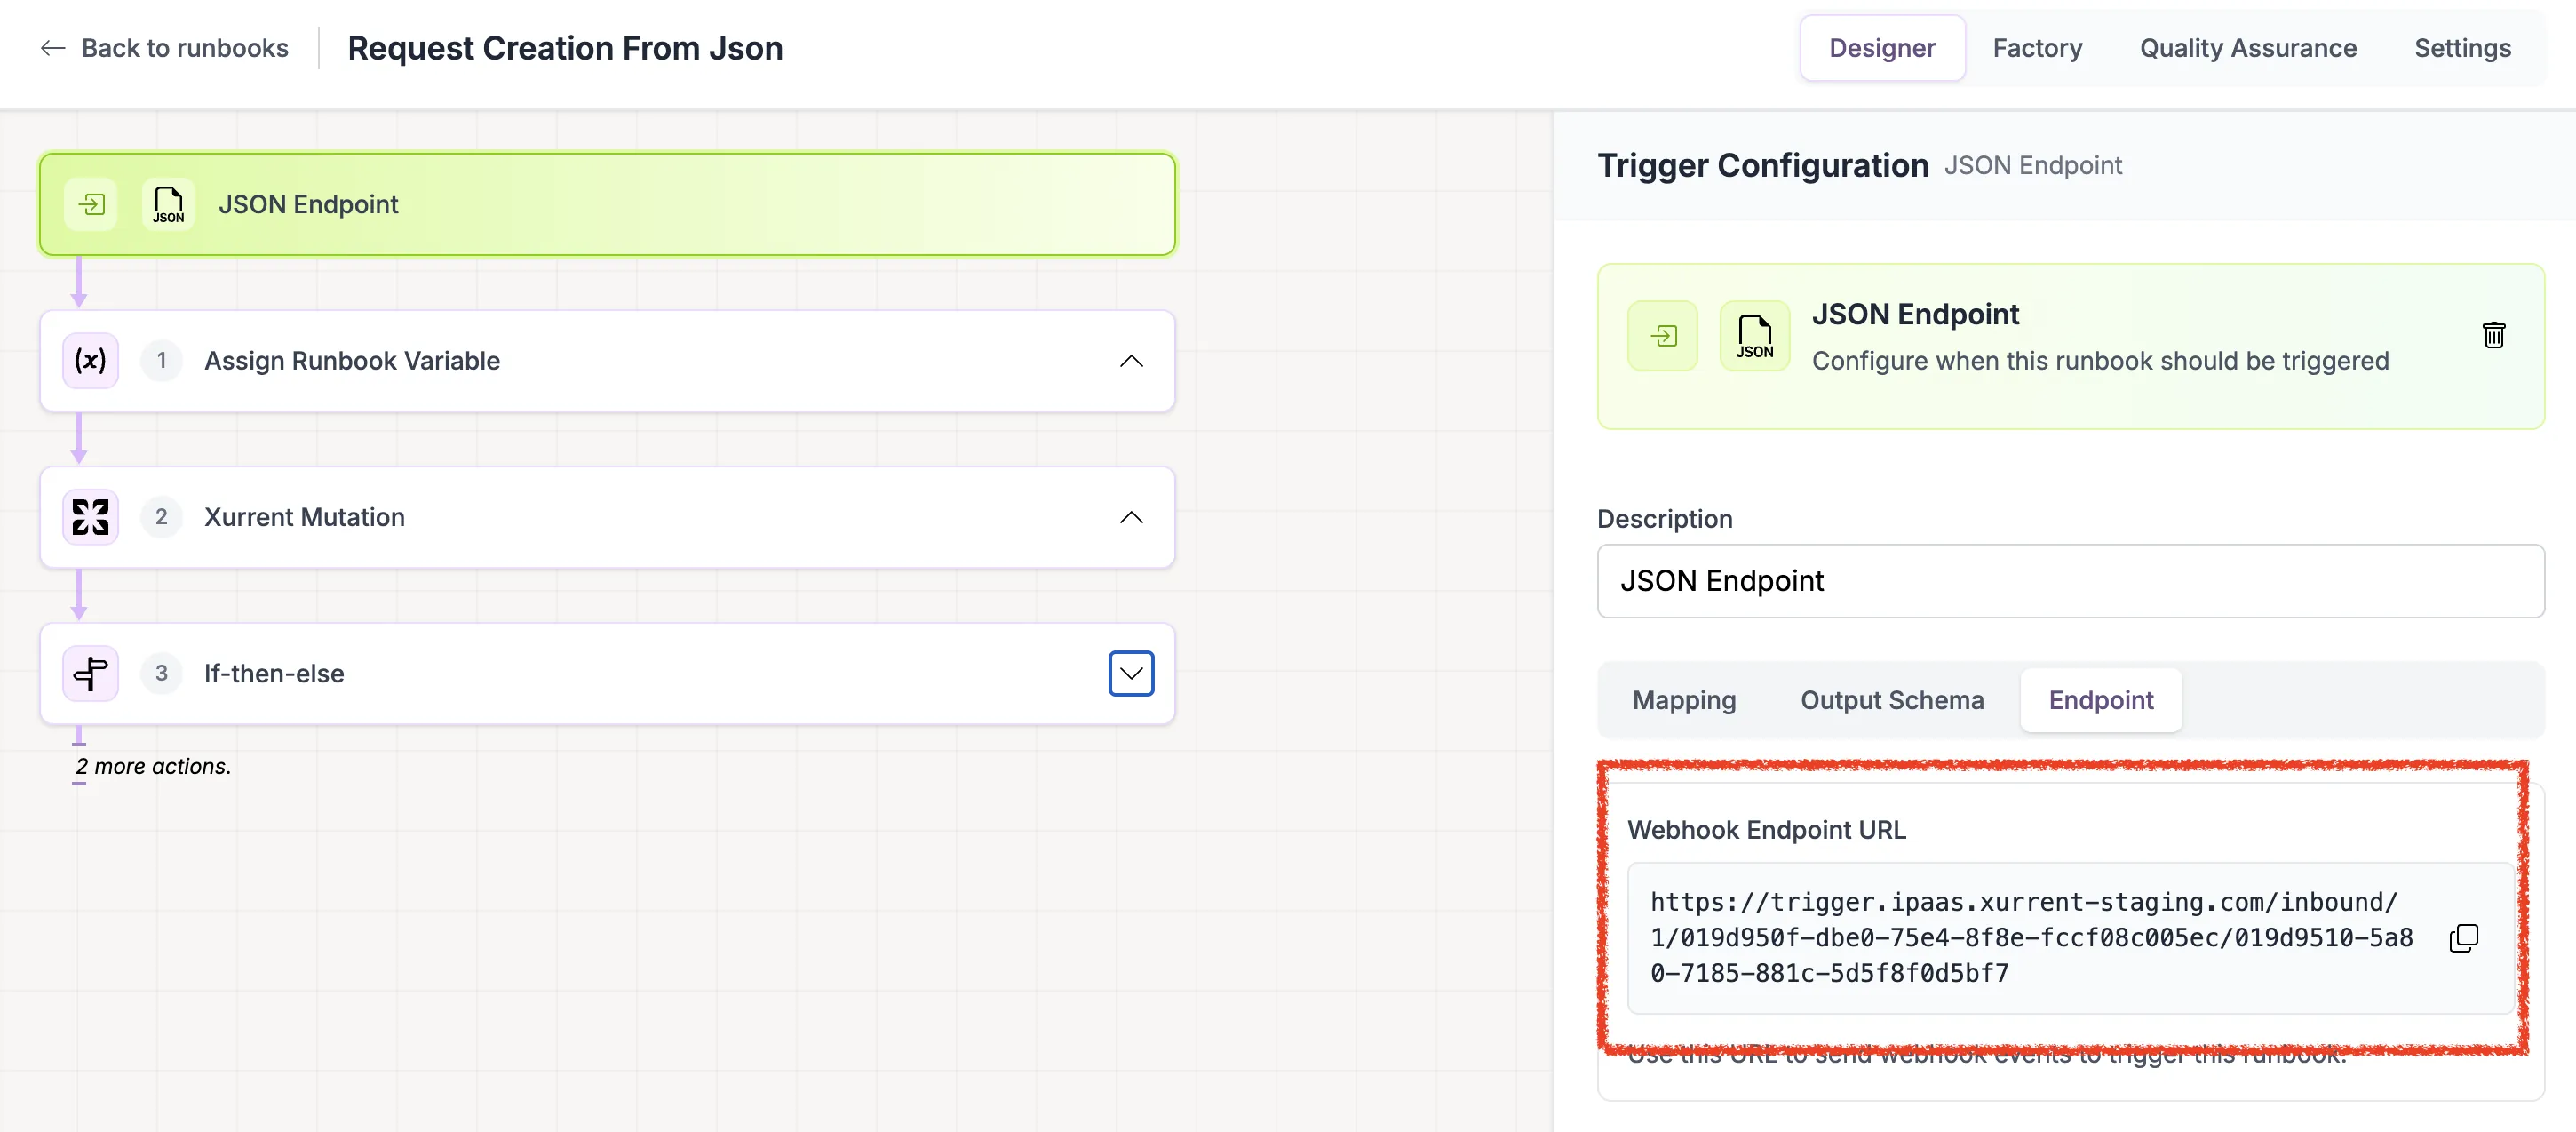
Click on the JSON Endpoint trigger to open the configuration panel.
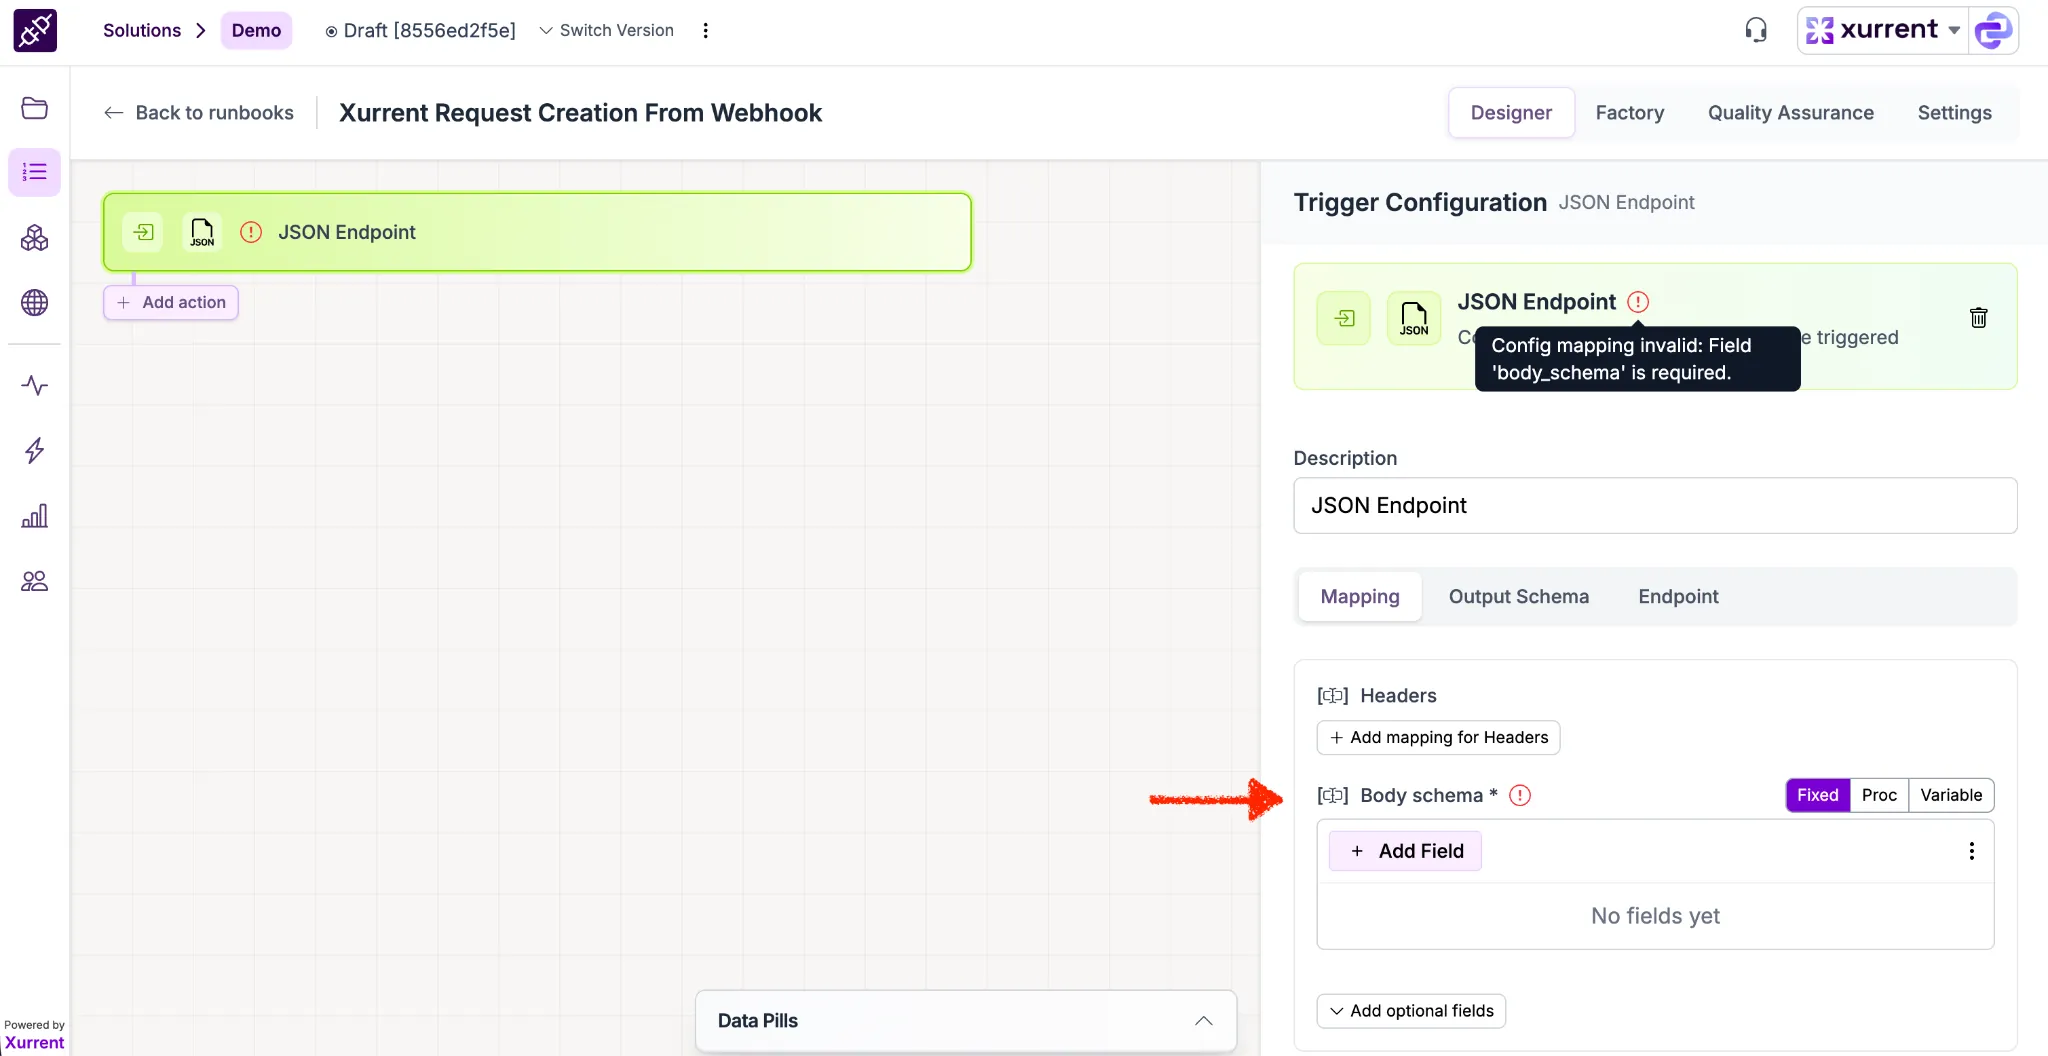
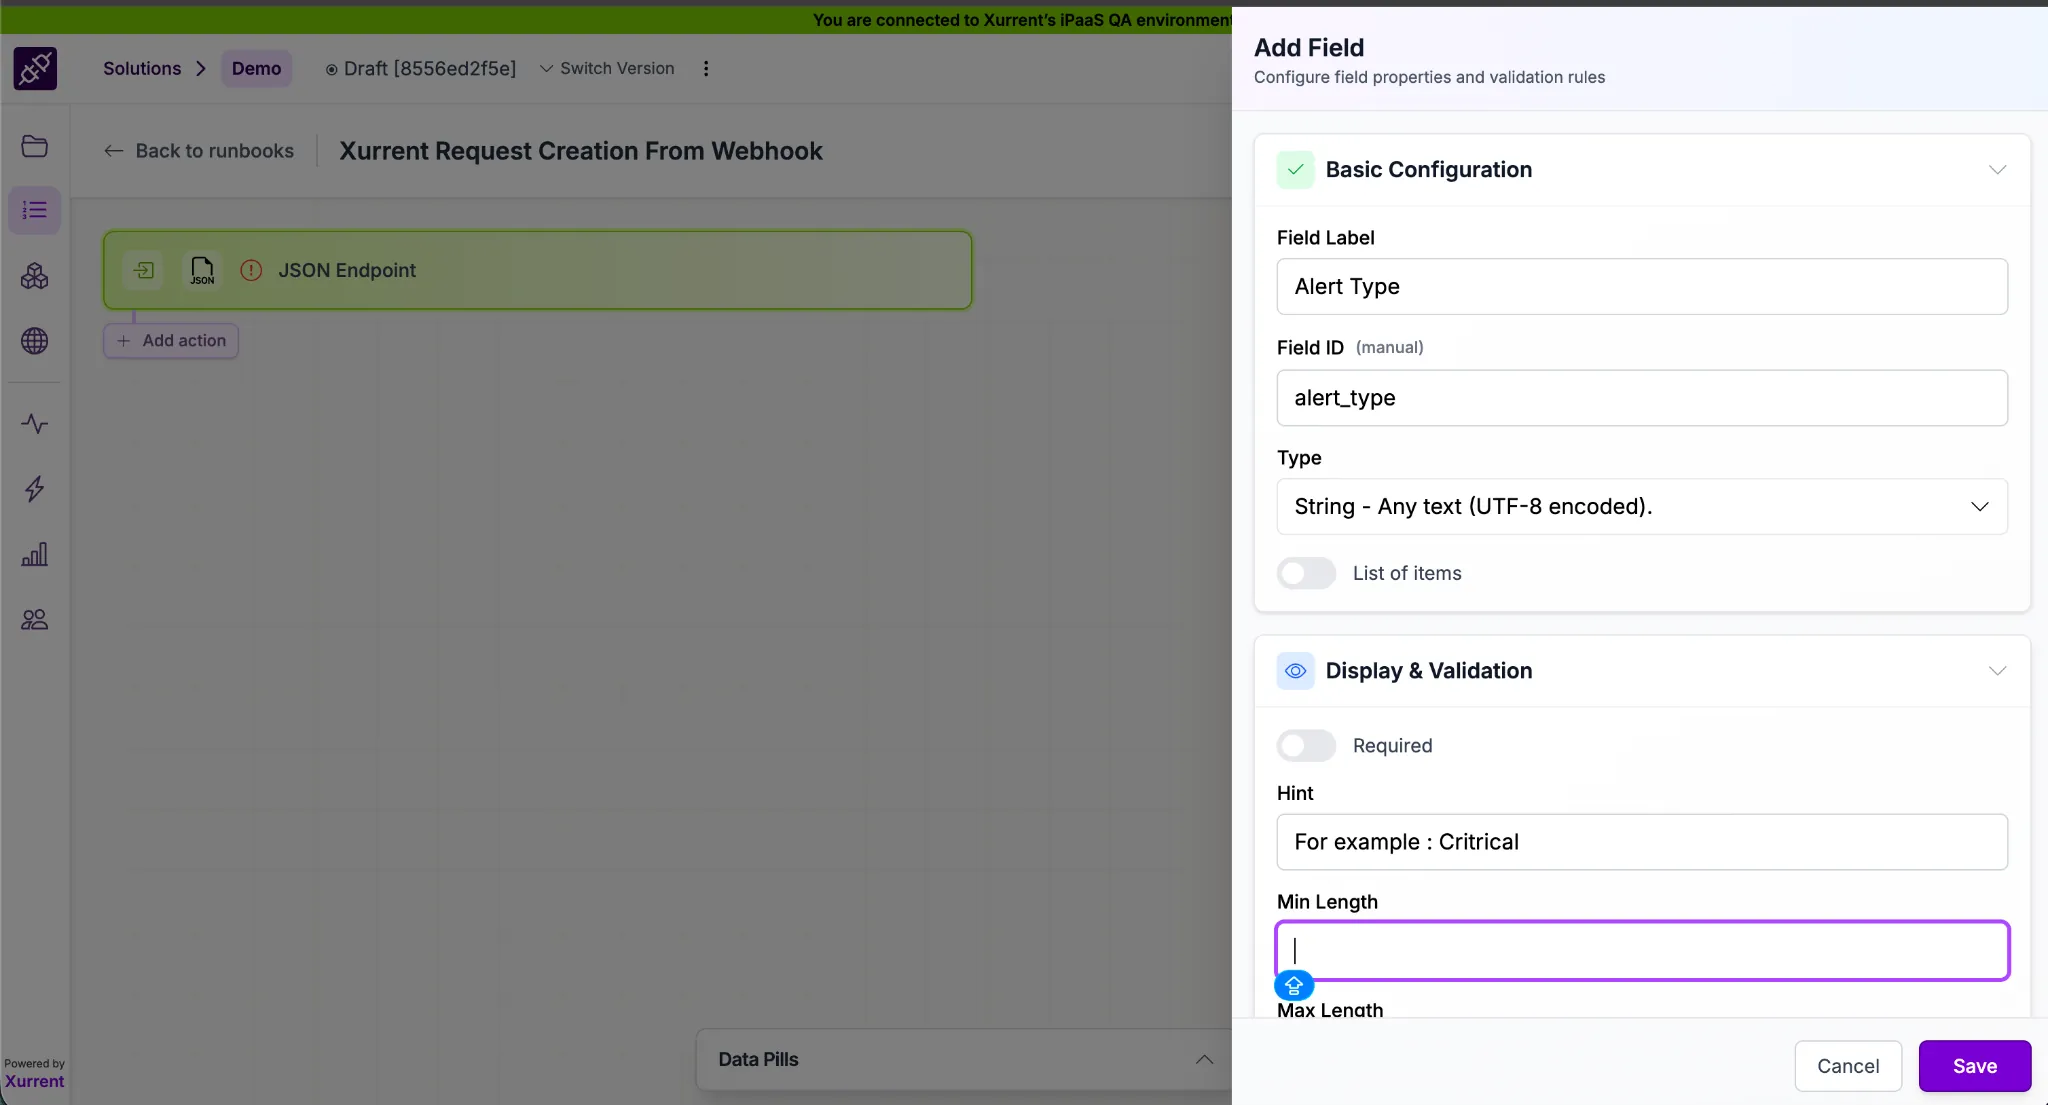
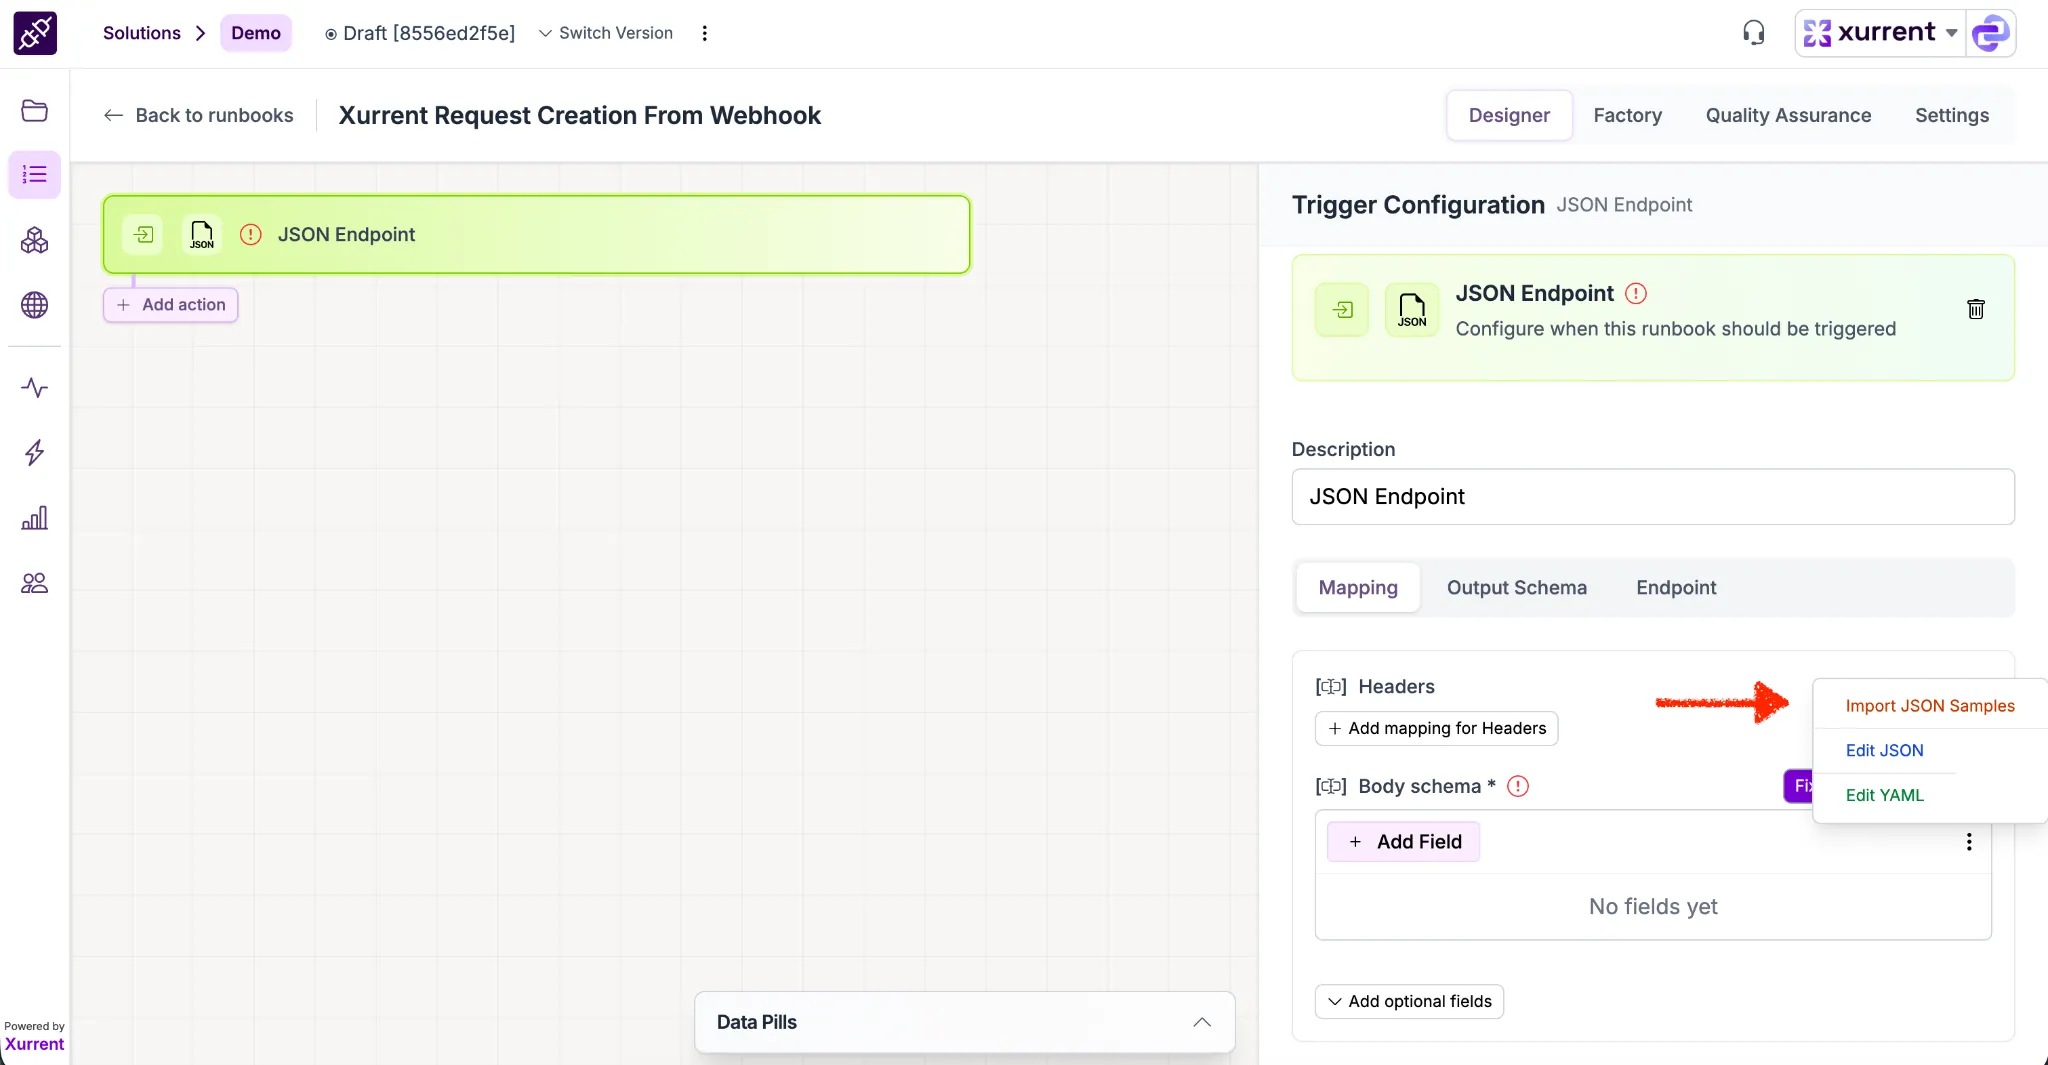
The Body Schema is mandatory — it defines the structure of the incoming webhook payload.
✅ You will be redirected to the YAML schema view
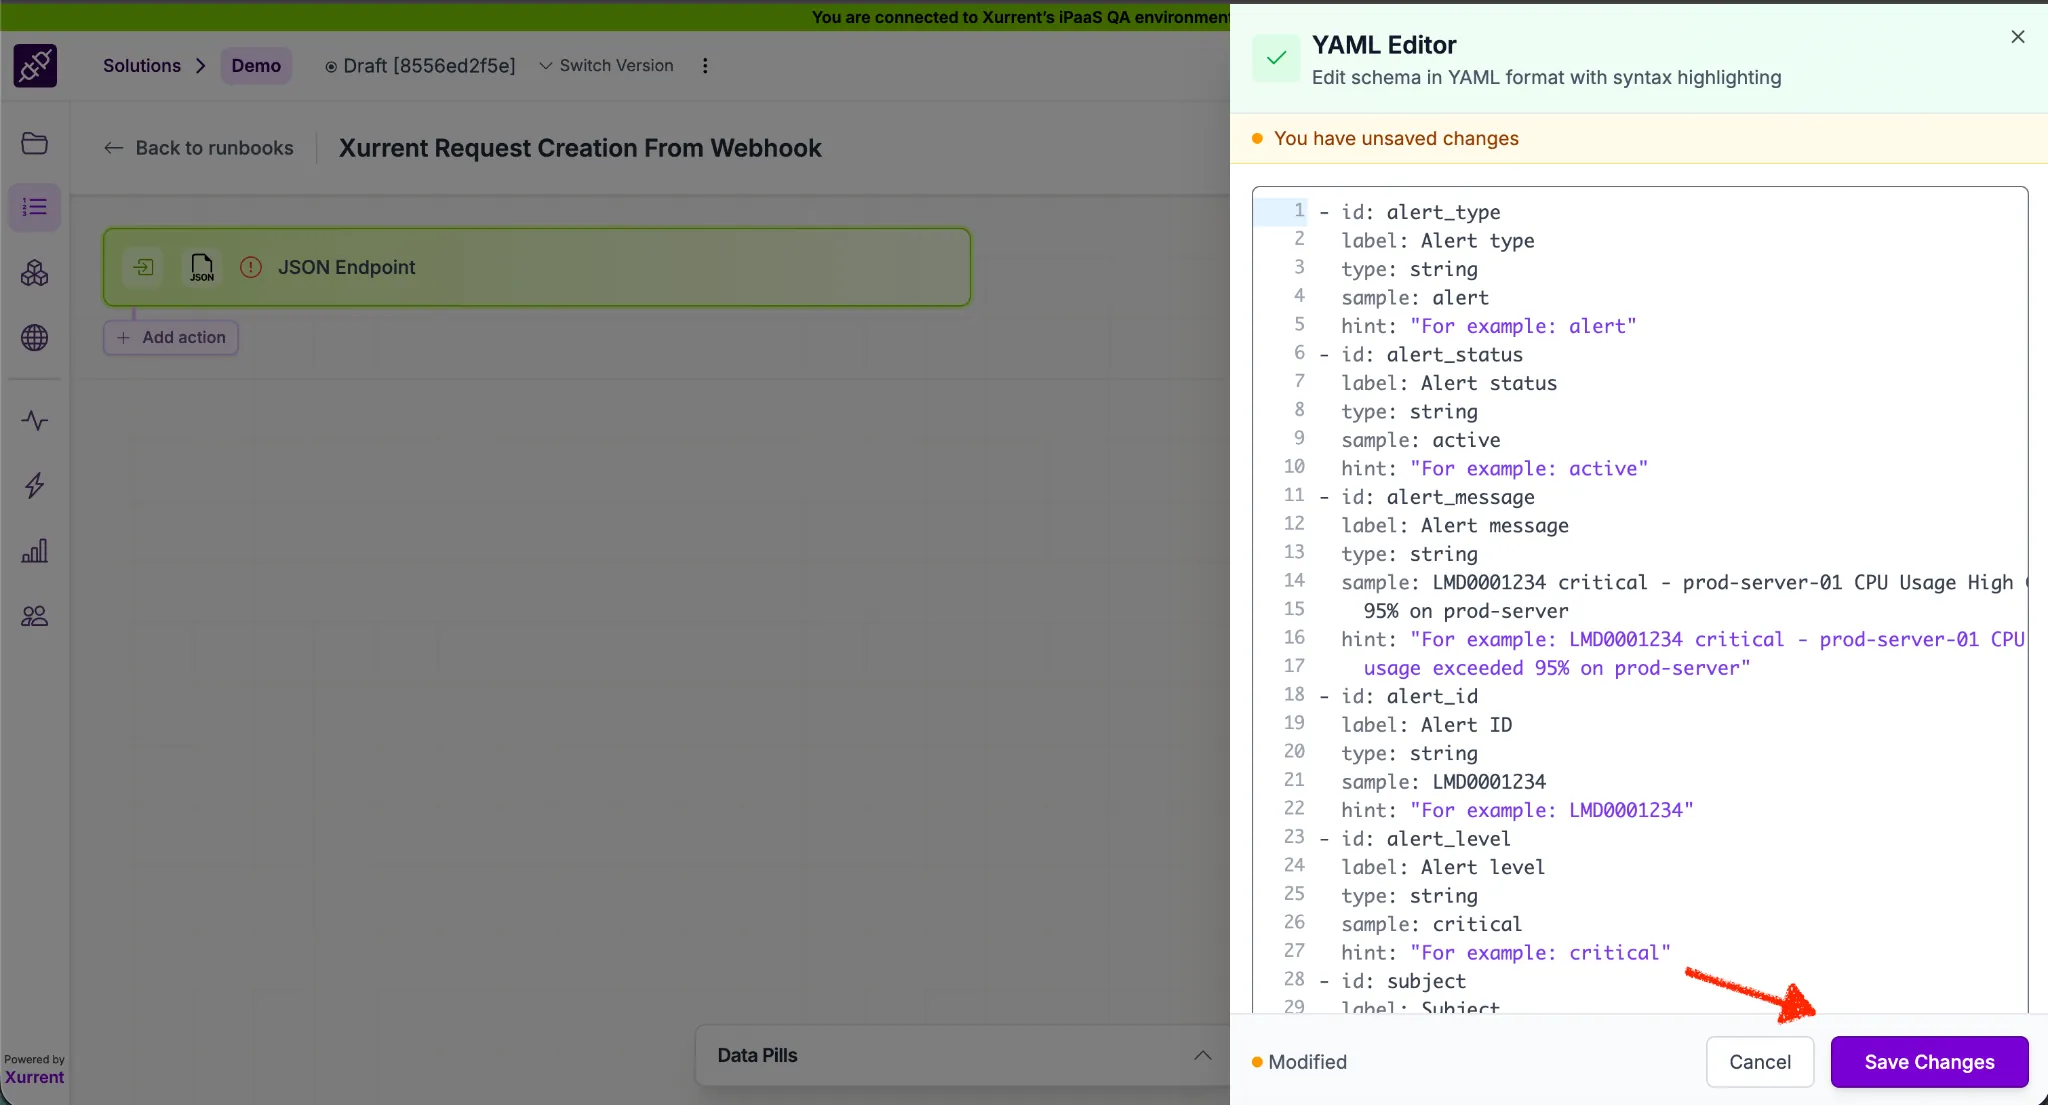
✅ If no errors are present:
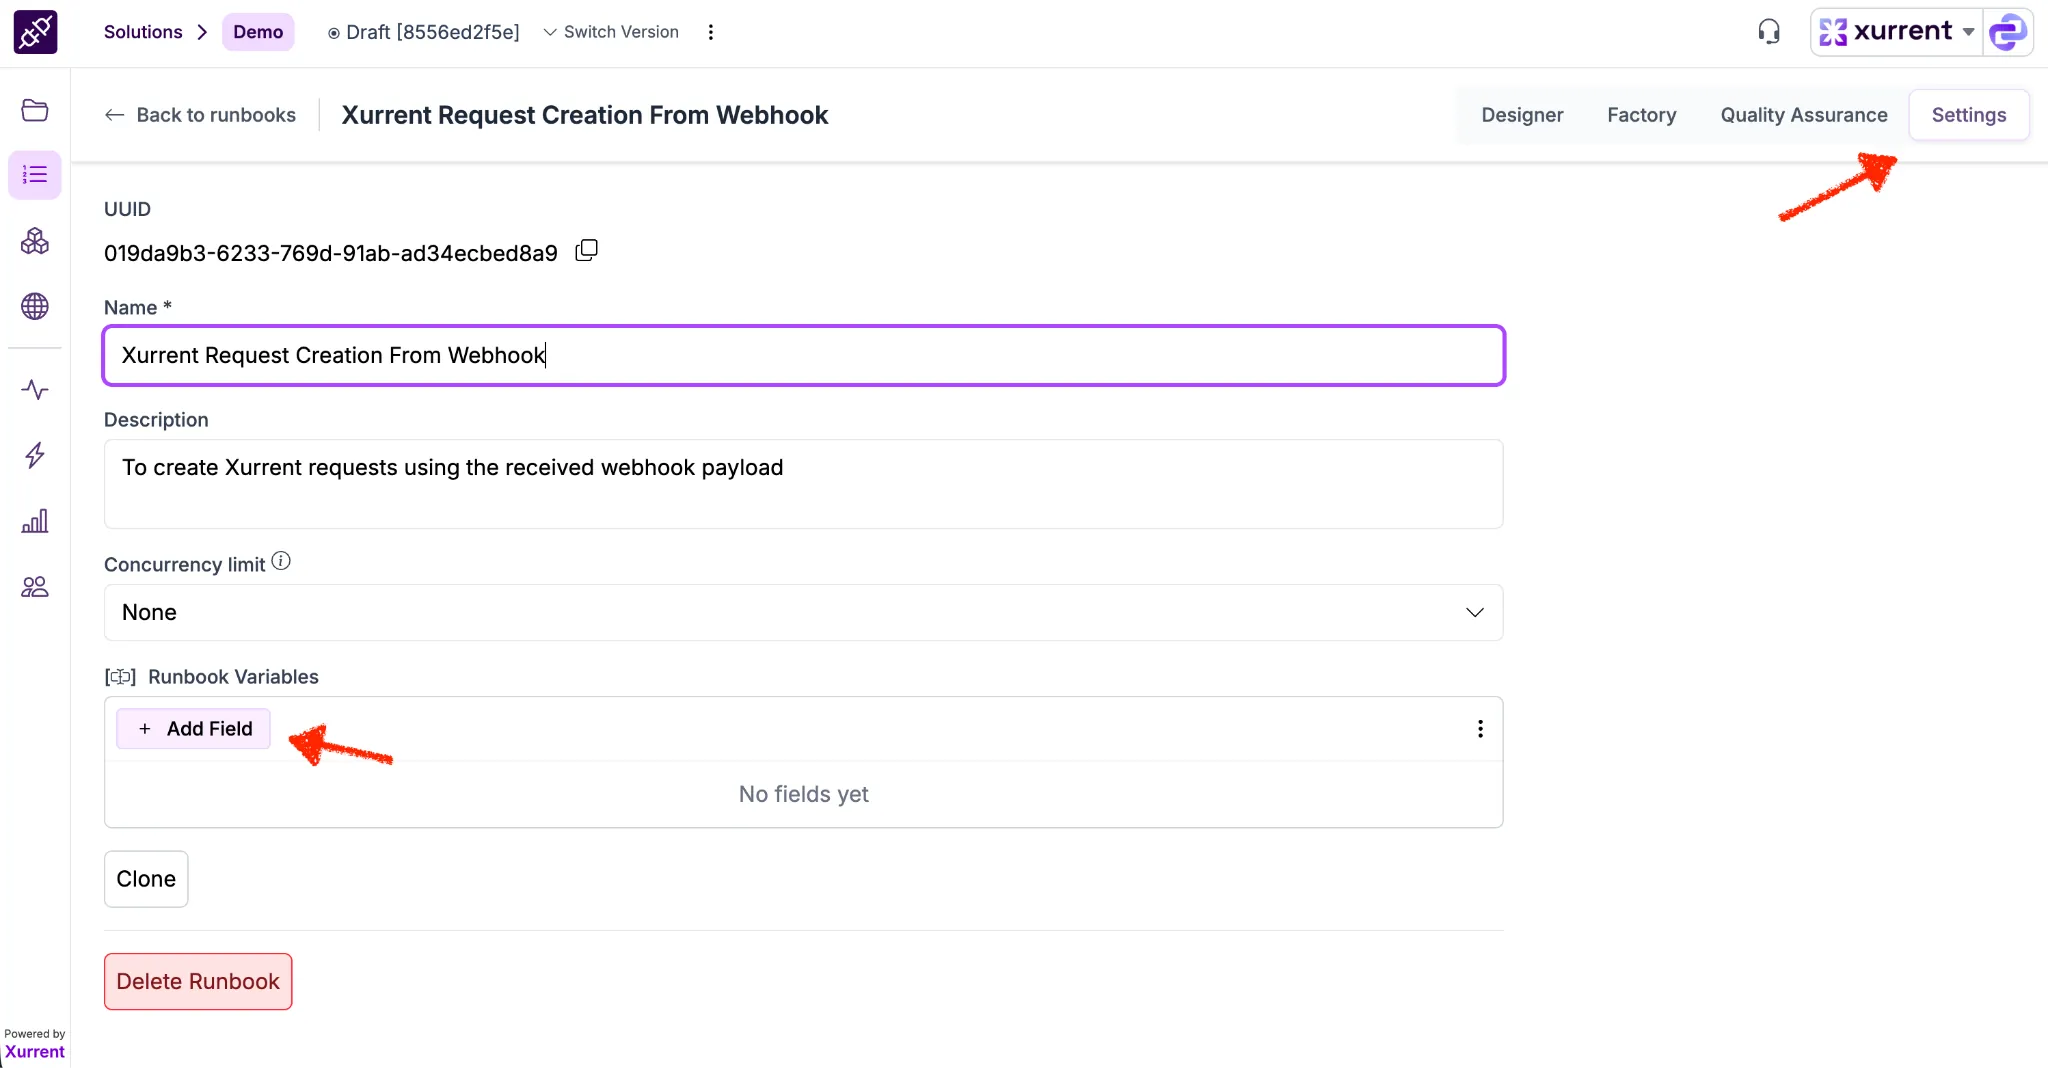
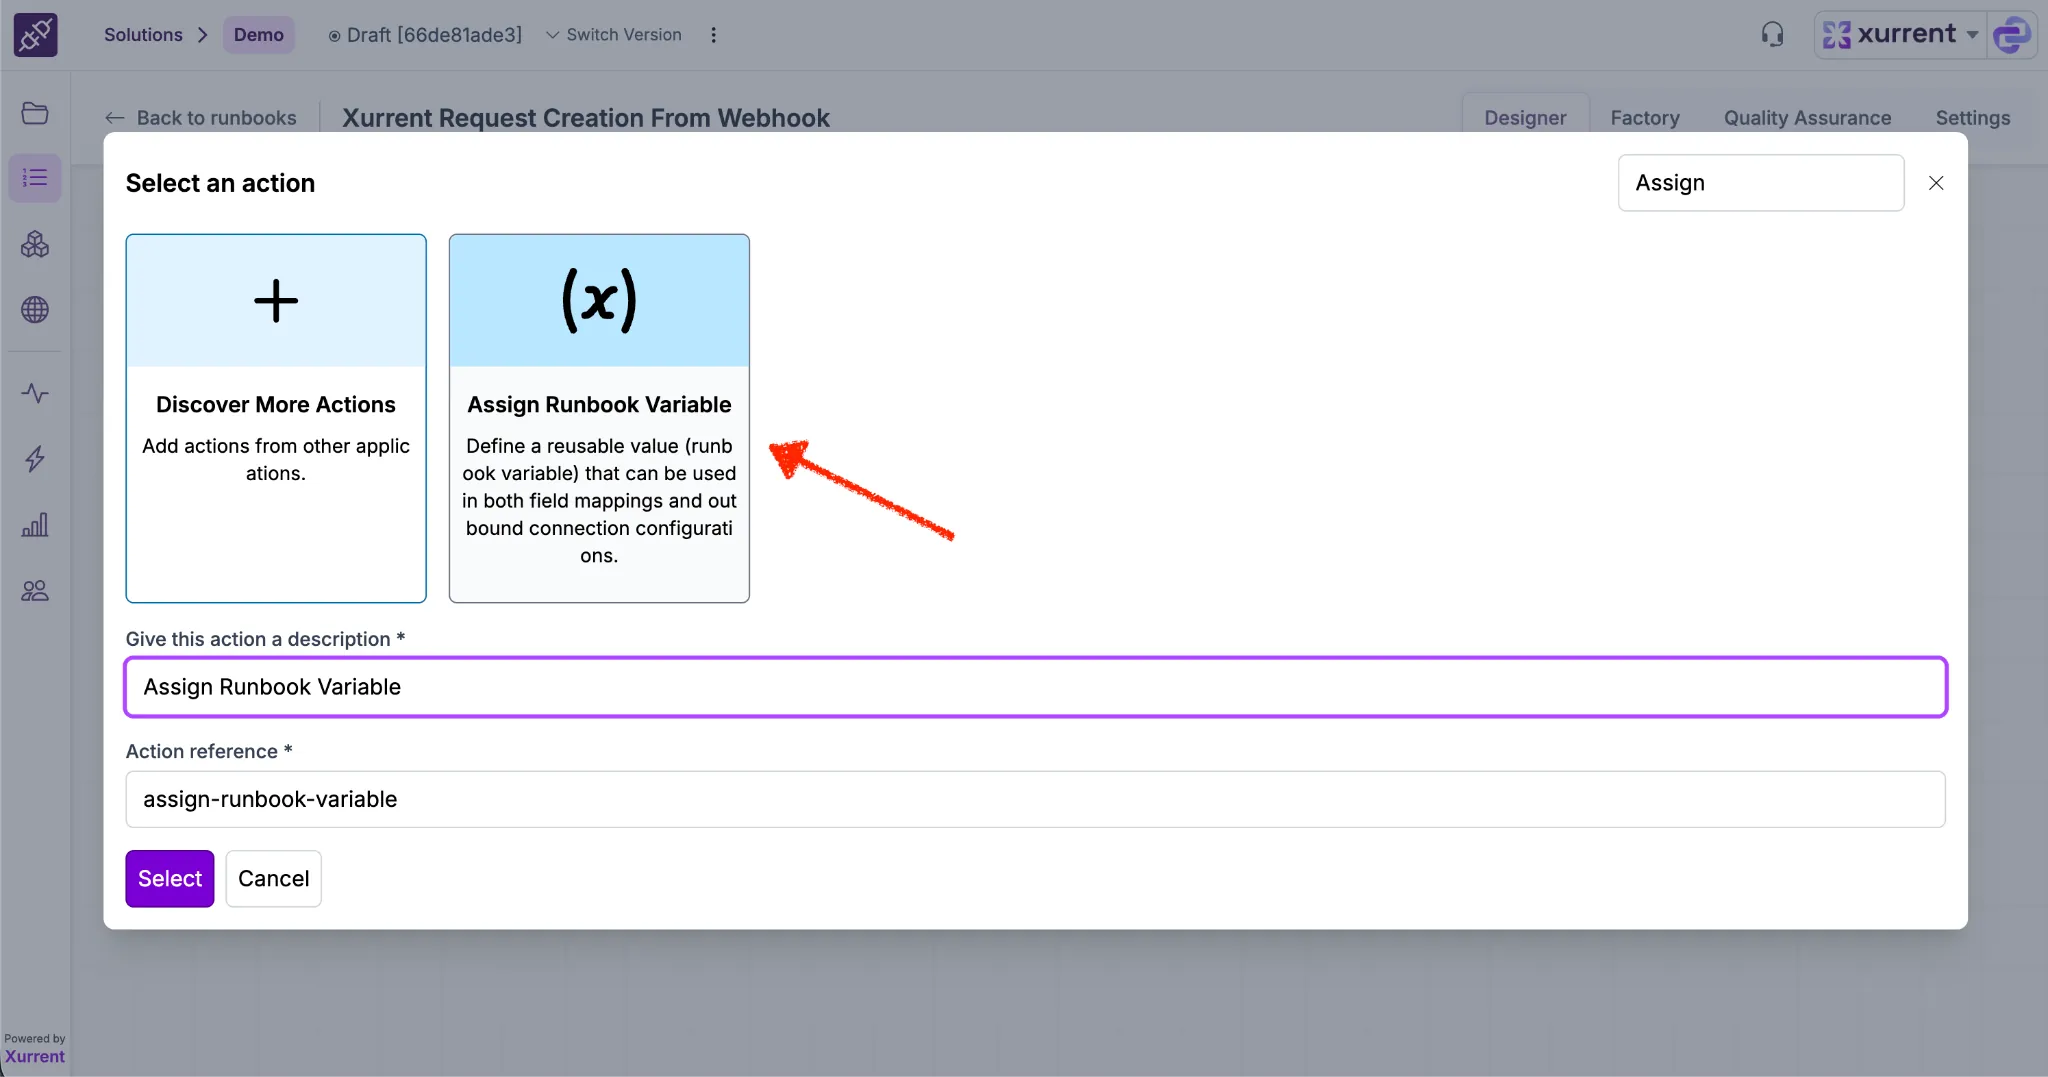
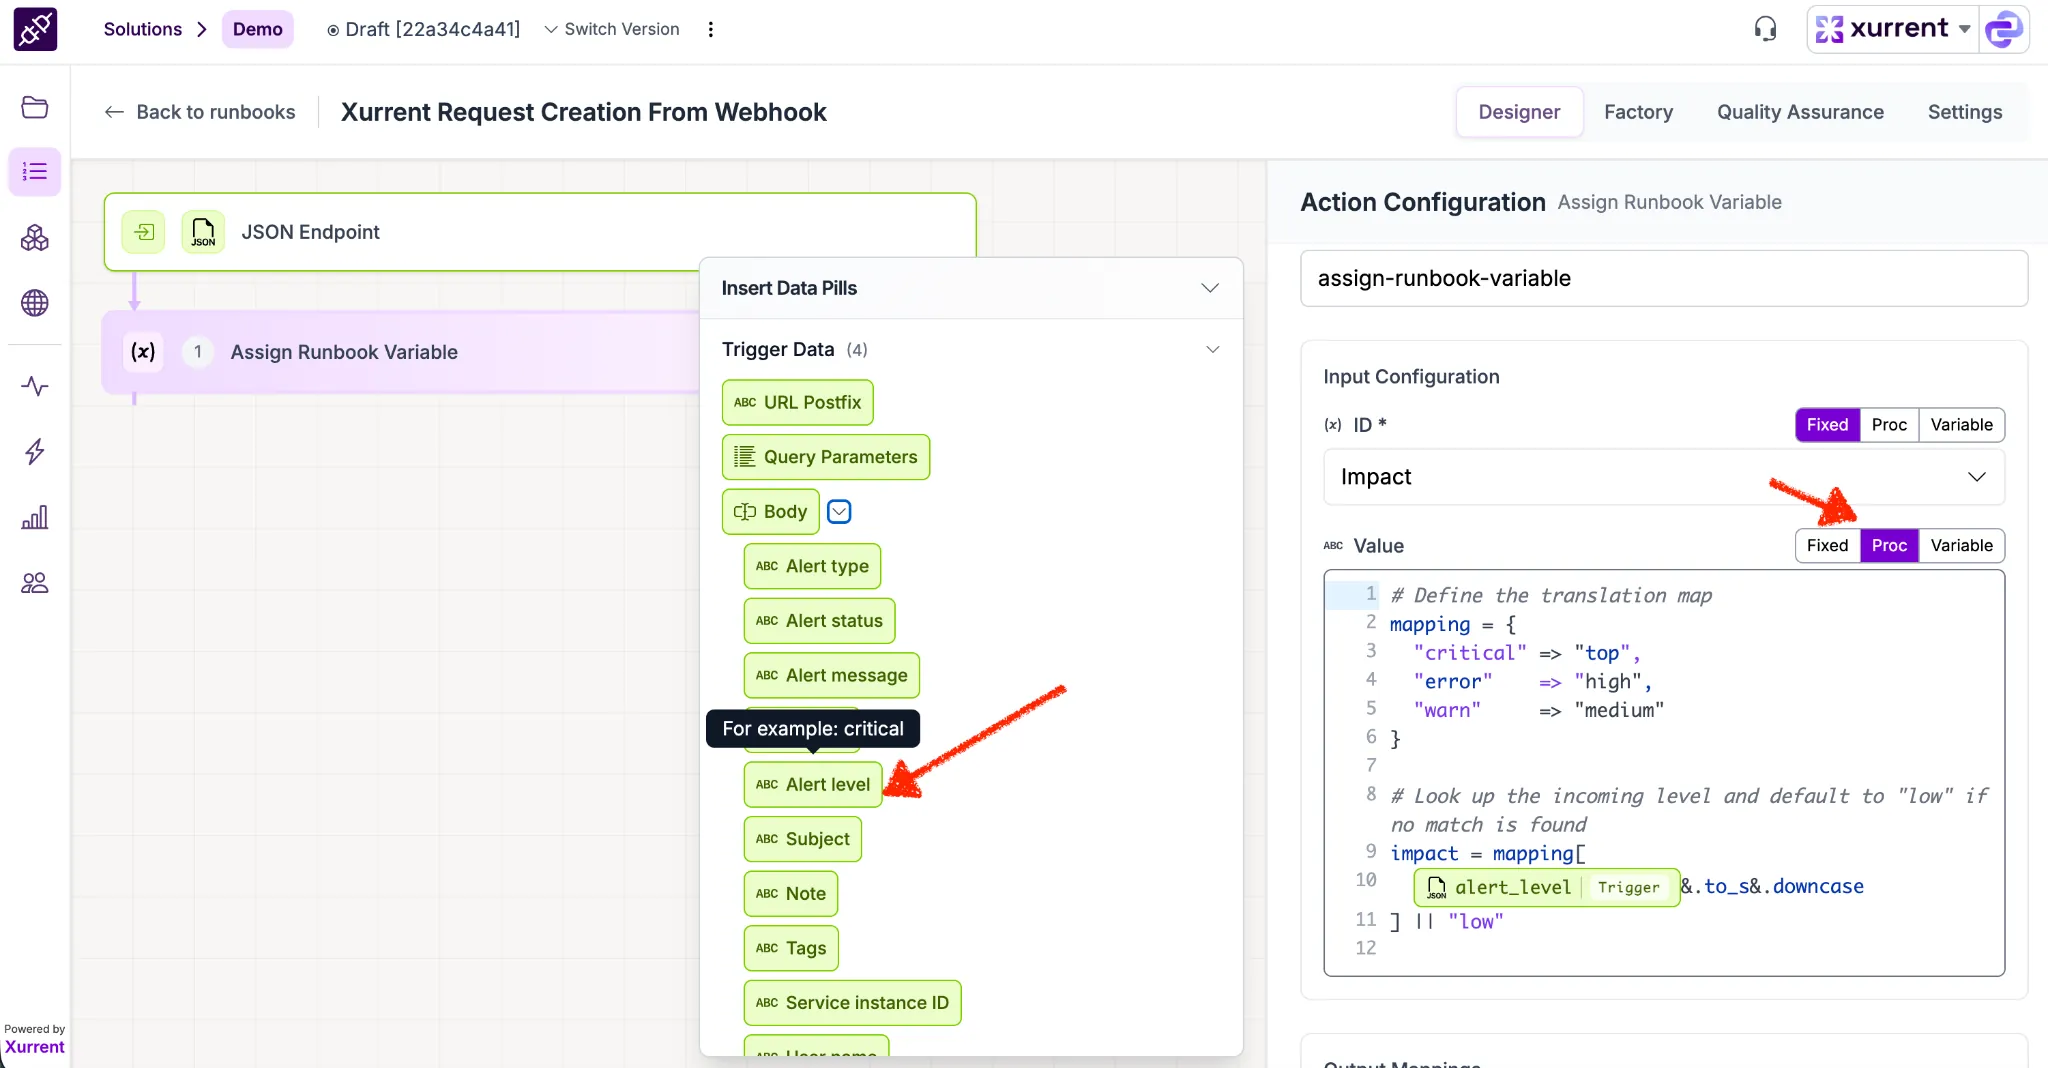
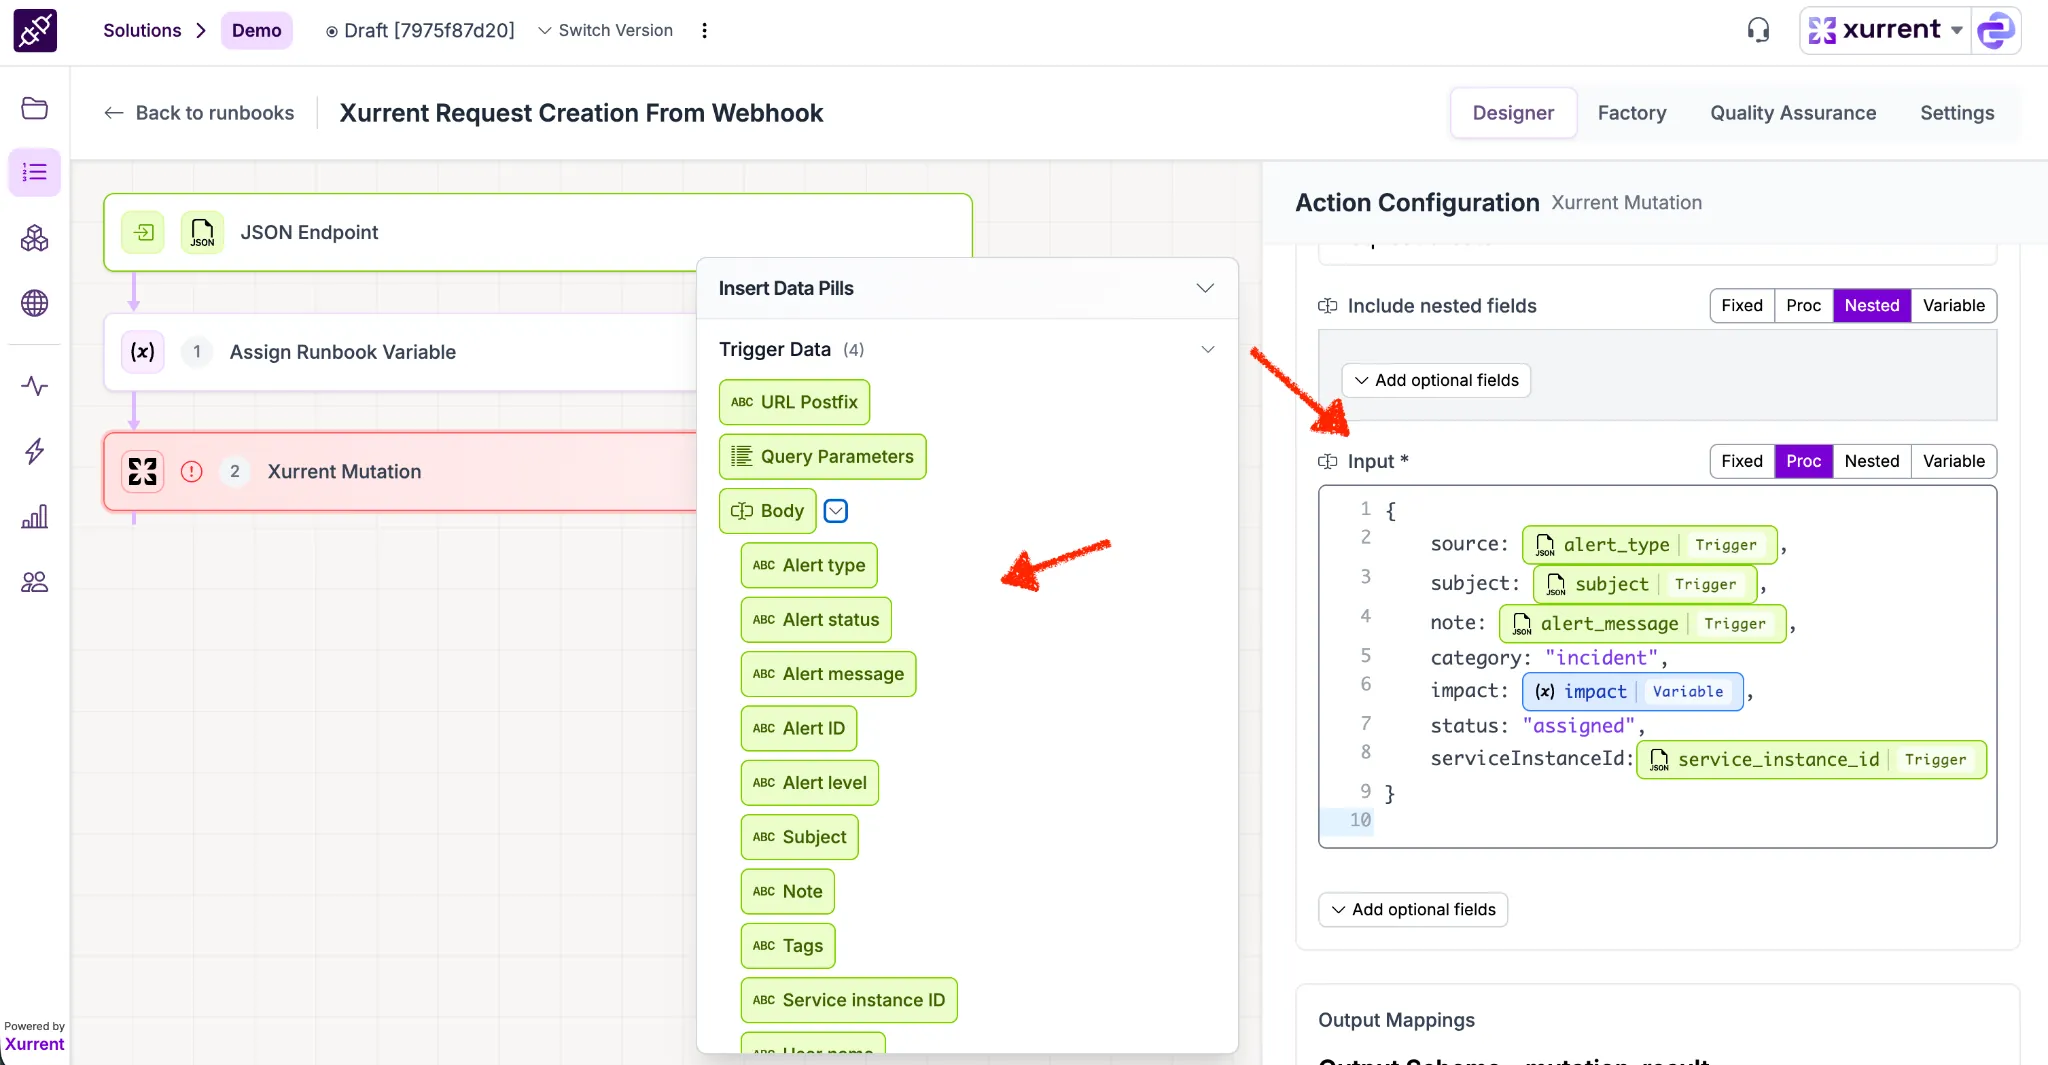
To transform incoming data (like "warn") into specific system values (like "medium"), you must first declare the variable in your settings and then define the logic in the designer.
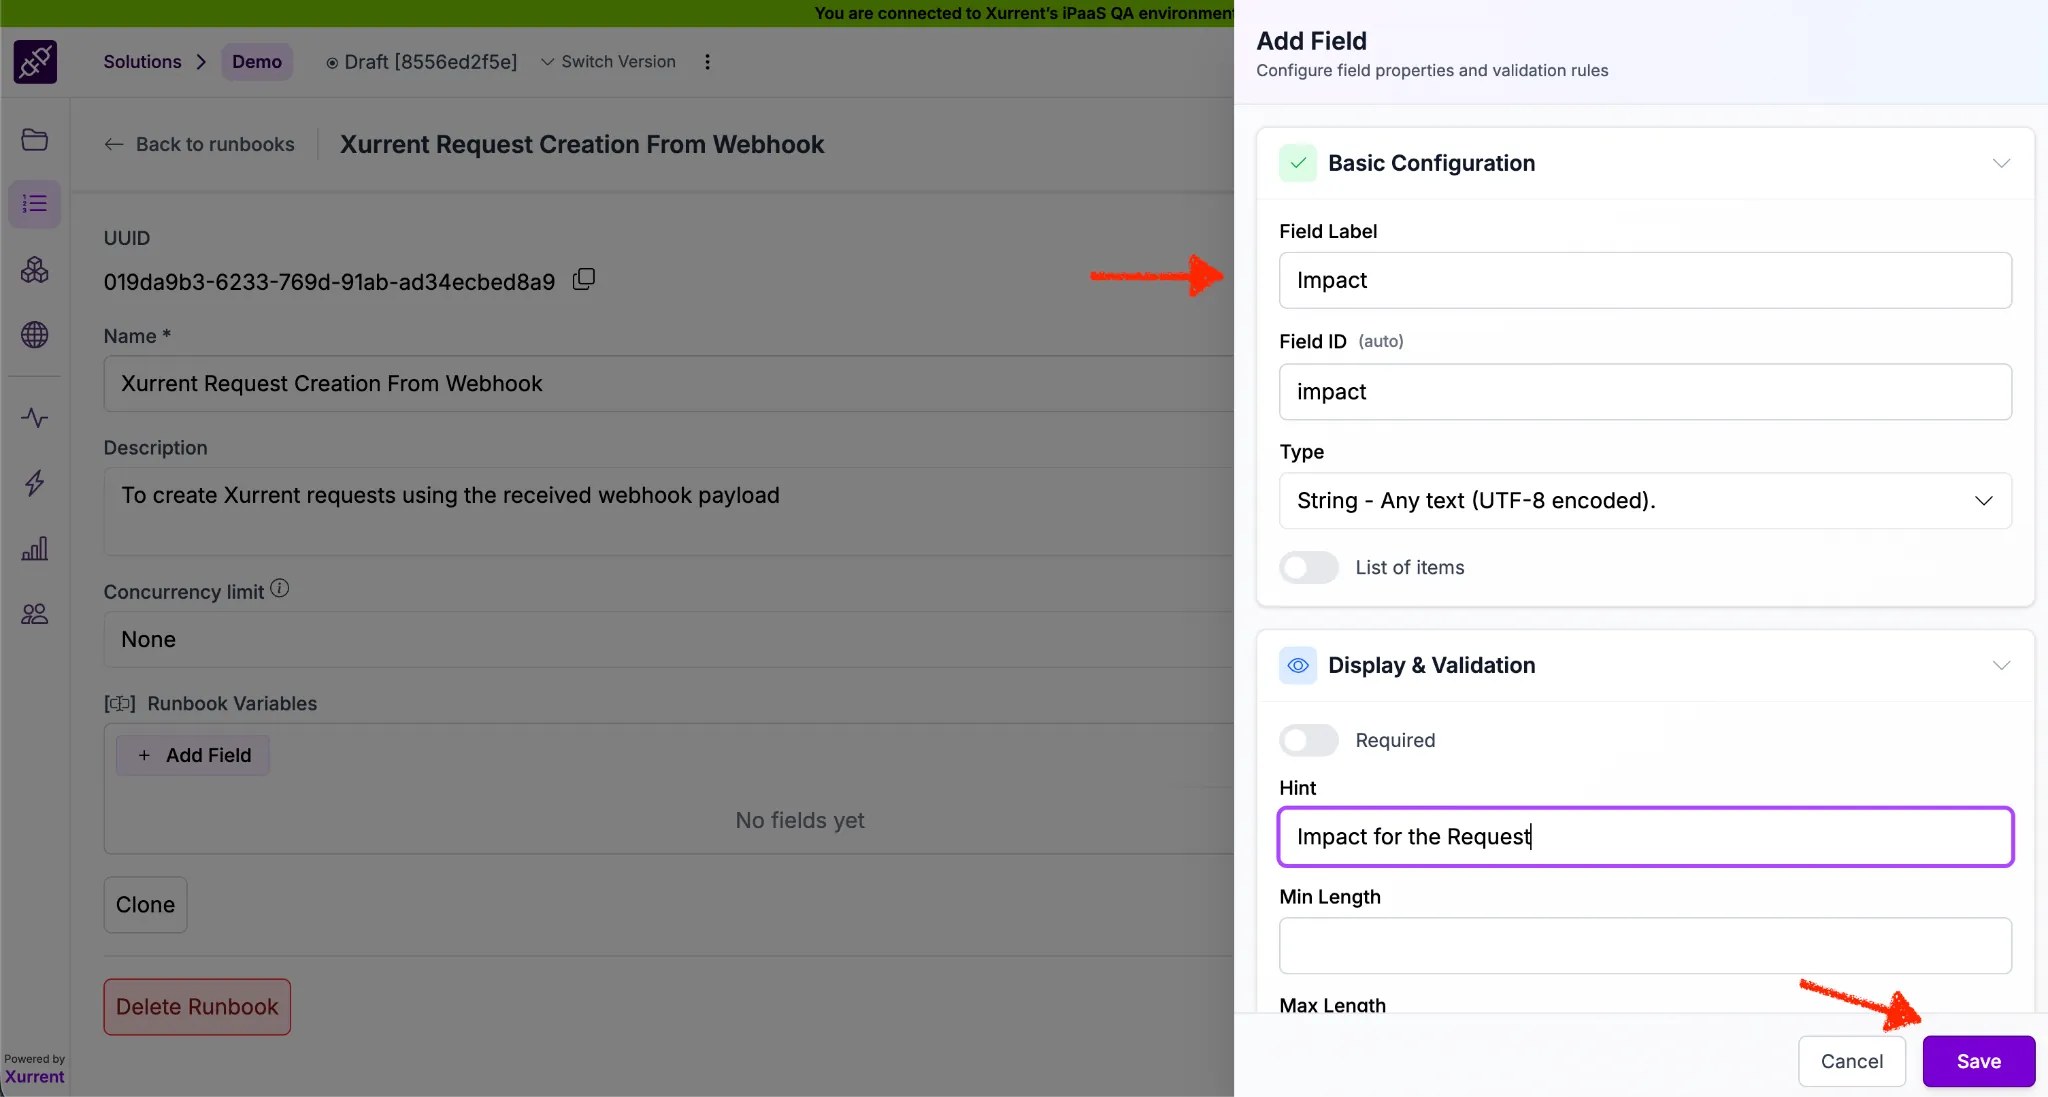
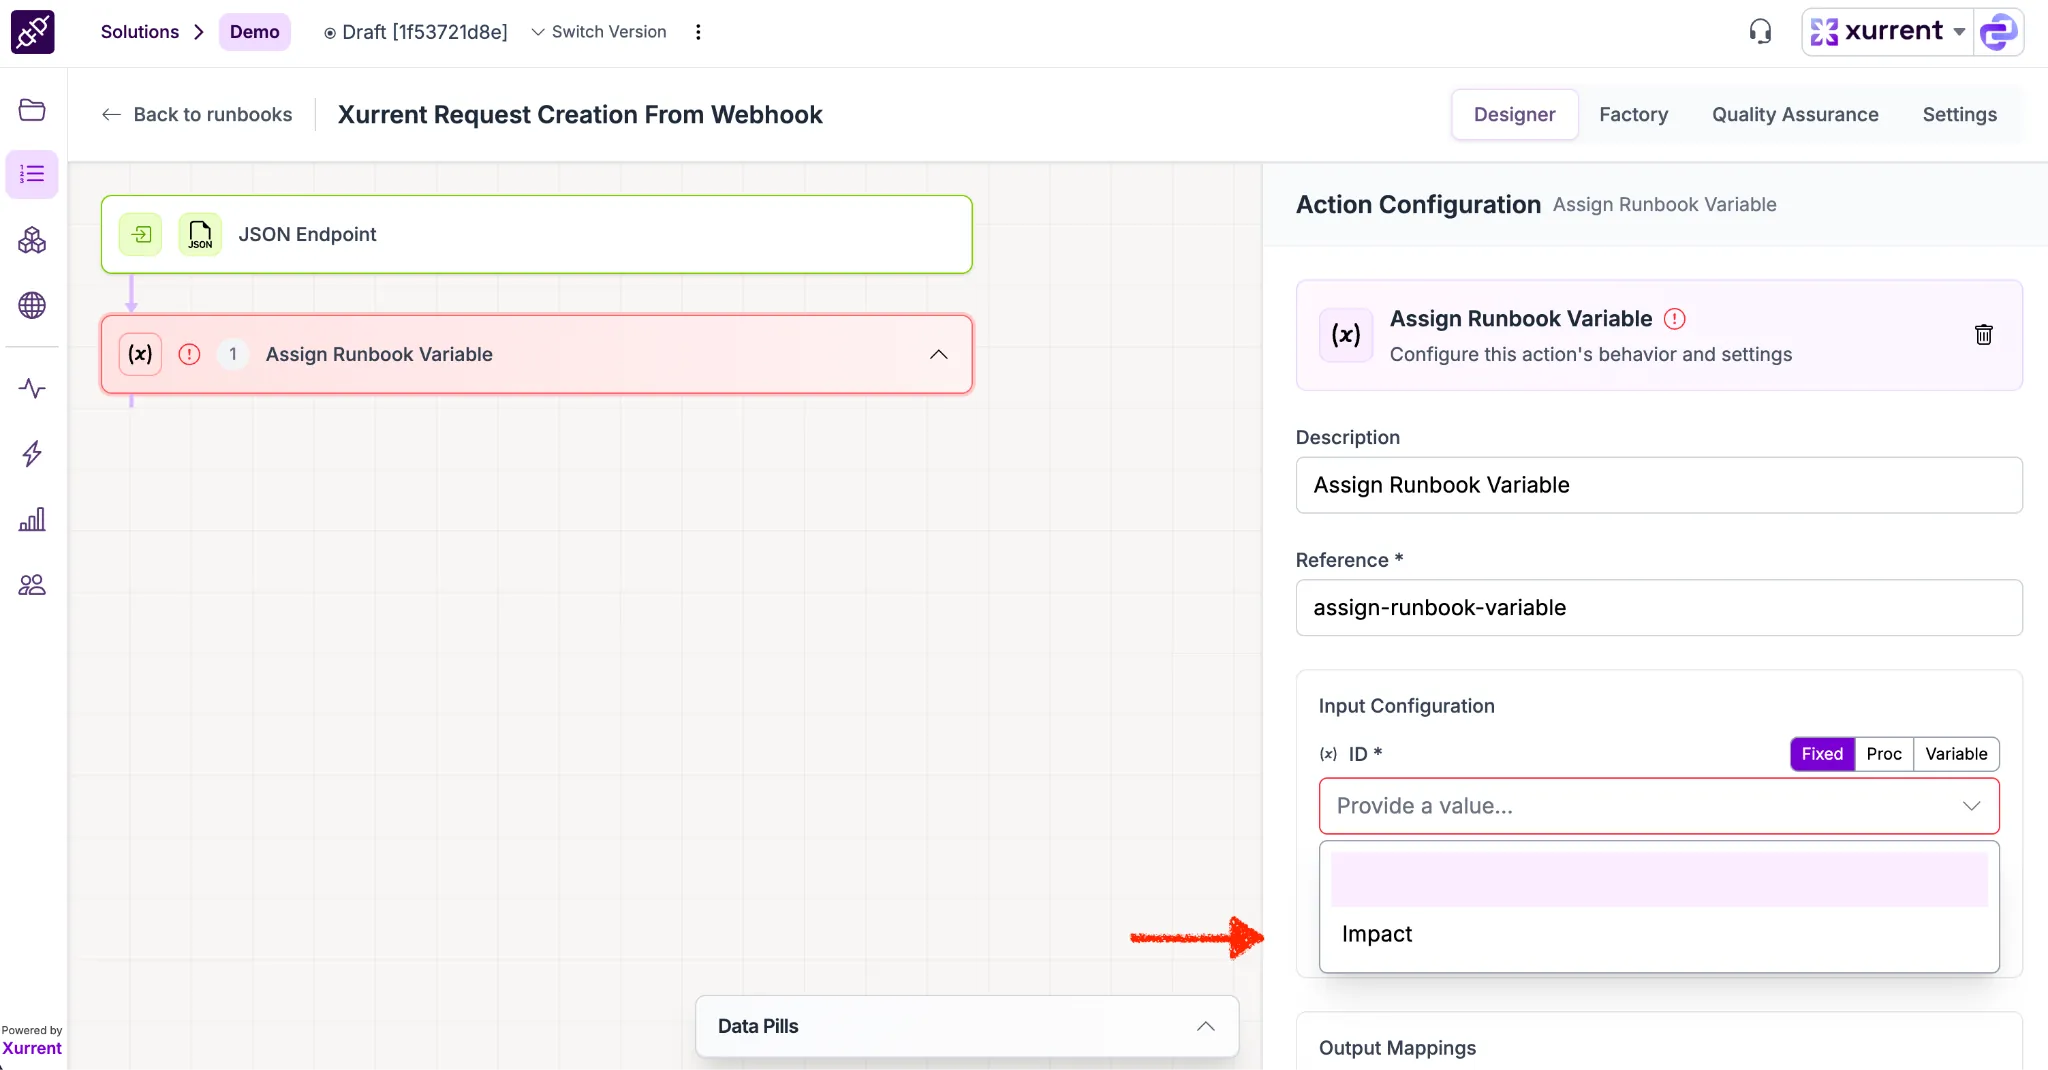
✅ Result: You now have a custom Datapill named impact that you can drag-and-drop into any subsequent action (like a Xurrent Mutation) to set the priority dynamically!
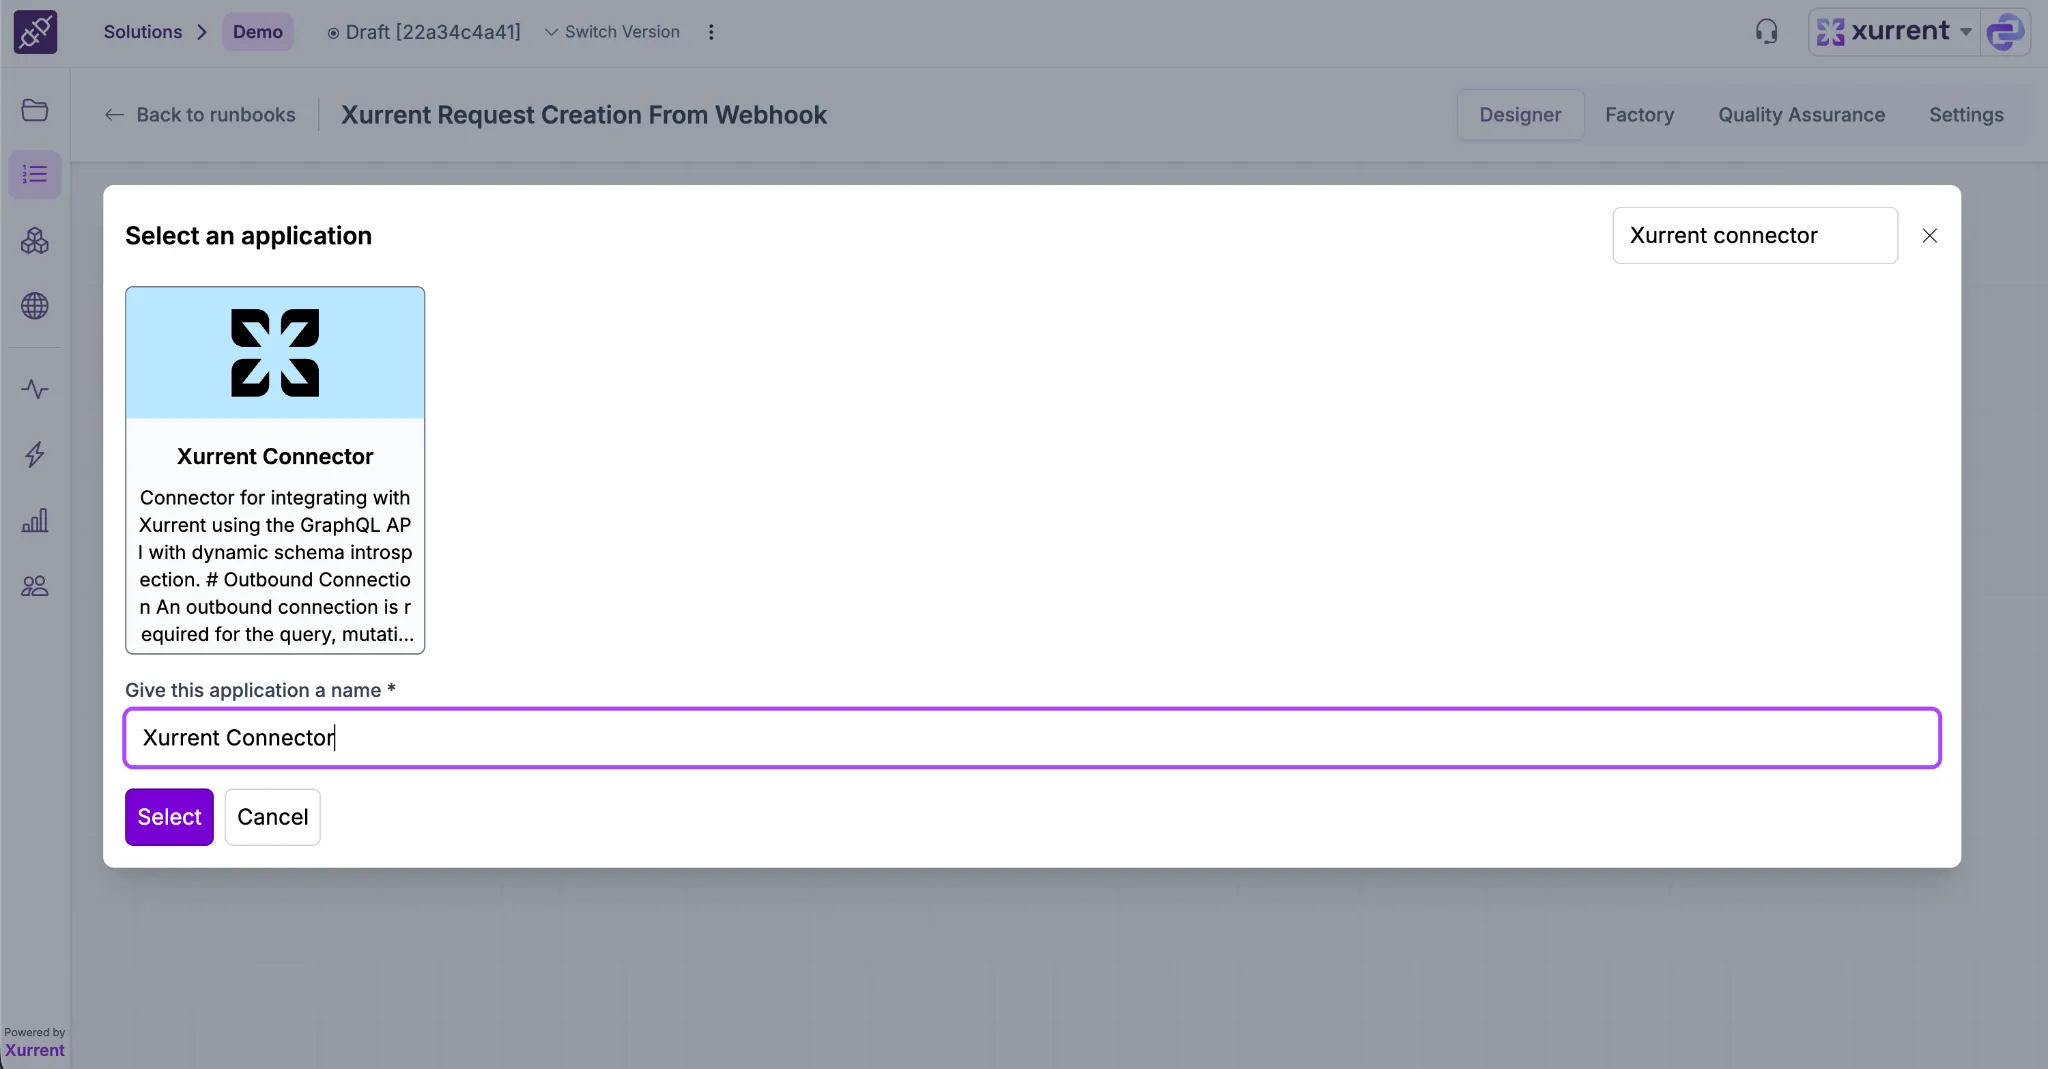
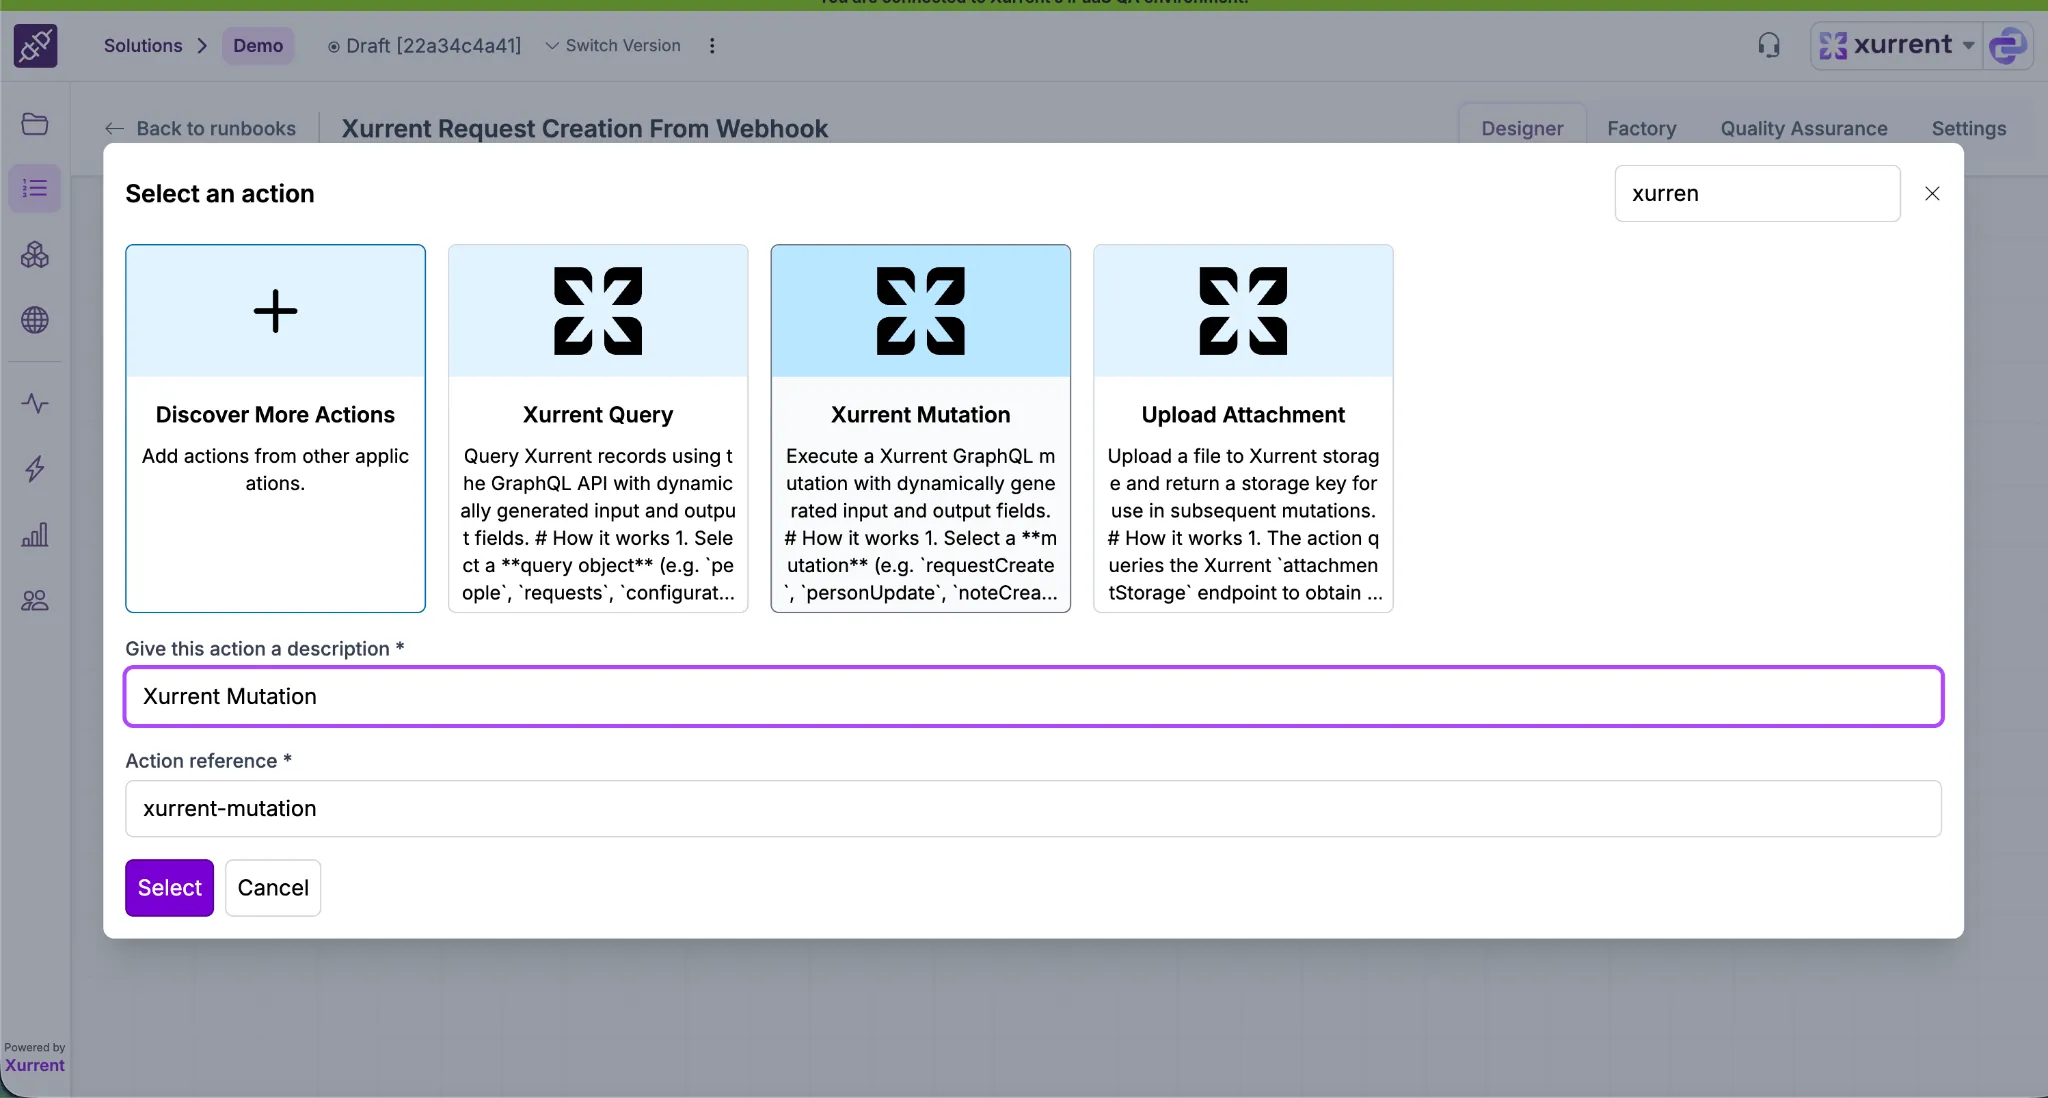
Now that your data is mapped and stored in the impact variable, you will use the Xurrent Connector to build the actual record.
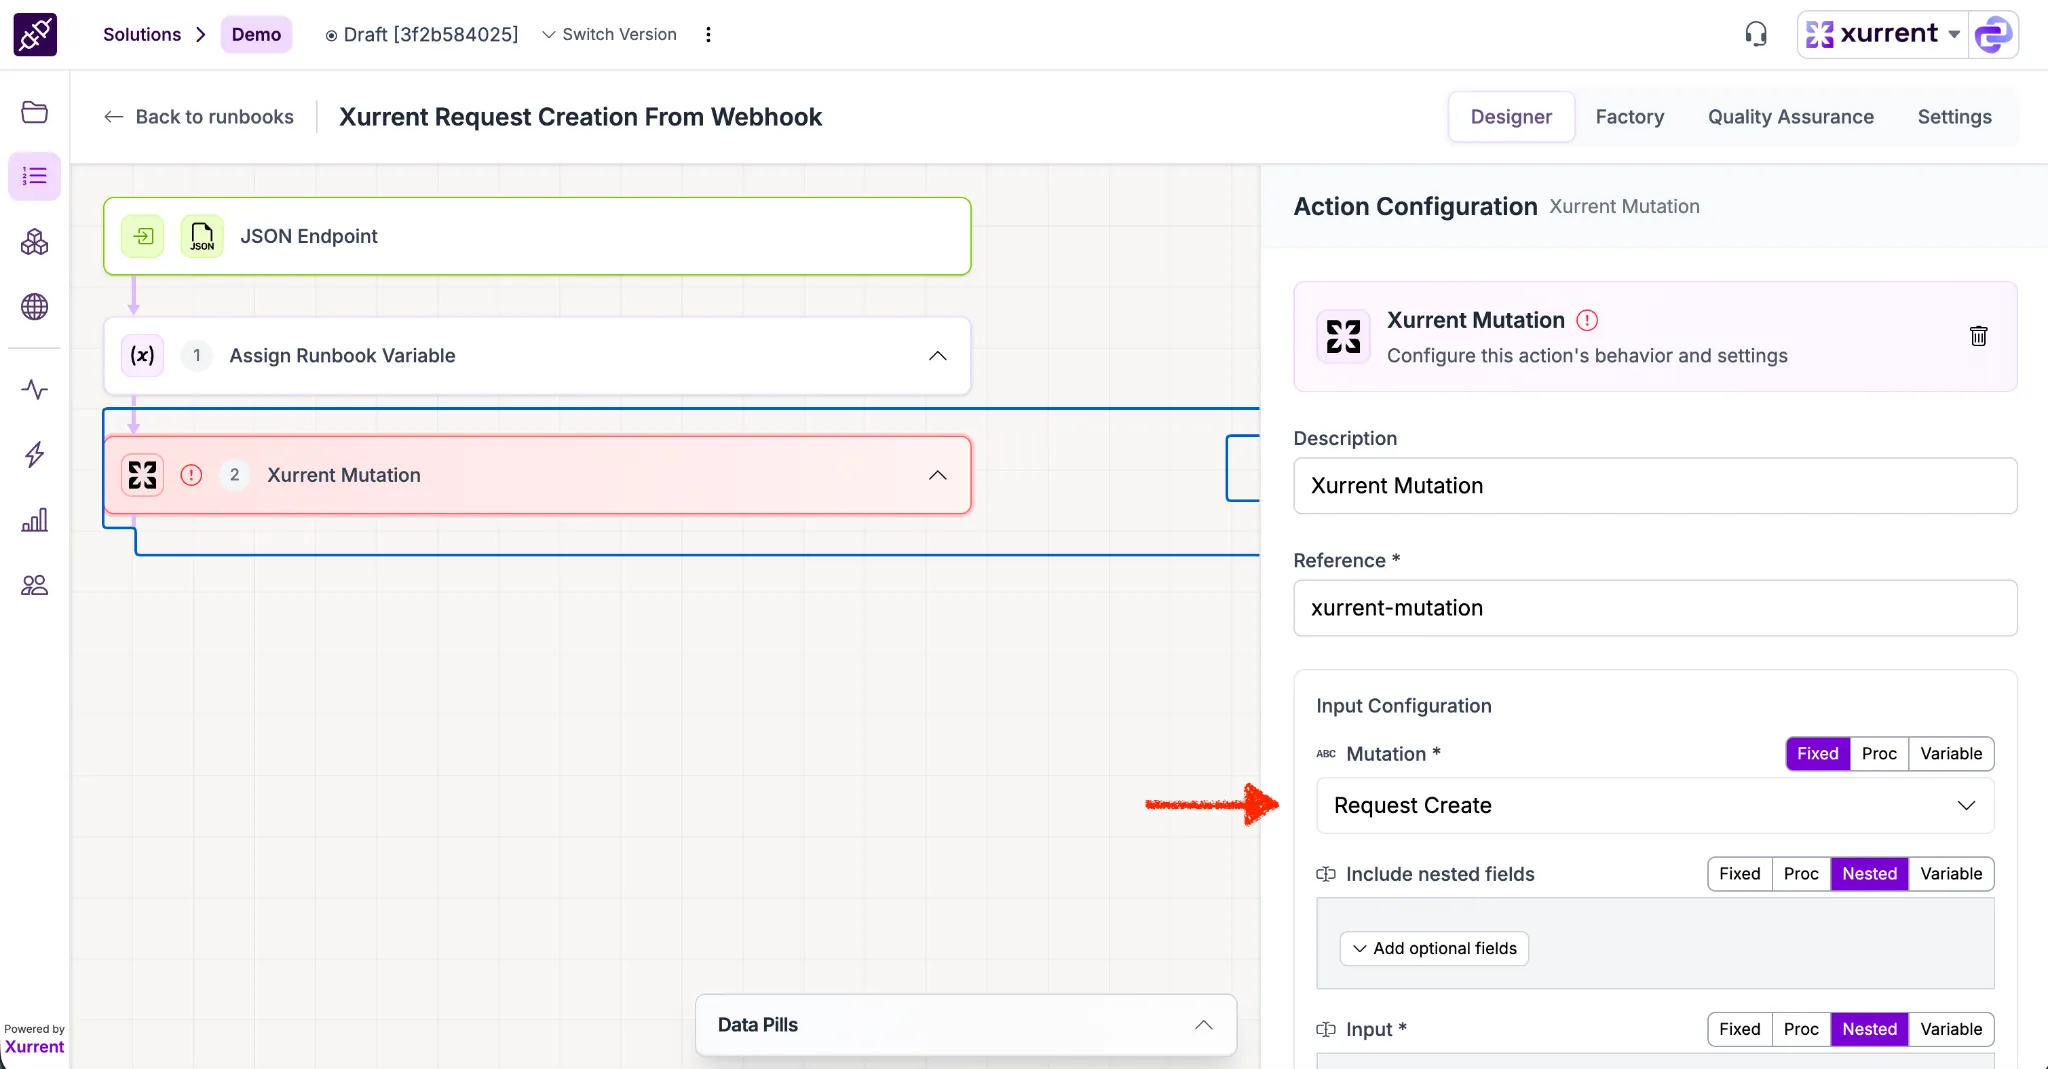
Sample :
✅ Result: Your Runbook is now fully configured to receive an alert, translate the priority logic, and create a structured Incident in Xurrent.
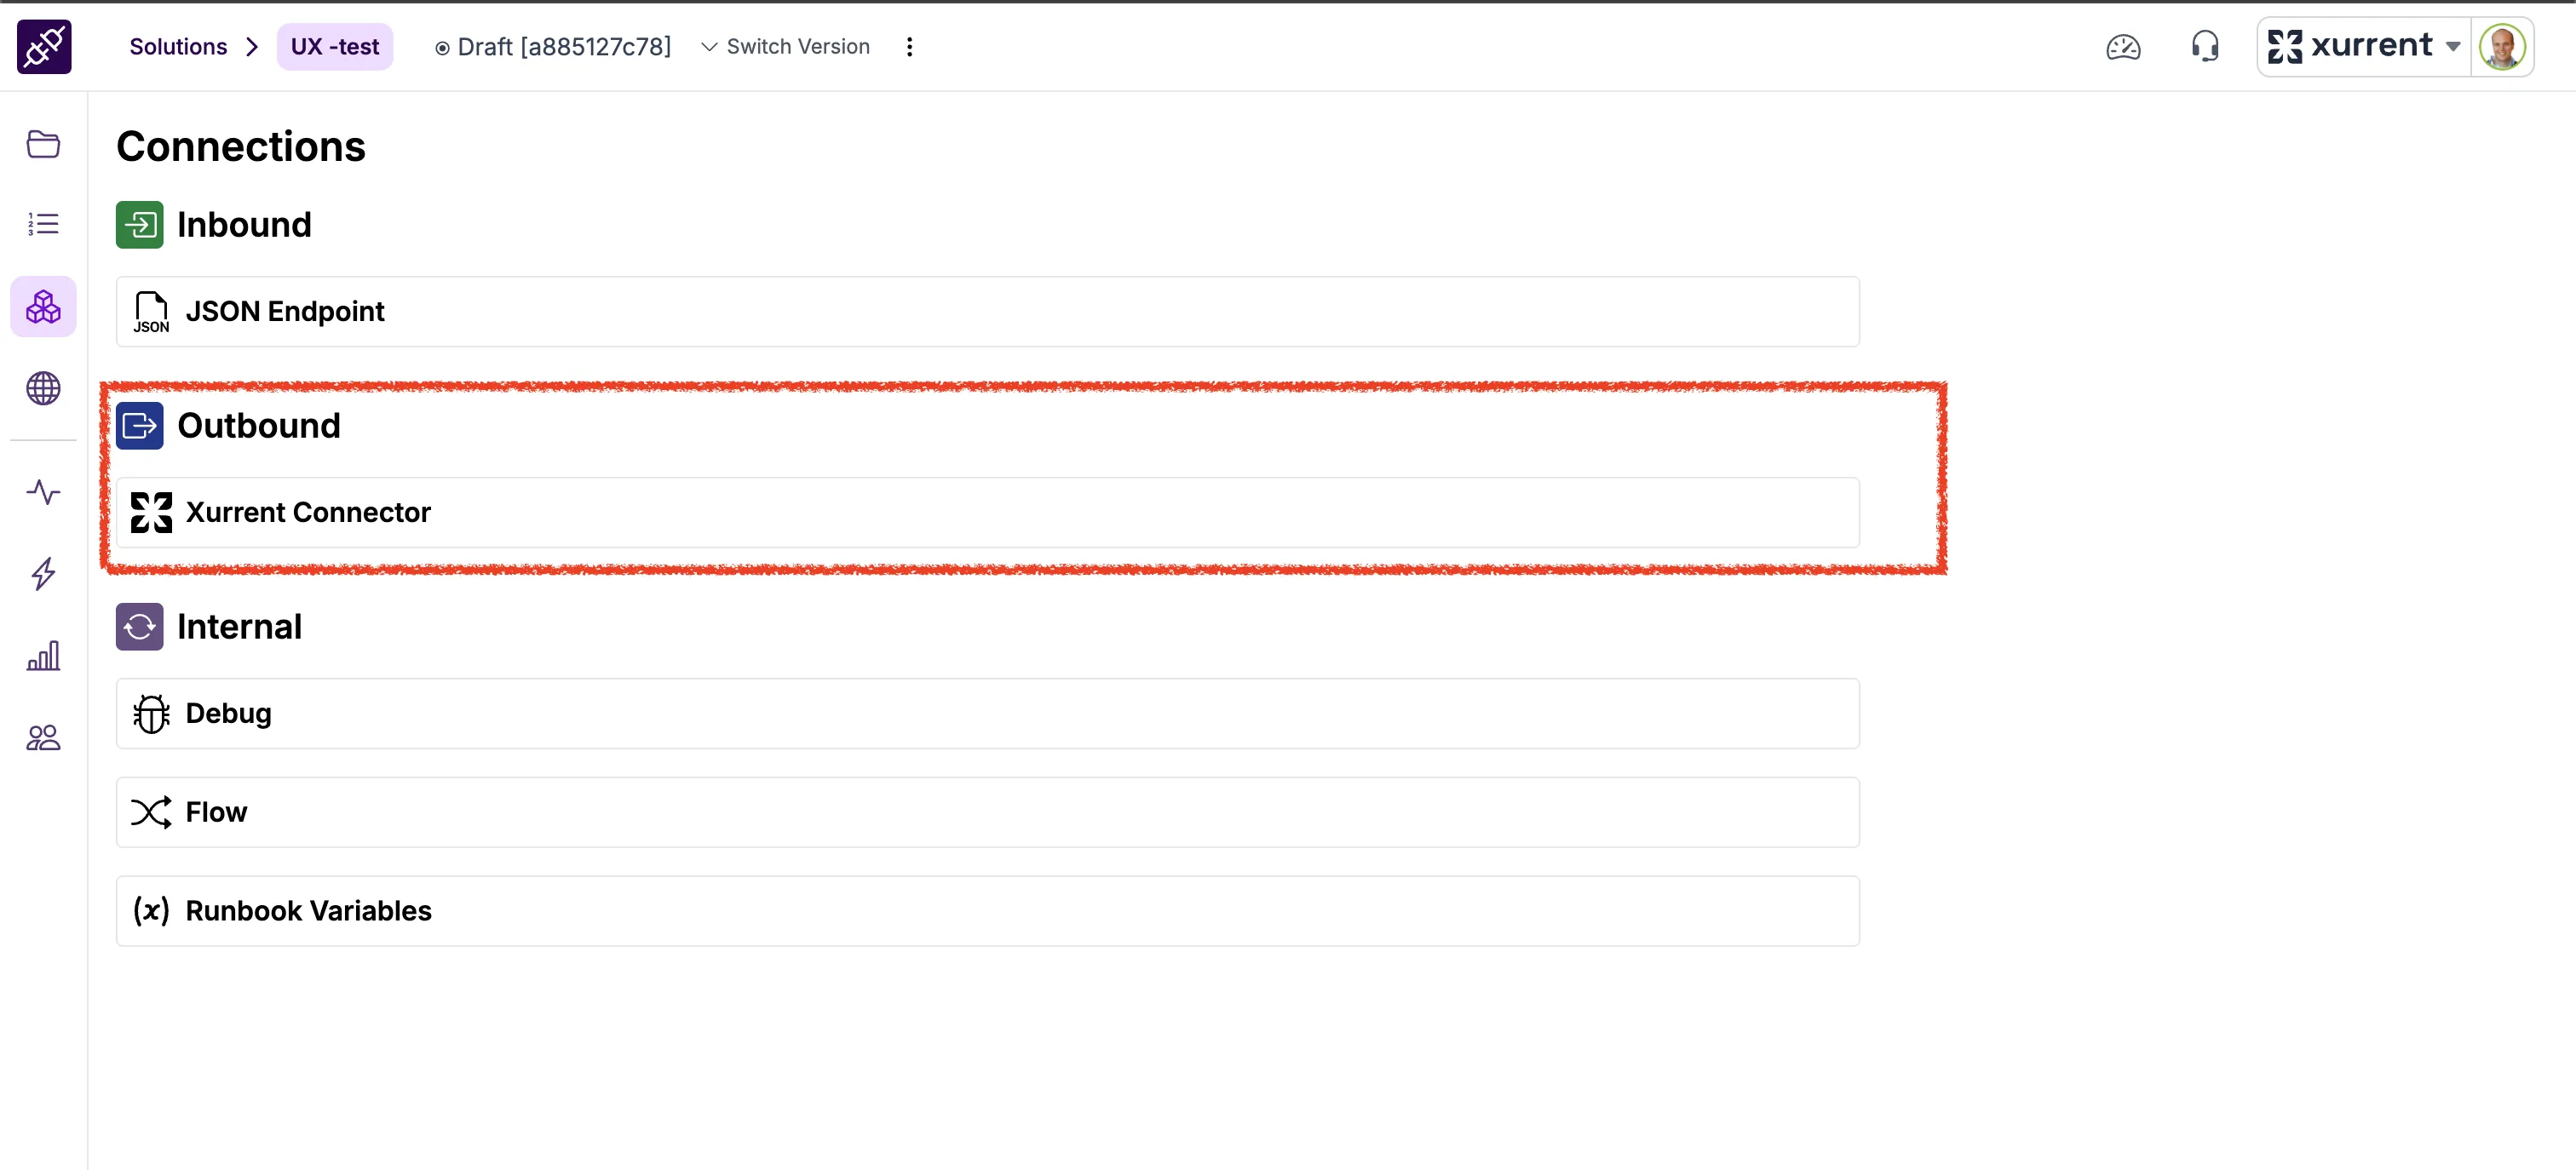
Once this is completed, navigate to the Connections section and select the Xurrent Connector under Outbound Connections.
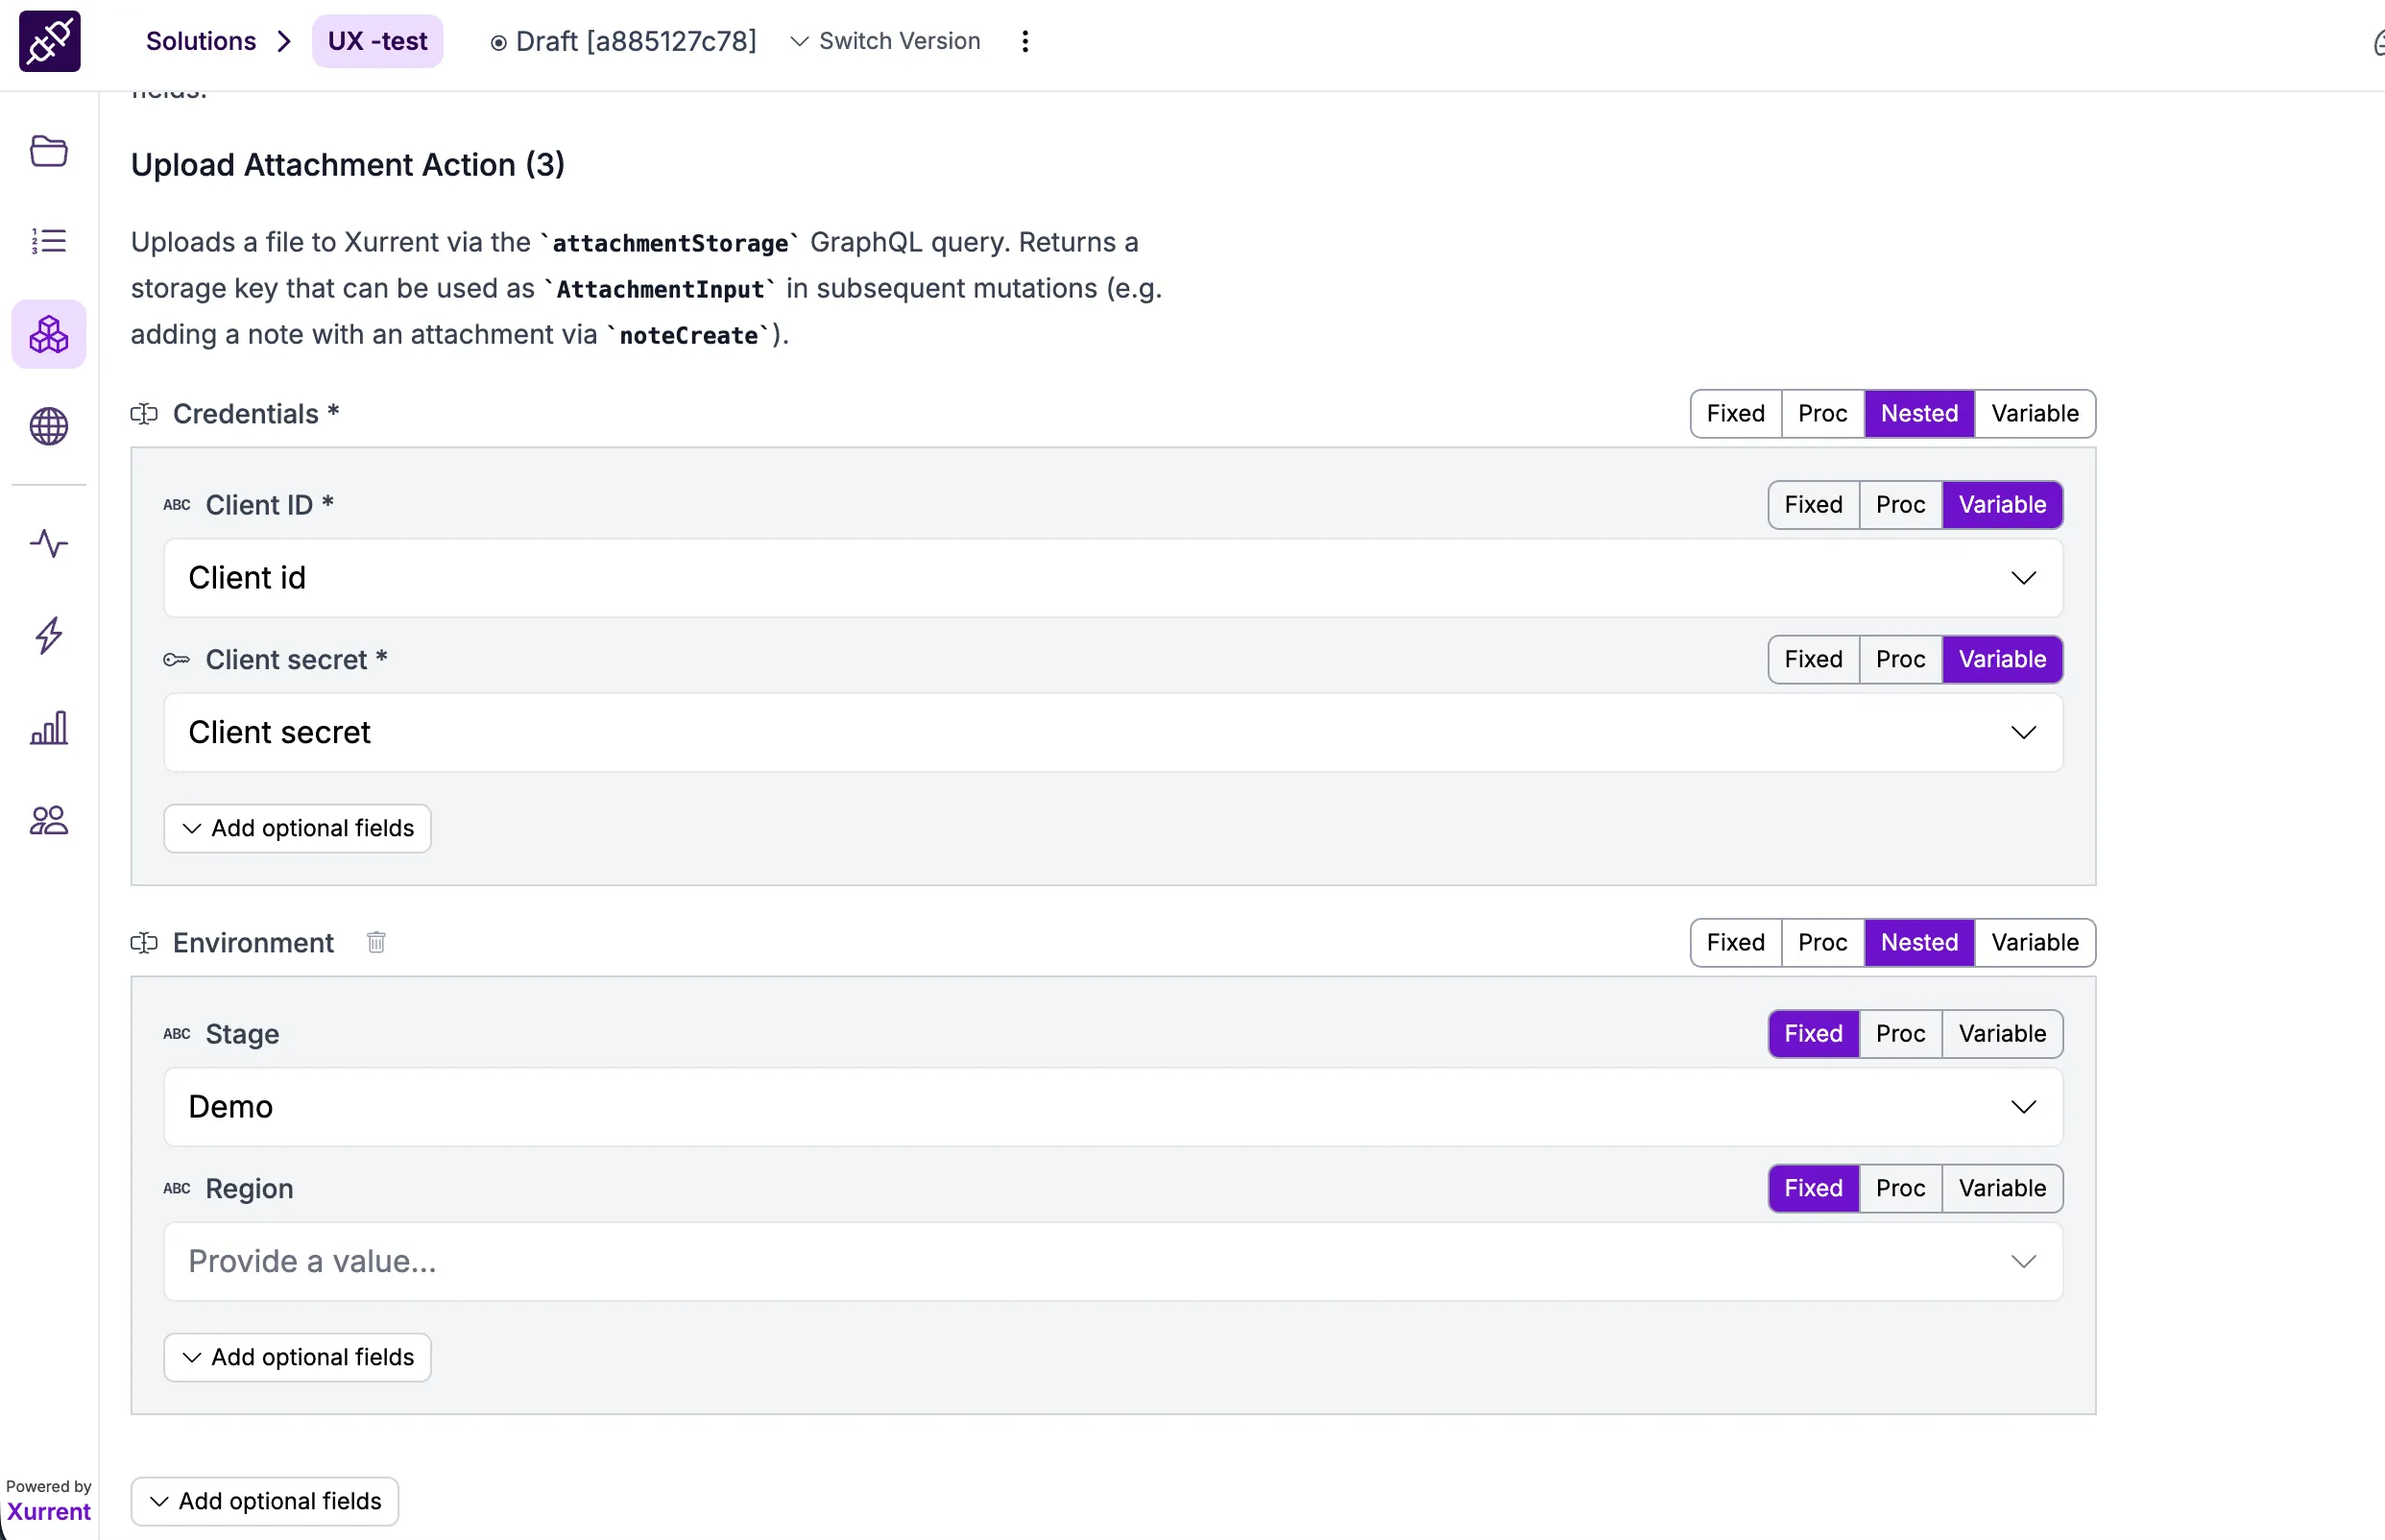
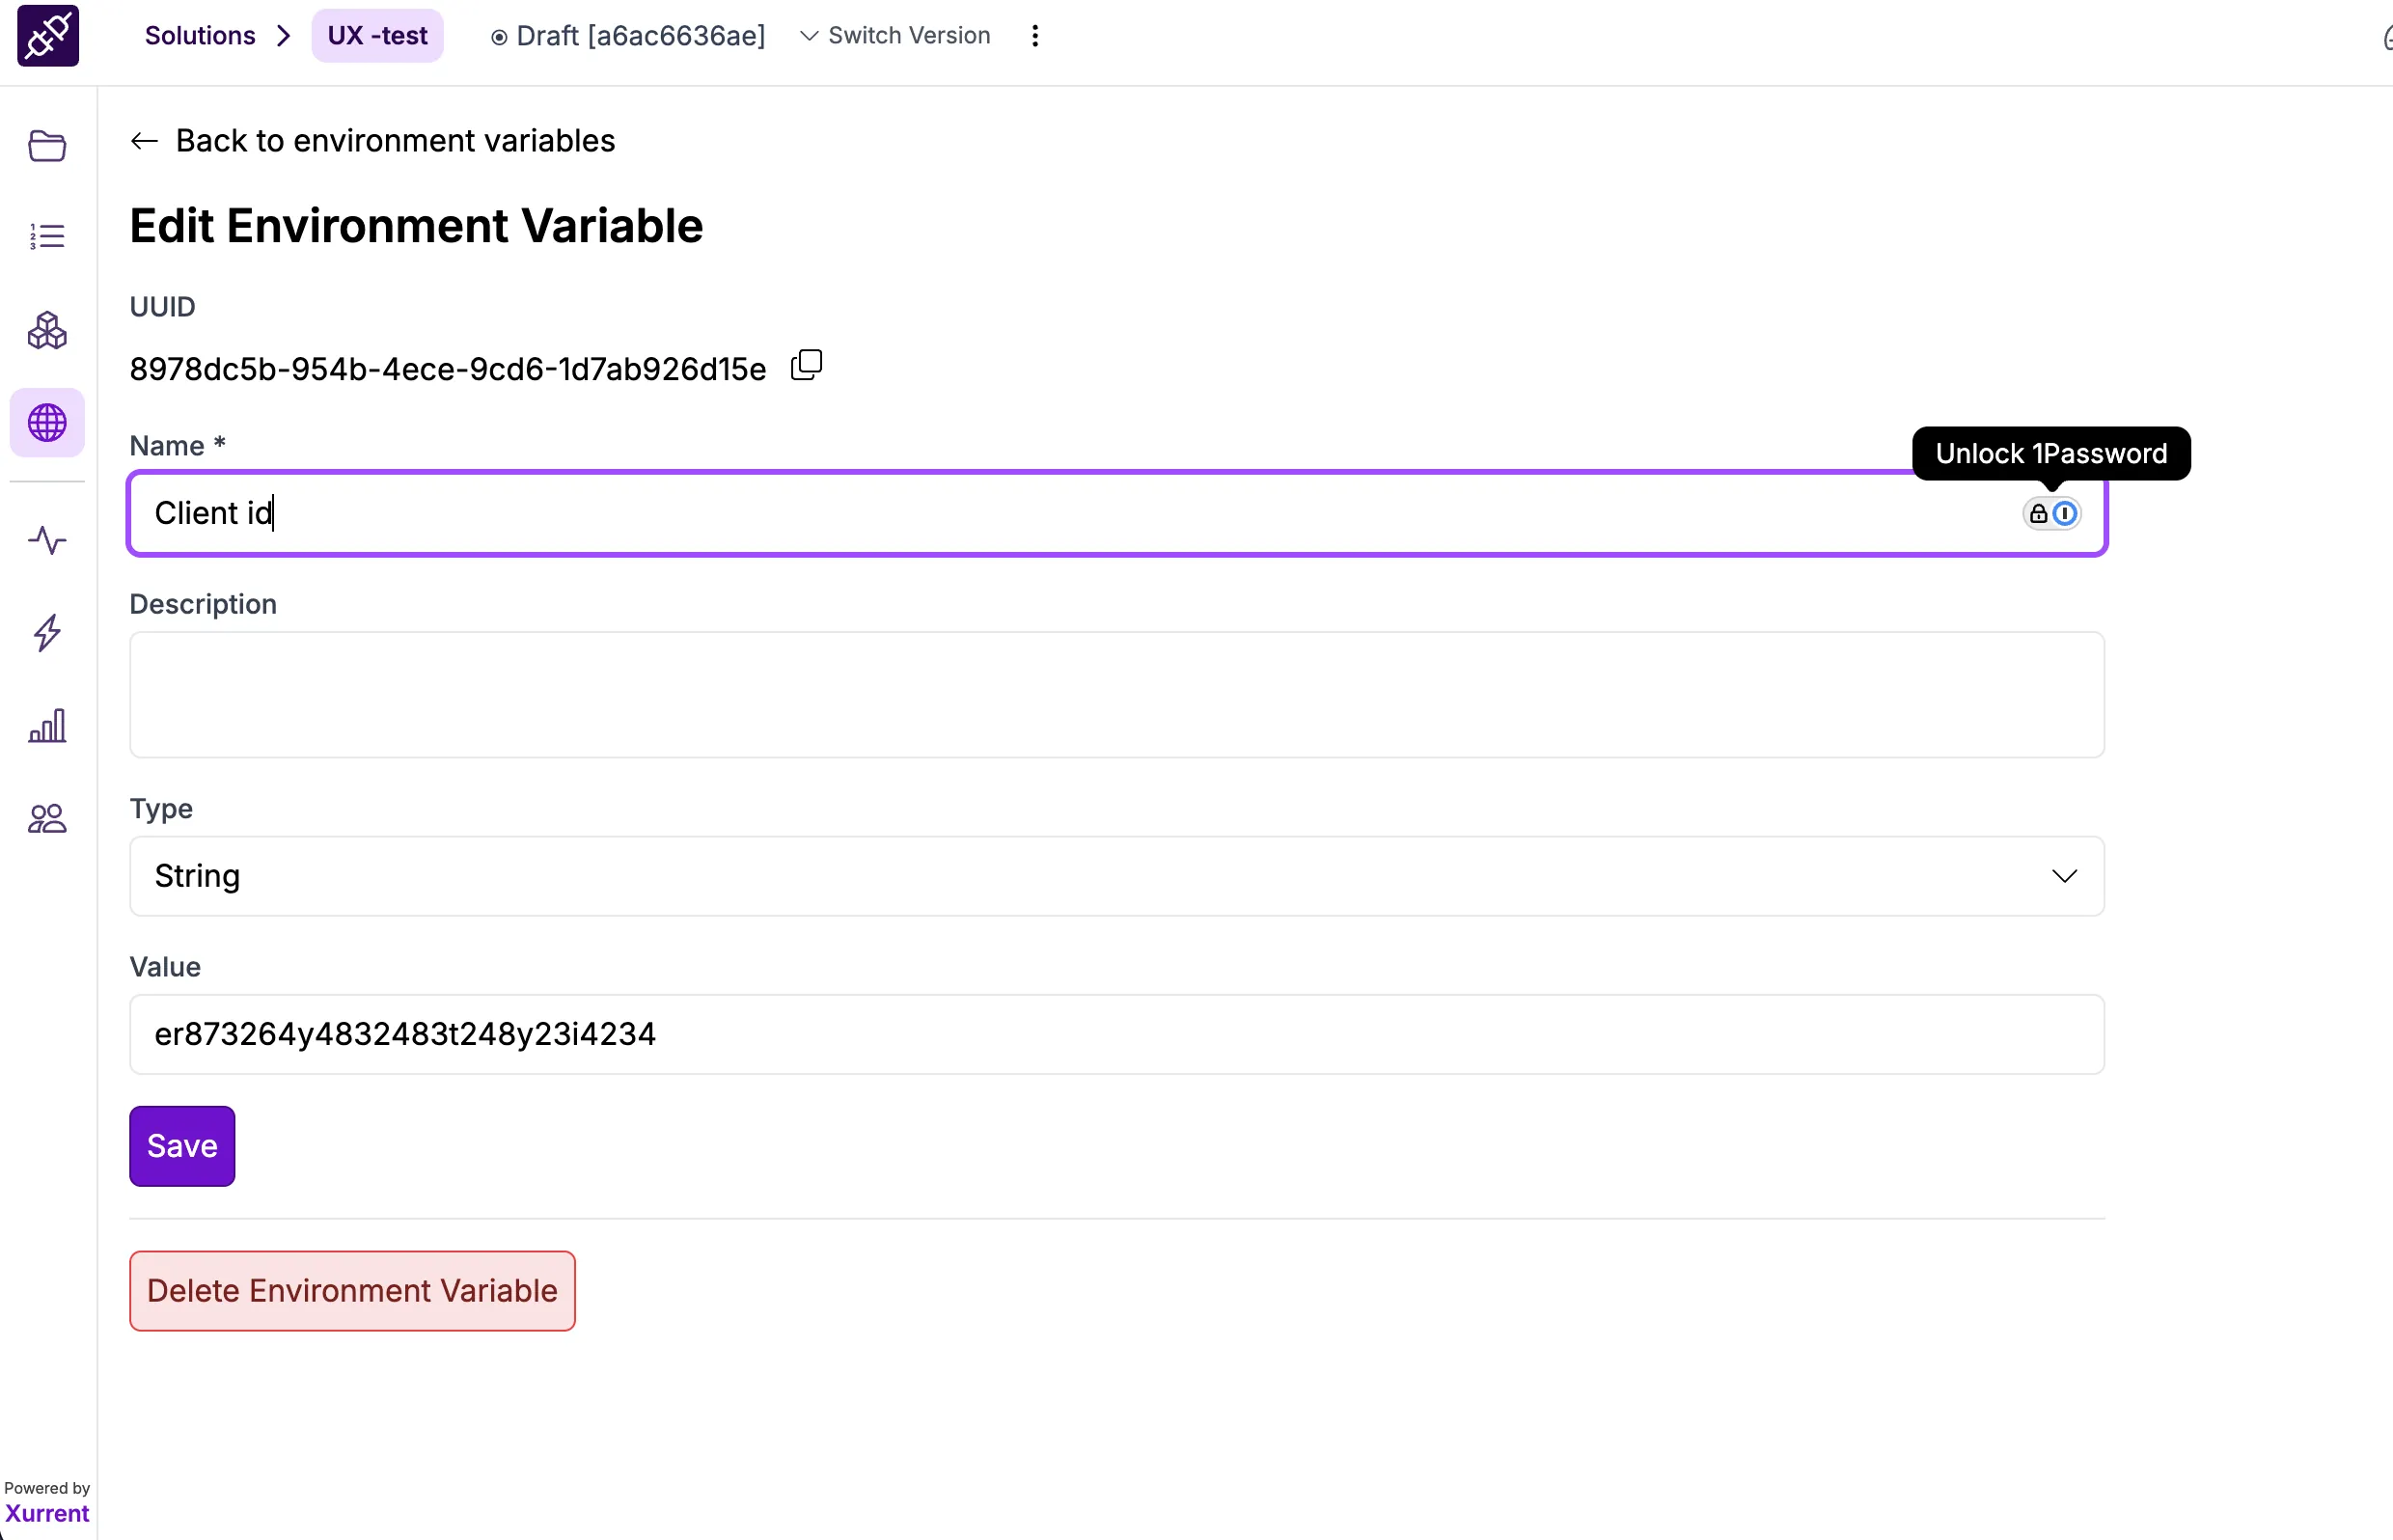
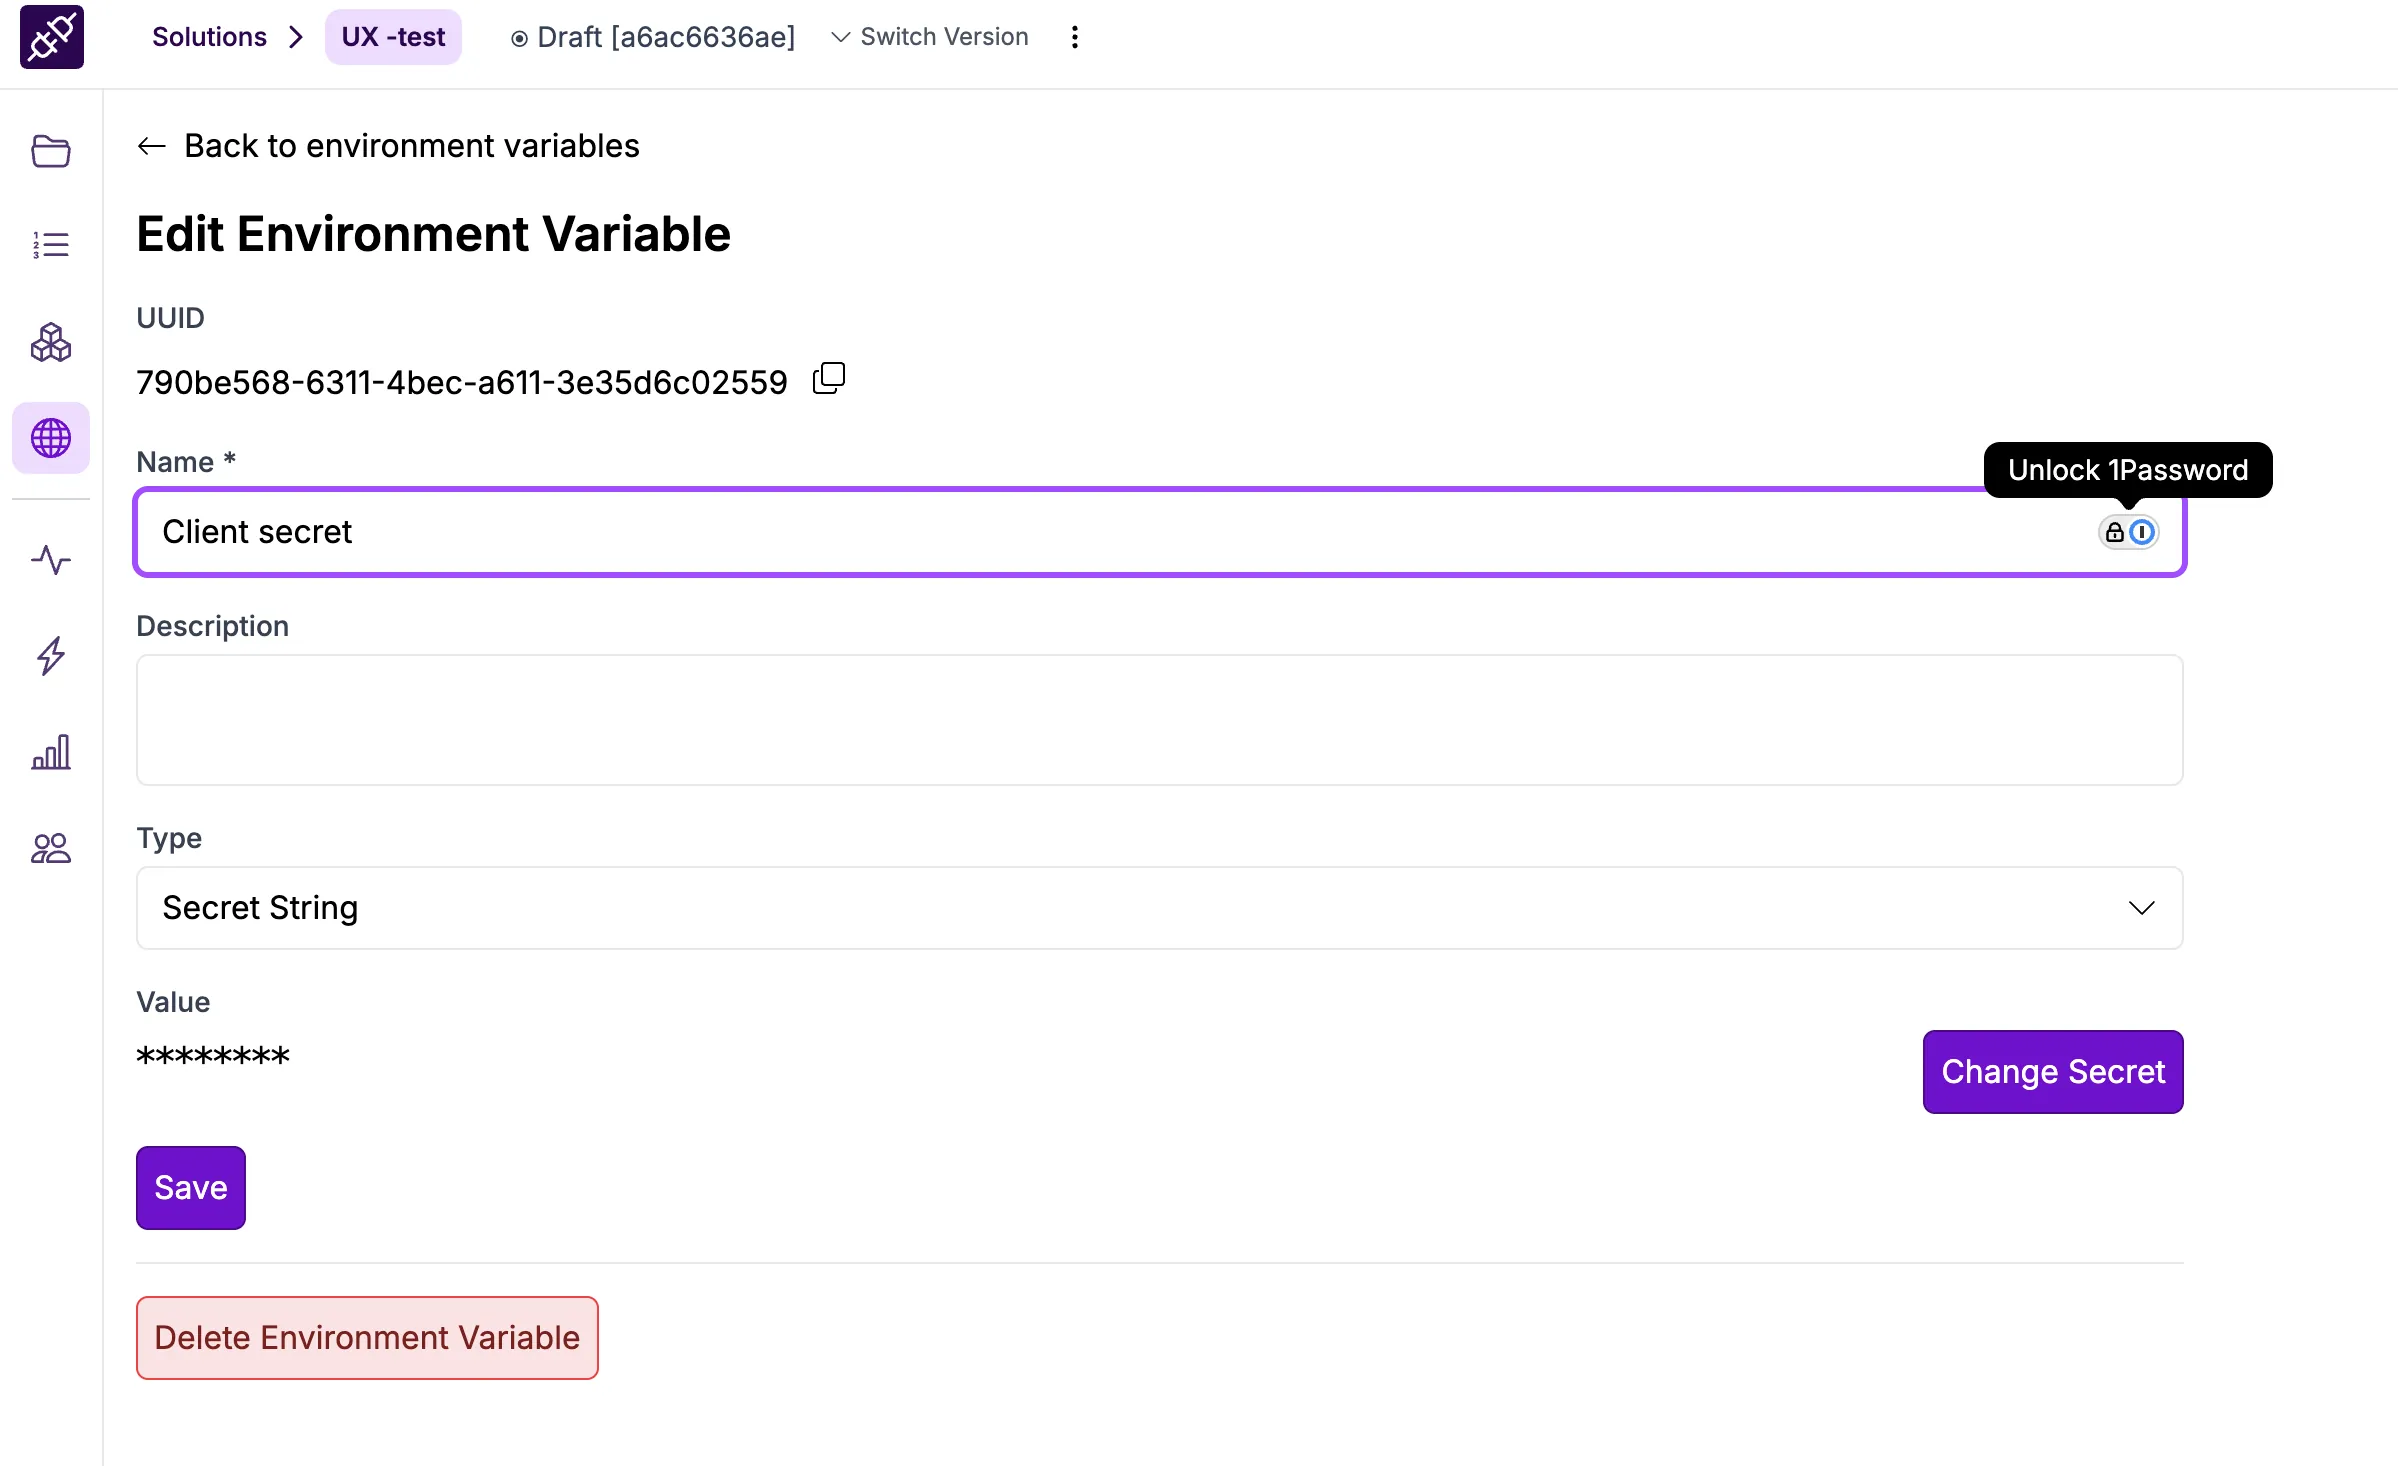
Next, configure the credentials. To retrieve these values, first set up the Client ID and Client Secret in the Environment Variables. Once configured, they will be available for selection within the connection variables.
Note : While Adding secrets in the Environment variables use type : Secret String only
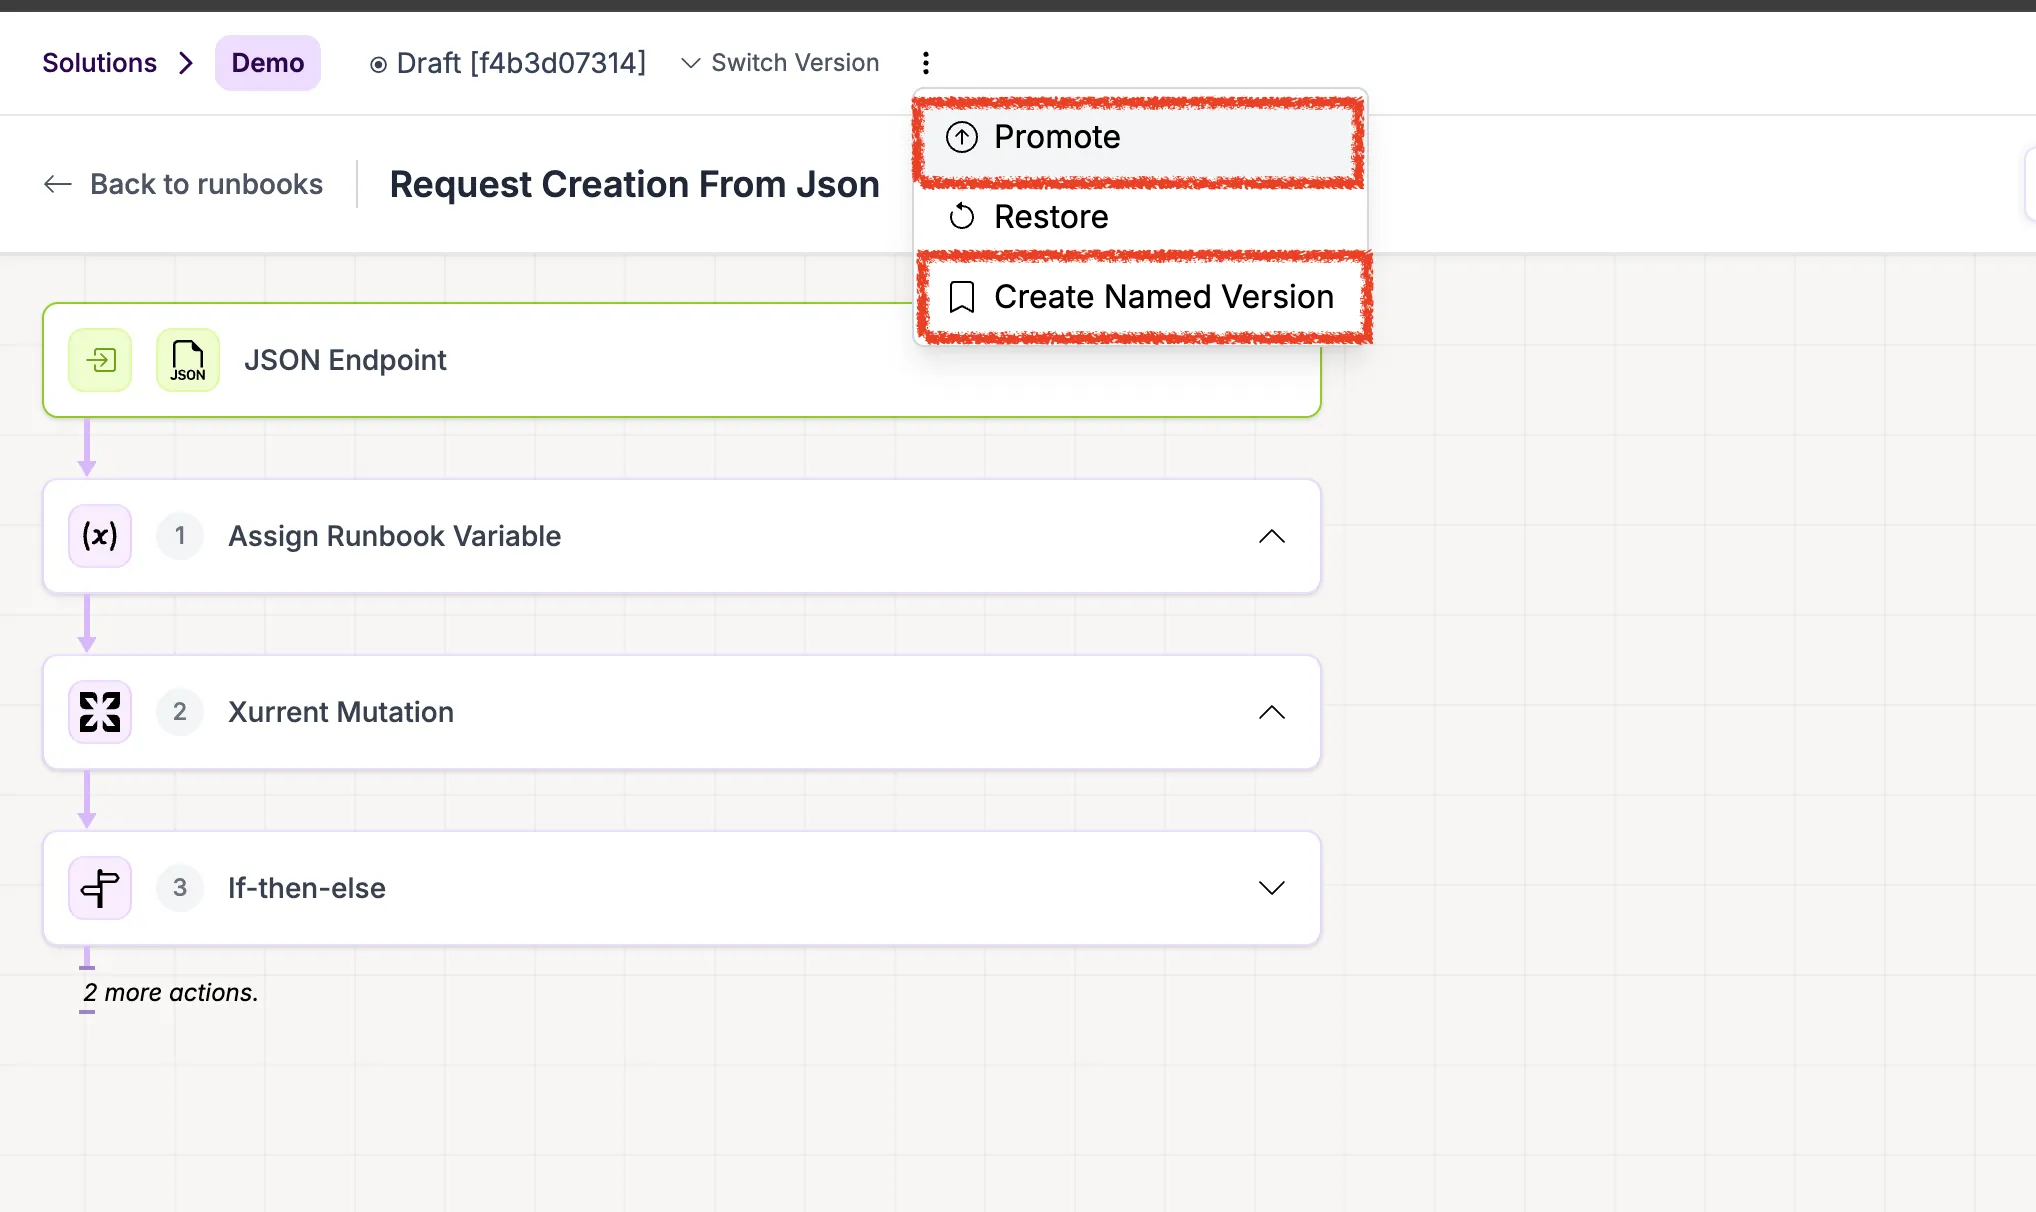
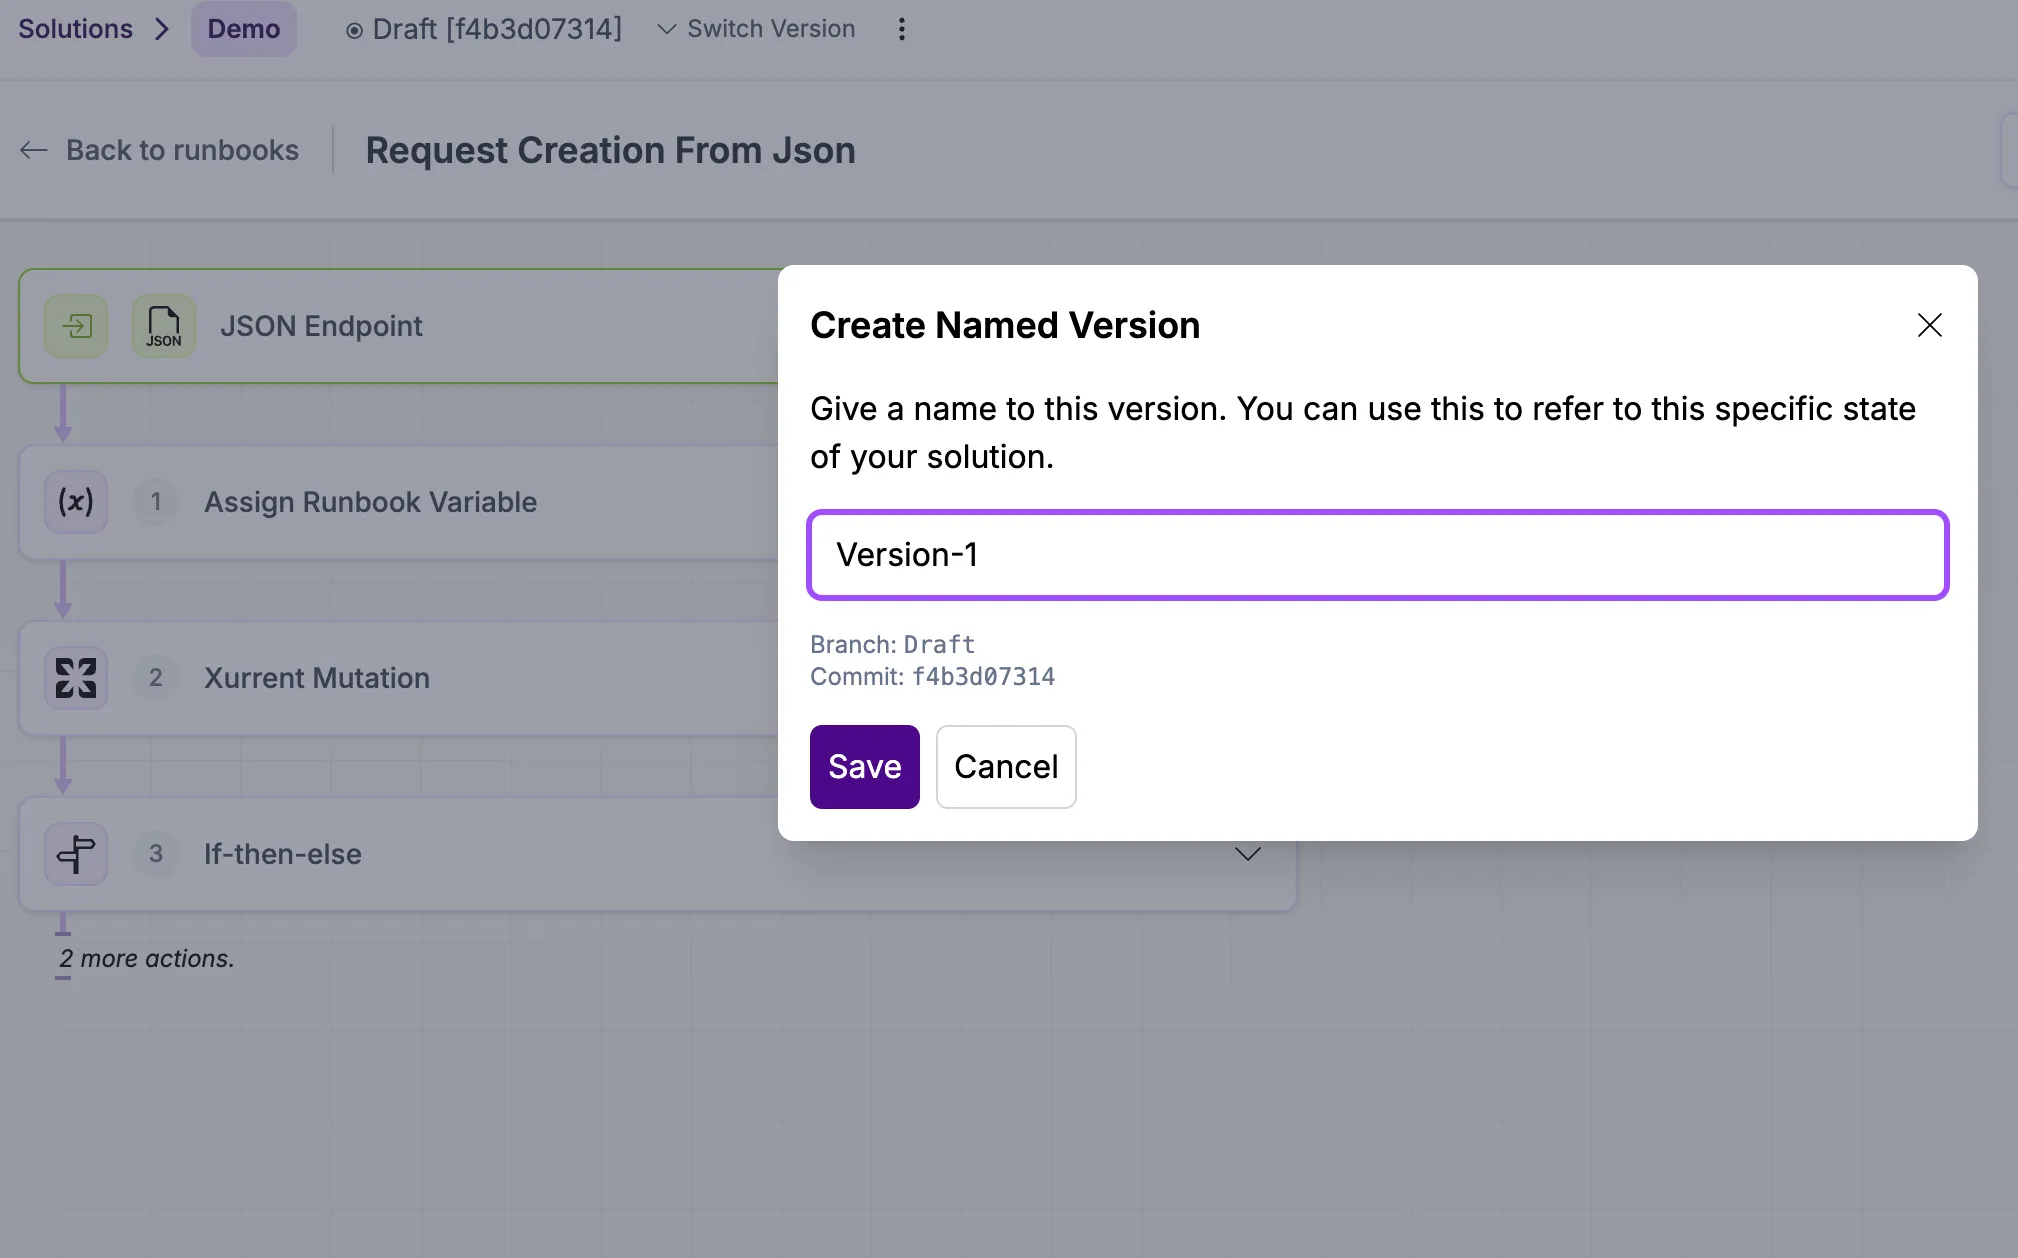
Once the setup is complete, click the three-dot menu at the top center and select Create Named Version. Provide a meaningful name so you can easily identify and restore this version in the future if needed.
Click on Save :
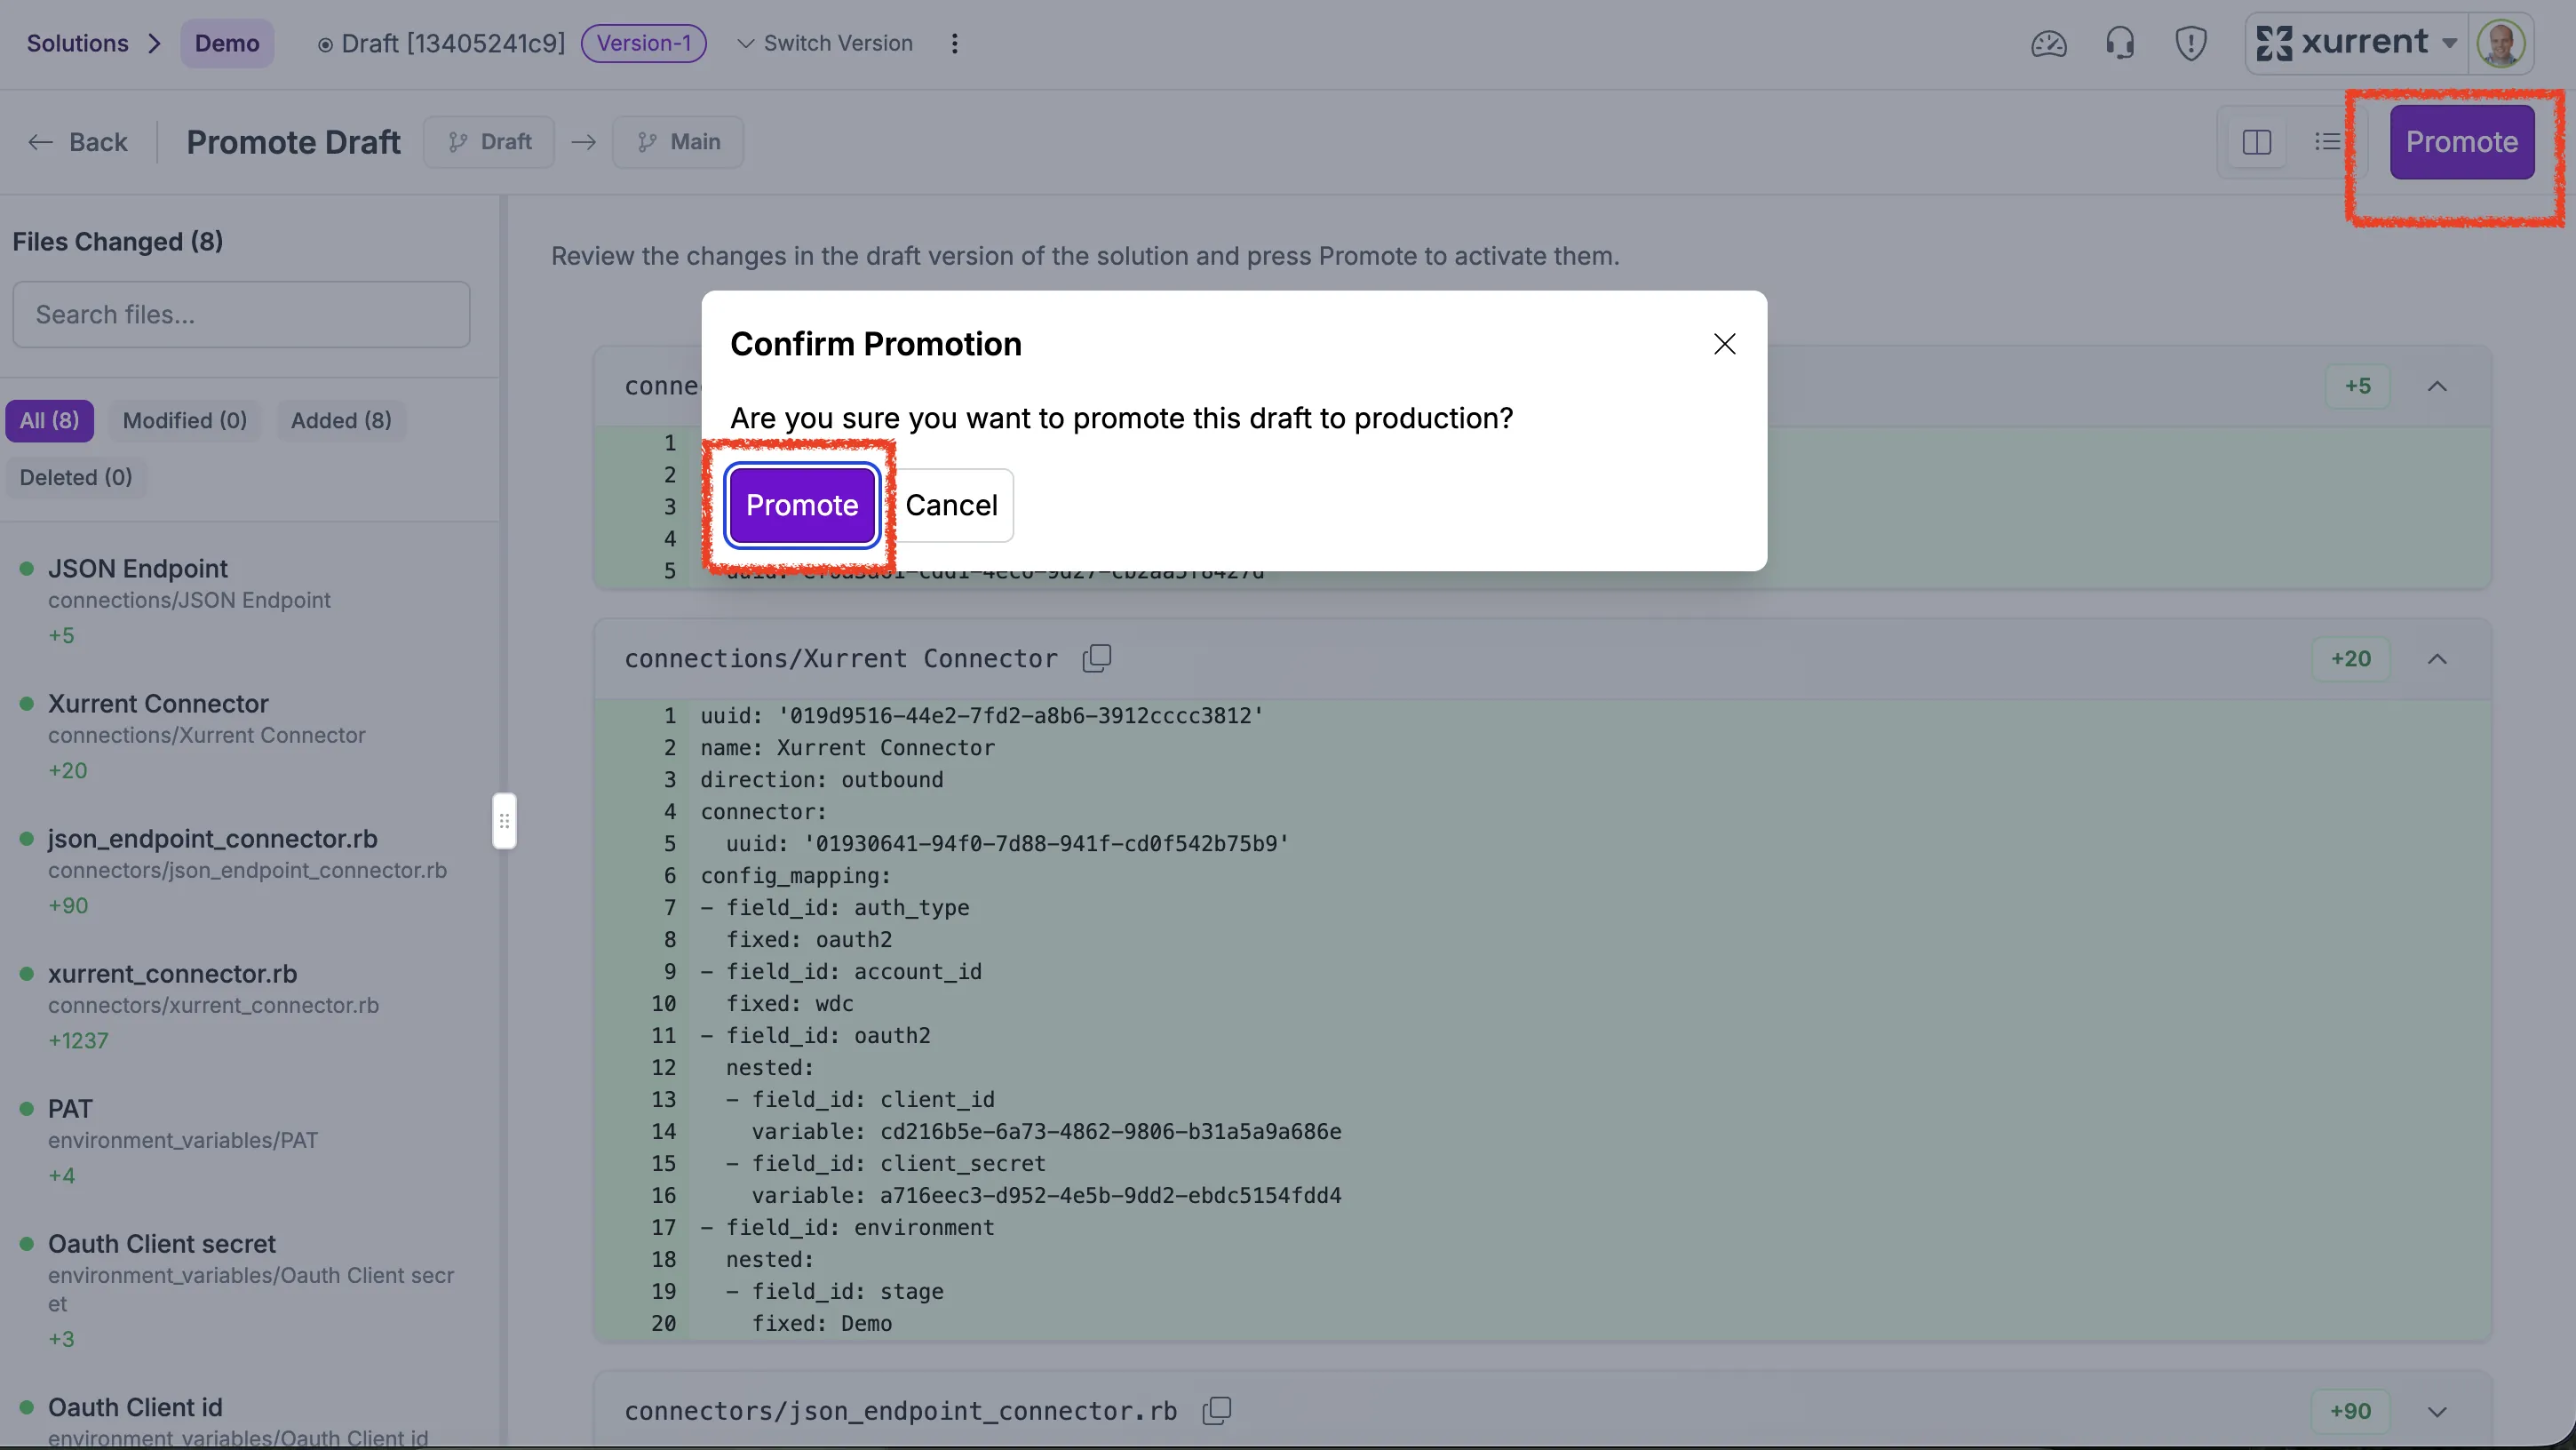
Then click the three-dot menu and select Promote to move your draft changes to the live version.
Once the solution is promoted, you can start sending sample payloads to the JSON webhook endpoint in Step 1.


.webp)
.webp)