Introducing Xurrent Account Sync
One of the most requested features by Xurrent customers, and the highest prioritized enhancement during last October’s CAB event in Istanbul, is the ability to transfer configuration data between environments. That means, for example, to be able to create a UI extension in QA and copy that to production, after it has been tested. Or to copy the holidays to other Xurrent accounts, which could save a lot of work for managed service providers. A first big step towards this has been made with the introduction of Xurrent Account Sync.
Configuration data, such as templates, calendars and agile boards, are never completely isolated, but are connected to other record types. To configure a team, for example, a calendar for work hours should be selected as well. If that calendar contains holidays, those should also be taken into account. And if the team has an agile board, that too should be part of the ecosystem, including the agile board columns. Such an ecosystem is called a ‘Sync set’. But don’t worry, Xurrent will figure that out for you. Let’s explain this new feature by going through the necessary steps. In the following example, two accounts are syncronized for Scrum workspaces. This is done in three steps, of which the first is one-time only.
Step 1: Set up the connection between source and target
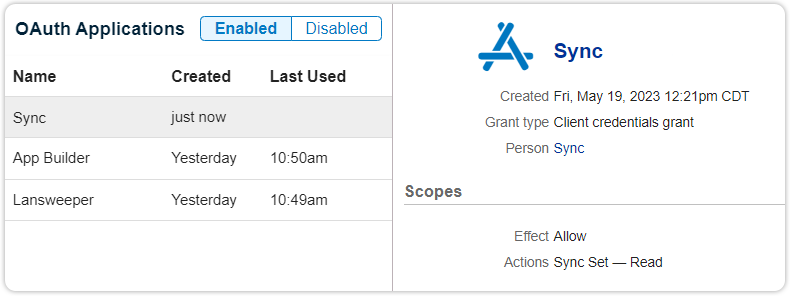
From the ‘OAuth Applications’ section of the Settings console in the source account (in this case: Widget Data Center or WDC), create a new OAuth application of type ‘Client credentials’ with scope ‘Sync Set’ for reading.
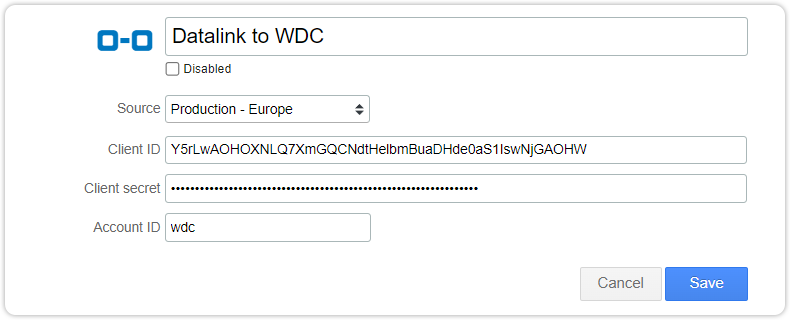
In the ‘Sync Links’ section of the Settings console of the target account (Widget Europe IT) a datalink with the source account should be prepared. For this, both the Client ID and Client secret from the OAuth application are necessary.
Step 2: Create a snapshot
Now it’s time to create a snapshot of the sync set in the source account, in the ‘Sync Sets’ section of the Settings console. First, Howard Tanner adds a sync set using the + button. He selects ‘Scrum workspaces’ as the type and presses Save. Next, he presses the green Add Snapshot button. The snapshot, containing not only scrum workspaces, but also the related product backlogs, teams, agile boards, agile board columns, calendars, and holidays is now created, as an export.
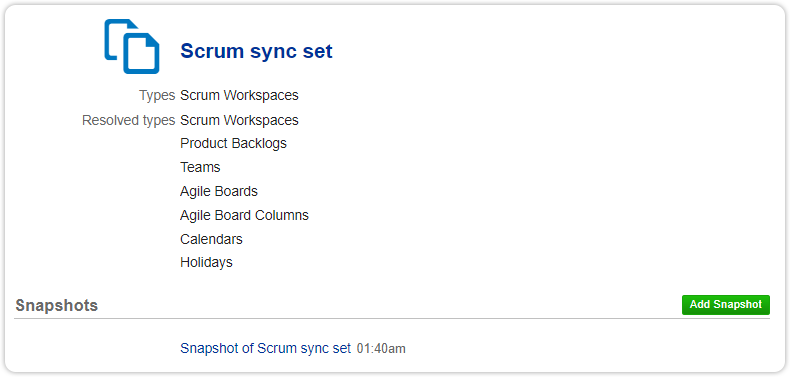
Mind that the requests that are part of the agile board columns and the people of the teams are not included in this snapshot. As previously stated, Account Sync only synchronizes configurable data.
Step 3: Import the snapshot
In this final step, the snapshot of the sync set is imported into the target account. In Widget Europe IT, Ander Alkin selects the ‘Datalink to WDC’ and presses the Add Sync Set Import button. In the next interface, he selects the ‘Scrum’ sync set and saves. This causes the snapshot to be processed. Reference data must be mapped, and in this step checks are made whether these mappings were previously made, or new mappings must manually be created.

After a few seconds, the status of the sync is updated to ‘Being Prepared’, as manual mapping still needs to be done (otherwise, the status would be ‘Prepared’). To realize this mapping, Ander follows the link ‘Scrum sync set’ and sees the type and number of records in the snapshot, with a link to the .csv files in the ‘Records’ section.
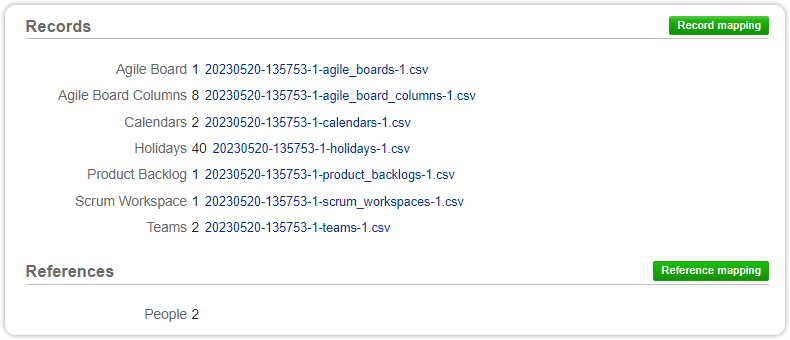
In the ‘References’ section, the records of two people need to be mapped to people in the target account. Clicking the green Reference Mapping button, this can now be done. Frank Watson is the coordinator of the Application Development team, and Rodney Wilson is the product owner of the Expense Reporting backlog and the similarly named Agile board. He is also the manager of the Application Development team, related to the Scrum workspace. The record of Rodney can, for example, be mapped to that of Ander Alkin. That means that all these responsibilities of Rodney in WDC are taken up by Ander in Widget Europe, IT.
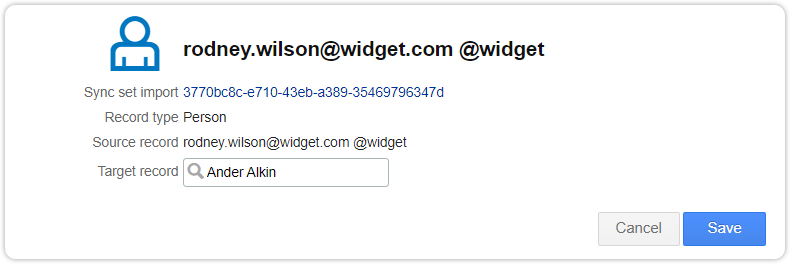
When all mappings are created, the synchronization can be started by pressing the Play button in the header bar from the ‘Sync set imports’ view.
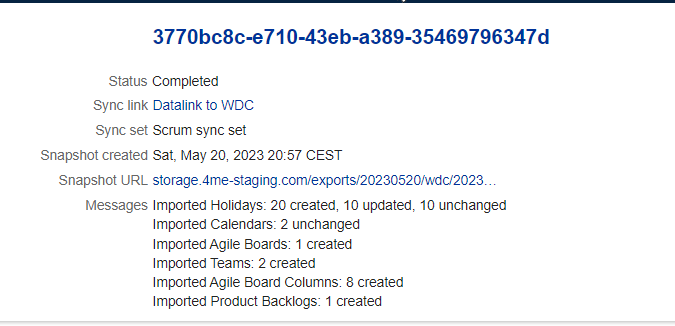
After a few seconds, the status should update to ‘Completed’ and all the records from the Sync set should now be available in the target account
